1.
DISCONNECT FRONT DOOR OPENING TRIM WEATHERSTRIP
2.
REMOVE FRONT PILLAR GARNISH
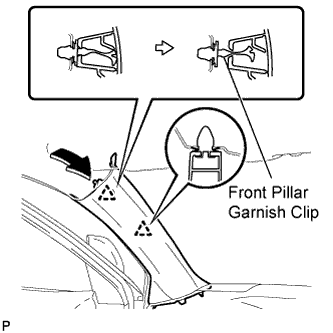
Pull the upper part of the garnish toward the inside of the cabin and disengage the garnish from the base of the 2 clips.
HINT:
Make the front pillar garnish LH hang down from the front pillar garnish clip.
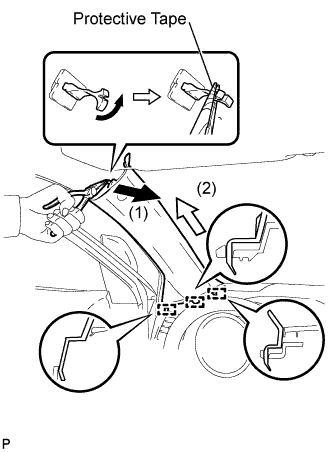
Turn the end of the front pillar garnish clip 90° with needle-nosed pliers and remove it from the front pillar garnish LH.
NOTICE:
Front pillar garnish clips are reusable if they are not removed from the vehicle and have no damage.
Replace the front pillar garnish clips with new ones if they are removed from the vehicle.
Disengage the 3 guides at the front end of the front pillar garnish LH and remove it.
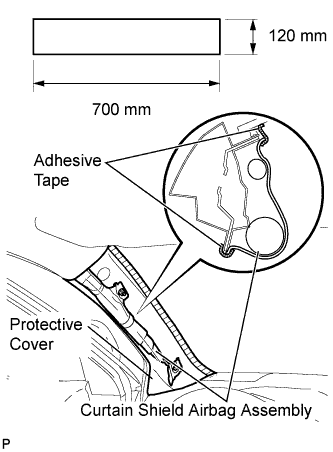
Protect the curtain shield airbag assembly.
Cover the airbag with a 700 mm (27.56 in.) x 120 mm (4.72 in.) cloth or piece of nylon and fix the ends of the cover with tape as shown in the illustration.
NOTICE:
Cover the curtain shield airbag with a protective cover as soon as the front pillar garnish is removed.