2007-2013 Highlander Kluger · Service Manual BODY ELECTRICAL

INSTALLATION

Removal / installation · Vehicles built May 2007 – Jul 2008

Versions by build date: May 2007 – Jul 2008 Aug 2008 – Jun 2010 from Jul 2010


1. INSTALL FRONT NO. 2 SPEAKER ASSEMBLY

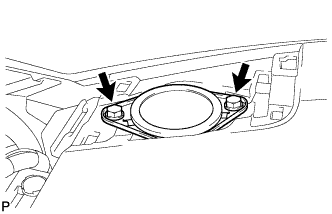
  1. E150560
    Connect the connector.

  1. Install the front No. 2 speaker assembly with the 2 bolts.


2. INSTALL NO. 1 INSTRUMENT PANEL SPEAKER PANEL SUB-ASSEMBLY

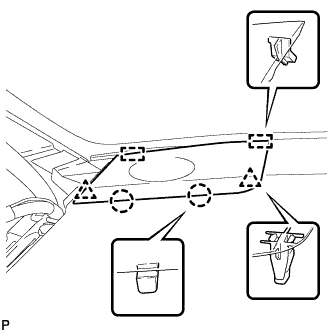
  1. B168375
    Engage the 2 guides.

  1. Engage the 2 claws and 2 clips, and install the No. 1 instrument panel speaker panel sub-assembly.


3. INSTALL FRONT PILLAR GARNISH

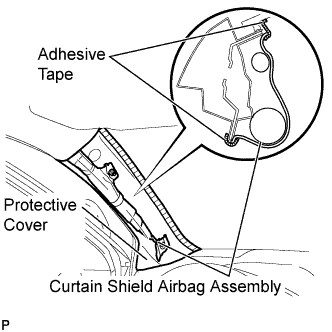
  1. B173226E01
    Remove the protective cover.

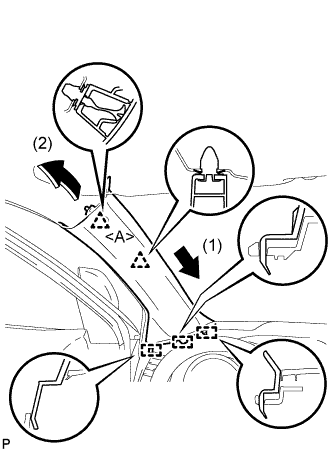
  1. B173223E01
    Install a new clip <A> on the front pillar garnish LH.

  1. Engage the 3 guides and 2 clips, then install the front pillar garnish LH.


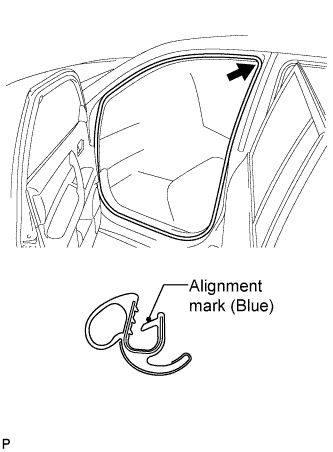
4. CONNECT FRONT DOOR OPENING TRIM WEATHERSTRIP

  1. B173235E01
    Align the alignment mark (blue) on the weatherstrip with the protruding portion on the body indicated by the arrow in the illustration, and install the front door opening trim weatherstrip LH.

    NOTICE:
    After installation, check that the corners fit correctly.

← REMOVAL (from Jul 2010)INSTALLATION (Aug 2008 – Jun 2010) →