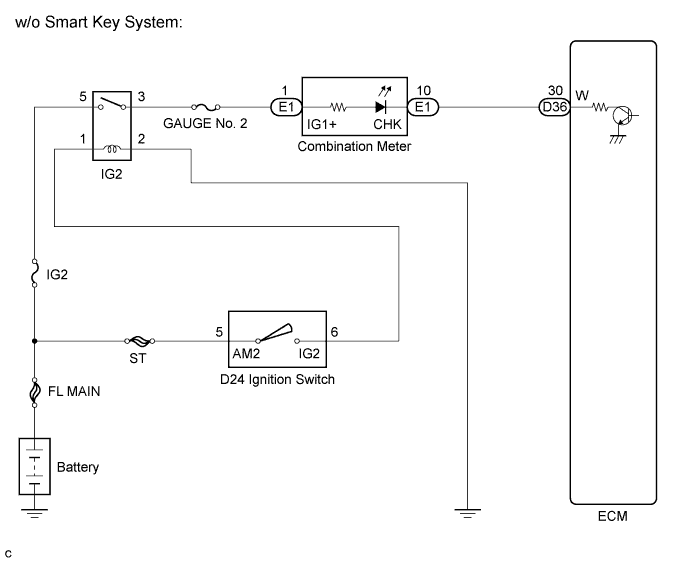
SFI SYSTEM > MIL Circuit |
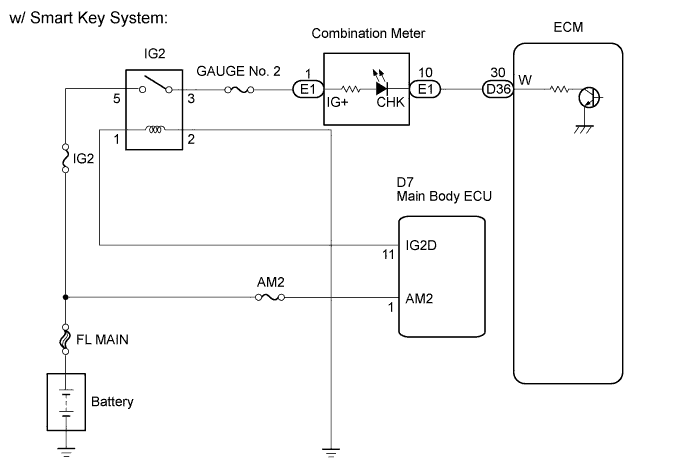
| 1.CHECK THAT MIL IS ILLUMINATED |
Turn the ignition switch on (IG).
Check the illumination of the MIL.
| Result | Proceed to |
| MIL remains illuminated (Even after ignition switch is turned on (IG) and several seconds have passed, MIL still remains illuminated) | A |
| MIL remains off (Does not illuminate at all) | B |
|
| ||||
| A | |
 |
| 2.CHECK WHETHER MIL TURNS OFF |
Connect the Techstream to the DLC3.
Turn the ignition switch on (IG) and turn the tester on.
Select the following menu items: Powertrain / Engine and ECT / Trouble Code.
Check if any DTCs have been stored. Note down any DTCs.
Clear the DTCs (Click here).
Check if the MIL goes off.
|
| ||||
| OK | ||
 | ||
| ||
| 3.CHECK HARNESS AND CONNECTOR (CHECK FOR SHORT IN WIRE HARNESS) |
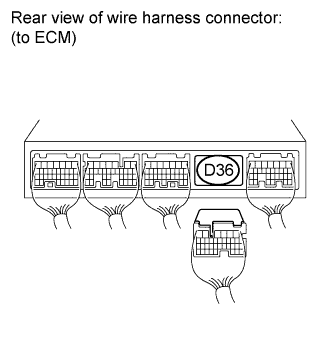 |
Disconnect the ECM connector.
Turn the ignition switch on (IG).
Check that the MIL is not illuminated.
Reconnect the ECM connector.
|
| ||||
| OK | ||
| ||
| ||
| 4.CHECK HARNESS AND CONNECTOR (COMBINATION METER - ECM) |
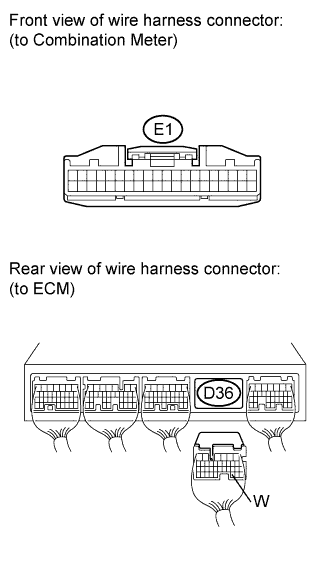 |
Disconnect the ECM connector.
Disconnect the combination meter connector.
Measure the resistance according to the value(s) in the table below.
| Tester Connection | Condition | Specified Condition |
| D36-30 (W) - E1-10 | Always | Below 1 Ω |
| Tester Connection | Condition | Specified Condition |
| D36-30 (W) or E1-10 - Body ground | Always | 10 kΩ or higher |
Reconnect the ECM connector.
Reconnect the combination meter connector.
|
| ||||
| OK | ||
| ||
| ||
| 5.CHECK THAT ENGINE STARTS |
Turn the ignition switch on (IG).
Start the engine.
| Result | Proceed to |
| Engine starts | A |
| Engine does not start* | B |
|
| ||||
| A | |
|
| 6.CHECK HARNESS AND CONNECTOR (COMBINATION METER - BODY GROUND) |
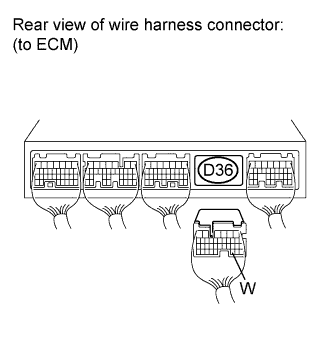 |
Disconnect the ECM connector.
Turn the ignition switch on (IG).
Measure the voltage according to the value(s) in the table below.
| Tester Connection | Condition | Specified Condition |
| D36-30 (W) - Body ground | Ignition switch on (IG) | 11 to 14 V |
Reconnect the ECM connector.
|
| ||||
| OK | ||
| ||
| ||
| 7.CHECK HARNESS AND CONNECTOR (COMBINATION METER - ECM) |
|
Disconnect the ECM connector.
Disconnect the combination meter connector.
Measure the resistance according to the value(s) in the table below.
| Tester Connection | Condition | Specified Condition |
| D36-30 (W) - E1-10 | Always | Below 1 Ω |
| Tester Connection | Condition | Specified Condition |
| D36-30 (W) or E1-10 - Body ground | Always | 10 kΩ or higher |
Reconnect the ECM connector.
Reconnect the combination meter connector.
|
| ||||
| OK | ||
| ||
| ||

