Home › TRANSMISSION ยท U151E AUTOMATIC TRANSAXLE › SHIFT SOLENOID VALVE

SHIFT SOLENOID VALVE > INSTALLATION

for Preparation Click here


1. INSTALL TRANSMISSION VALVE BODY ASSEMBLY


    C050017
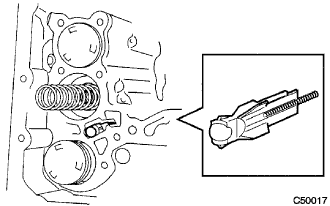
  1. Install the spring and check ball body.

  1. Align the groove of the manual valve with the pin of the lever.


    C091933E05
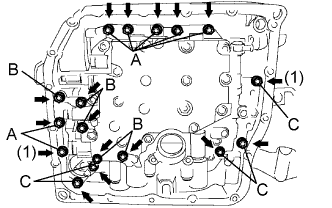
  1. Install the 17 bolts.

    Torque:
    11 N*m{ 110 kgf*cm , 8 ft.*lbf }

    NOTICE:
    1. Push the valve body against the accumulator piston springs and check ball body to install the valve body.
    2. First, temporarily tighten the bolts marked (1) in the illustration because they are positioning bolts.

    Bolt length:
    Bolt A:
    25 mm (0.98 in.)
    Bolt B:
    57 mm (2.24 in.)
    Bolt C:
    41 mm (1.61 in.)


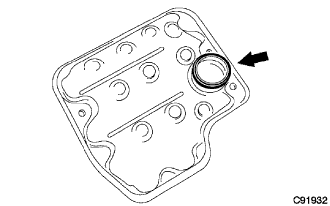
2. INSTALL VALVE BODY OIL STRAINER ASSEMBLY


    C091932
  1. Coat a new O-ring with ATF.

  1. Install the O-ring to the oil strainer.


    C091931
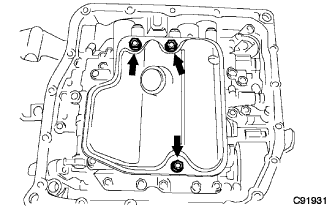
  1. Install the oil strainer with the 3 bolts.

    Torque:
    11 N*m{ 110 kgf*cm , 8 ft.*lbf }


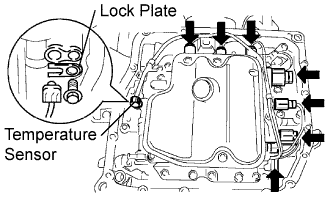
3. INSTALL TRANSMISSION WIRE


    C091927E08
  1. Coat a new O-ring with ATF.

  1. Install the ATF temperature sensor with the lock plate and bolt.

    Torque:
    6.6 N*m{ 67 kgf*cm , 58 in.*lbf }

  1. Connect the 7 shift solenoid valve connectors.


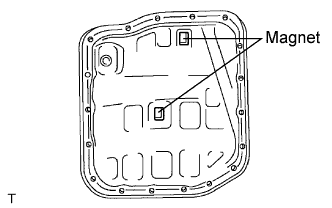
4. INSTALL AUTOMATIC TRANSAXLE OIL PAN SUB-ASSEMBLY


    D030865E03
  1. Install the 2 magnets in the oil pan.

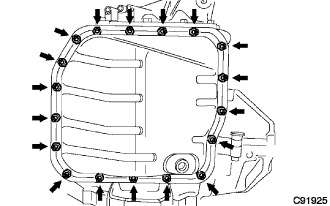
  1. Apply adhesive to the 18 bolts.

    Adhesive:
    Toyota Genuine Adhesive 1344, Three Bond 1344 or equivalent


    C091925
  1. Install the oil pan and a new gasket to the transaxle case with the 18 bolts.

    Torque:
    7.8 N*m{ 80 kgf*cm , 69 in.*lbf }

    NOTICE:
    Apply adhesive to the bolts and tighten them within 10 minutes of application.


5. CONNECT CABLE TO NEGATIVE BATTERY TERMINAL

NOTICE:
When disconnecting the cable, some systems need to be initialized after the cable is reconnected (Click here).


6. INSTALL AUTOMATIC TRANSAXLE ASSEMBLY
(Click here)