Home › SUSPENSION & AXLE › SUSPENSION › REAR LOWER ARM (for 2WD)

REAR LOWER ARM (for 2WD) > INSTALLATION

for Preparation Click here


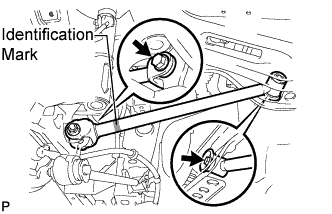
1. TEMPORARILY INSTALL REAR NO. 1 SUSPENSION ARM ASSEMBLY


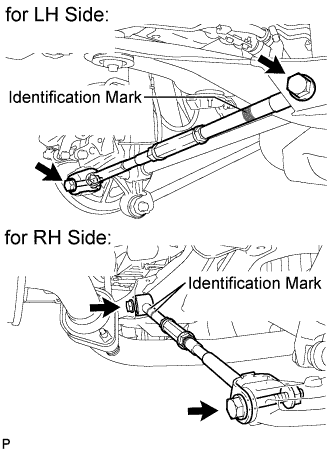
C167805E01
  1. Temporarily install the rear No. 1 suspension arm assembly to the rear suspension member with the bolt.

    NOTICE:
    Ensure that the identification mark faces the rear side of the vehicle.

  1. Temporarily install the rear No. 1 suspension arm assembly to the rear axle carrier sub-assembly with the bolt and the nut.

    NOTICE:
    Since a stopper nut is used, temporarily tighten the bolt.


2. TEMPORARILY INSTALL REAR NO. 2 SUSPENSION ARM ASSEMBLY


C170680E01
  1. Temporarily install the rear No. 2 suspension arm assembly to the rear suspension member with the bolt.

    NOTICE:
    Ensure that the identification mark faces the rear side of the vehicle.

  1. Temporarily install the rear No. 2 suspension arm assembly to the rear axle carrier sub-assembly with the bolt and the nut.

    NOTICE:
    Since a stopper nut is used, temporarily tighten the bolt.


3. STABILIZE SUSPENSION


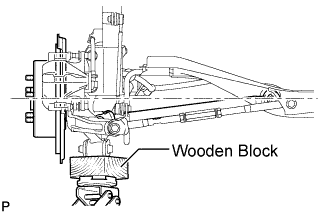
    C167817E01
  1. Jack up the rear axle carrier, placing a wooden block underneath to avoid damage. Apply load to the suspension so that the installed bolt of the rear No. 1 suspension arm (inner side) is horizontally aligned with the center of the rear axle hub.

    CAUTION:
    Do not jack up the rear axle carrier sub-assembly too high as the vehicle may fall.

    NOTICE:
    Do not bend the brake dust cover.

    HINT:
    1. If the rear drive shaft assembly cannot be positioned horizontally as shown in the illustration even when the rear axle carrier sub-assembly is jacked up, apply additional load to the vehicle such as by having a person sit in the rear seat.
    2. Use the same procedures for the RH side and LH side.


4. FULLY TIGHTEN REAR NO. 1 SUSPENSION ARM ASSEMBLY


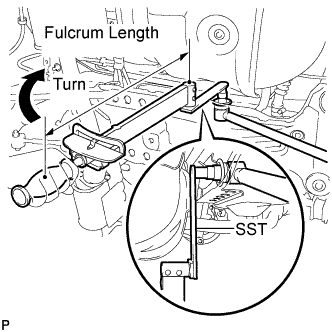
    C167806E01
  1. Using SST and a socket wrench (19 mm), fully tighten the bolt.
    Torque:
    without SST:
    120 N*m{ 1223 kgf*cm , 88 ft.*lbf }
    with SST:
    89 N*m{ 904 kgf*cm , 65 ft.*lbf }

    SST
    09961-00950  

    NOTICE:
    1. Use a torque wrench with a fulcrum length of 425 mm (16.73 in.).
    2. This torque value is effective when SST is parallel to the torque wrench.
    3. The final torque must be applied under standard vehicle height conditions.


    C170679
  1. Fully tighten the bolt

    Torque:
    112 N*m{ 1141 kgf*cm , 82 ft.*lbf }

    NOTICE:
    1. Since a stopper nut is used, fully tighten the bolt.
    2. The final torque must be applied under standard vehicle height conditions.


5. FULLY TIGHTEN REAR NO. 2 SUSPENSION ARM ASSEMBLY


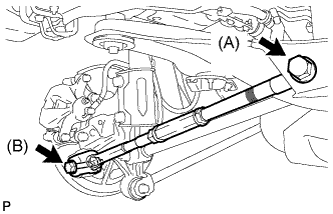
C167804E02
  1. Fully tighten the bolts.

    Torque:
    Bolt (A):
    120 N*m{ 1223 kgf*cm , 88 ft.*lbf }
    Bolt (B):
    112 N*m{ 1141 kgf*cm , 82 ft.*lbf }

    NOTICE:
    1. Since a stopper nut is used, fully tighten the bolt.
    2. The final torque must be applied under standard vehicle height conditions.


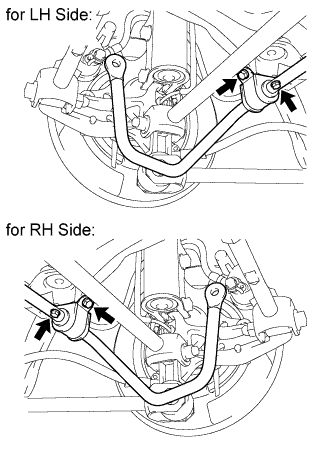
6. INSTALL REAR STABILIZER BAR


    C170677E01
  1. Install the rear stabilizer bar with the 4 bolts.

    Torque:
    19 N*m{ 194 kgf*cm , 14 ft.*lbf }


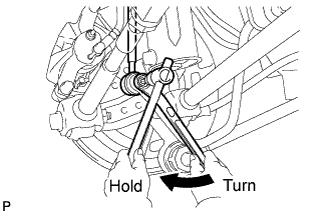
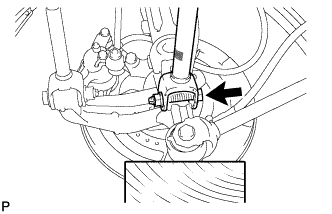
7. INSTALL REAR STABILIZER LINK ASSEMBLY LH


    C167797E02
  1. Install the rear stabilizer link assembly LH to the rear stabilizer bar with the nut.

    Torque:
    39 N*m{ 400 kgf*cm , 29 ft.*lbf }

    HINT:
    If the ball joint turns together with the nut, use a hexagon wrench (5 mm) to hold the stud bolt.


8. INSTALL REAR STABILIZER LINK ASSEMBLY RH

HINT:
Perform the same procedure as the LH side.


9. INSTALL REAR WHEEL

Torque:
103 N*m{ 1050 kgf*cm , 76 ft.*lbf }


10. INSTALL SPARE WHEEL CARRIER LOCK COVER (w/ Cover)


11. INSTALL SPARE TIRE


12. INSTALL LOWER SPARE WHEEL CARRIER HINGE COVER (w/ Cover)


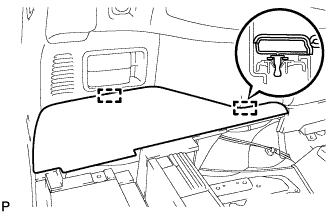
13. INSTALL DECK TRIM SERVICE HOLE COVER


14. INSTALL REAR MAT


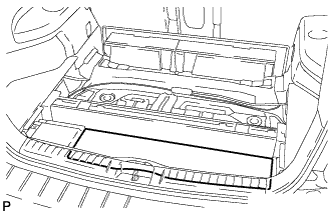
    B173249
  1. Install the rear mat.


15. INSTALL TONNEAU COVER ASSEMBLY (w/ Tonneau Cover)
  1. Install the tonneau cover assembly.


16. INSTALL NO. 2 DECK BOARD SUB-ASSEMBLY (w/ Tonneau Cover)


    B173244
  1. Engage the 2 guides and install the No. 2 deck board sub-assembly.


17. INSTALL NO. 3 DECK BOARD SUB-ASSEMBLY (w/ Tonneau Cover)


    B173242
  1. Engage the 2 guides and install the No. 3 deck board sub-assembly.


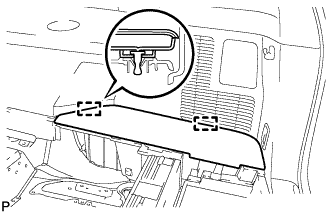
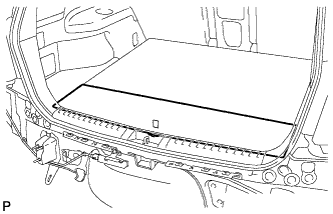
18. INSTALL DECK BOARD ASSEMBLY


    B173240
  1. Install the deck board sub-assembly.


19. INSPECT AND ADJUST REAR WHEEL ALIGNMENT

HINT:
Click here