 |
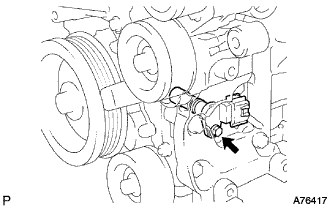
Install the crankshaft position sensor with the bolt.
- Torque:
- 10 N*m{ 102 kgf*cm , 7 ft.*lbf }
CRANKSHAFT POSITION SENSOR > INSTALLATION |
| 1. INSTALL CRANKSHAFT POSITION SENSOR |
Apply a light coat of engine oil to the O-ring on the crankshaft position sensor.
|
Install the crankshaft position sensor with the bolt.
Connect the crankshaft position sensor connector.
| 2. TEMPORARILY TIGHTEN COMPRESSOR AND MAGNETIC CLUTCH |
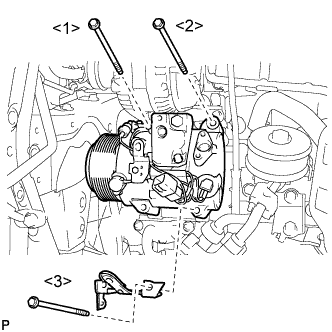 |
Temporarily install the compressor and magnetic clutch with the bolts.
| 3. INSTALL COMPRESSOR AND MAGNETIC CLUTCH |
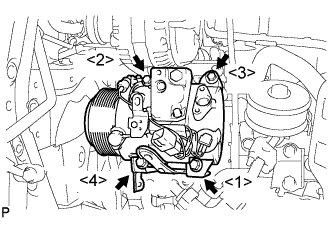 |
Install the compressor and magnetic clutch with the 4 bolts.
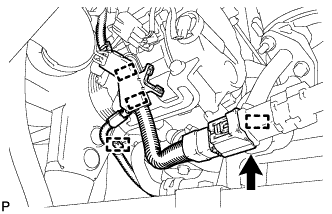 |
Engage each clamp.
Connect the connector.
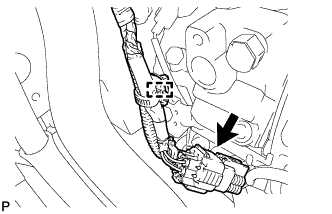 |
Engage the clamp.
Connect the connector.
| 4. CONNECT SUCTION HOSE SUB-ASSEMBLY |
Remove the attached vinyl tape from the hose.
Apply sufficient compressor oil to a new O-ring and the fitting surface of the compressor and magnetic clutch.
Install the O-ring onto the suction hose sub-assembly.
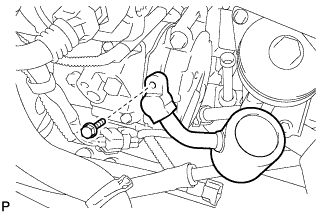 |
Install the suction hose sub-assembly onto the compressor and magnetic clutch with the bolt.
| 5. CONNECT DISCHARGE HOSE SUB-ASSEMBLY |
Remove the attached vinyl tape from the hose.
Apply sufficient compressor oil to a new O-ring and the fitting surface of the compressor and magnetic clutch.
Install the O-ring onto the discharge hose sub-assembly.
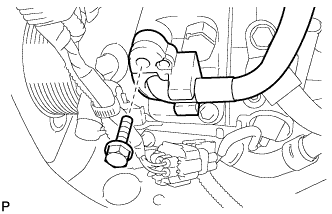 |
Install the discharge hose sub-assembly onto the compressor and magnetic clutch with the bolt.
| 6. INSTALL RADIATOR ASSEMBLY AND FAN ASSEMBLY WITH MOTOR |
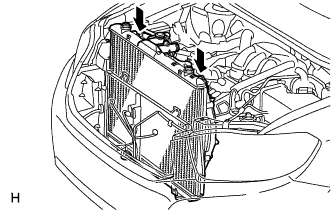 |
Install the radiator assembly and fan assembly with motor.
| 7. INSTALL COOLER CONDENSER ASSEMBLY |
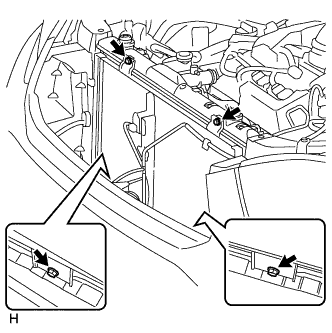 |
Install the cooler condenser assembly with the 4 bolts.
| 8. INSTALL UPPER RADIATOR SUPPORT SUB-ASSEMBLY |
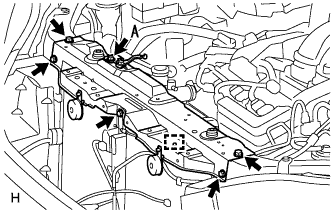 |
Install the upper radiator support sub-assembly with the 6 bolts and attach the hood lock control cable clamp to the radiator support.
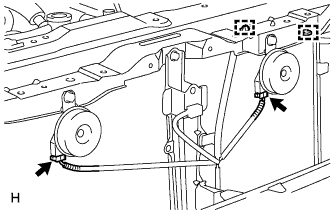 |
Connect the low pitched horn and high pitched horn connectors.
| 9. INSTALL HOOD LOCK ASSEMBLY (w/ Engine Hood Courtesy Switch) |
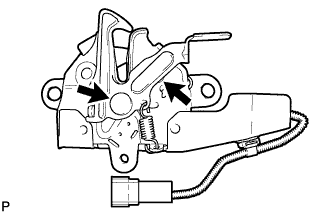 |
Apply MP grease to the sliding areas of the lock.
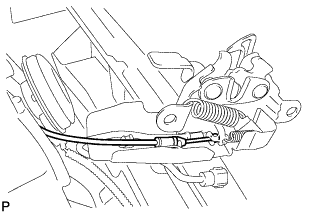 |
Connect the hood lock control cable.
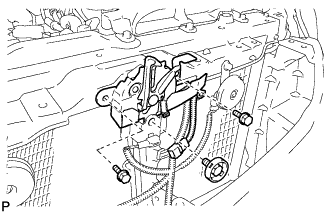 |
Install the hood lock assembly with the 3 bolts.
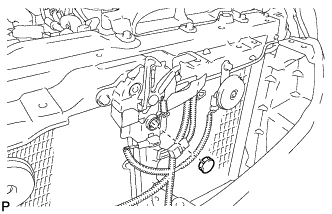 |
Install the hood lock nut cap.
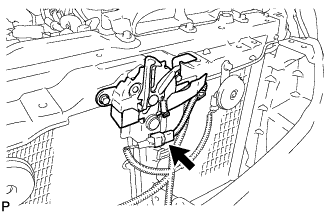 |
Connect the connector.
| 10. INSTALL HOOD LOCK ASSEMBLY (w/o Engine Hood Courtesy Switch) |
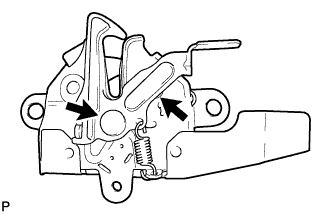 |
Apply MP grease to the sliding areas of the lock.
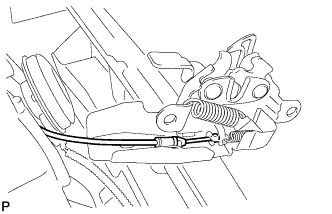 |
Connect the hood lock control cable.
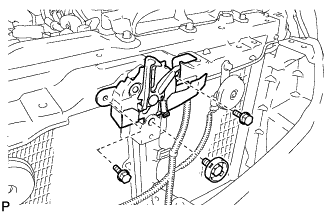 |
Install the hood lock assembly with the 3 bolts.
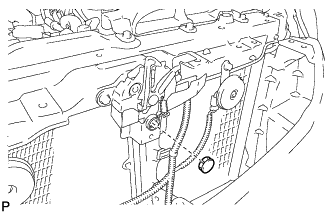 |
Install the hood lock nut cap.
| 11. INSTALL RADIATOR GRILLE |
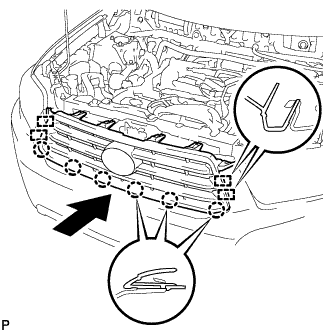 |
Engage the 4 guides and 6 claws, and install the radiator grille.
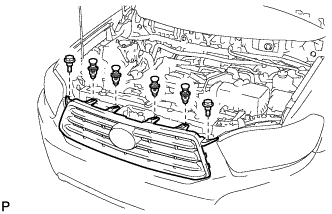 |
Install the 4 clips and 2 bolts.
| 12. CONNECT COOLING FAN ECU CONNECTOR |
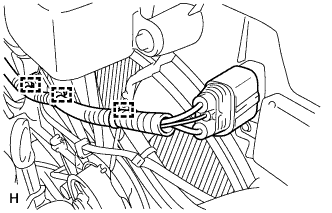 |
Connect the cooling fan ECU connector and attach the wire harness clamps to the fan shroud RH side.
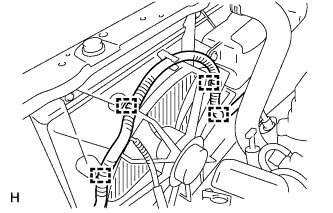 |
Attach the wire harness clamps to the fan shroud LH side.
| 13. CONNECT OIL COOLER HOSE |
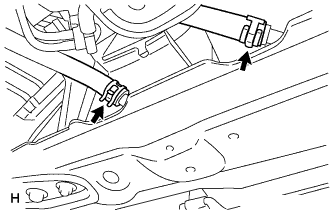 |
Connect the oil cooler hoses to the radiator.
| 14. CONNECT NO. 2 RADIATOR HOSE |
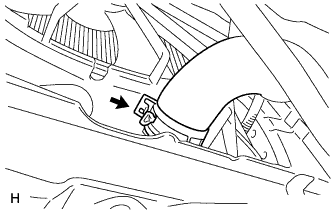 |
Connect the No. 2 radiator hose to the radiator.
| 15. CONNECT NO. 1 RADIATOR HOSE |
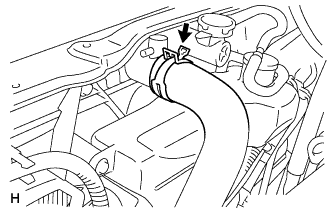 |
Connect the No. 1 radiator hose to the radiator.
| 16. INSTALL NO. 1 AIR CLEANER INLET |
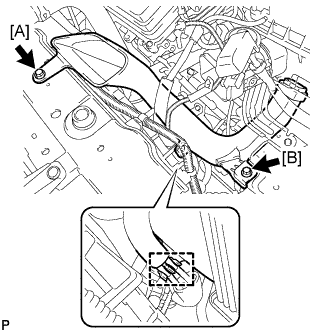 |
Install the No. 1 air cleaner inlet with the 2 bolts.
Connect the 2 vacuum hoses.
| 17. INSTALL NO. 2 AIR CLEANER INLET |
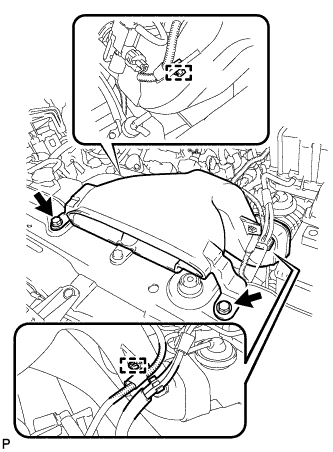 |
Install the No. 2 air cleaner inlet with the 2 bolts.
Connect the 2 vacuum hoses and harness clamps.
| 18. INSTALL BATTERY |
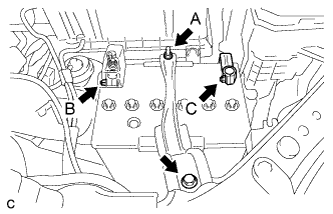 |
Install the battery tray and battery.
Install the battery clamp with the bolt and nut.
Connect the positive battery terminal, and tighten the nut.
Connect the negative battery terminal, and tighten the nut.
| 19. INSTALL COOL AIR INTAKE DUCT SEAL |
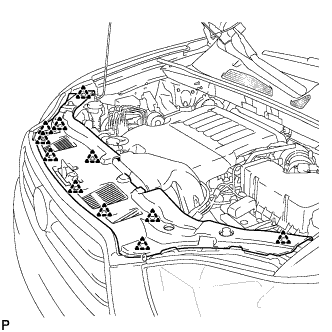 |
Install the cool air intake duct seal with the 11 clips.
| 20. CHARGE WITH REFRIGERANT |
Perform vacuum purging using a vacuum pump.
Charge with refrigerant HFC-134a (R134a).
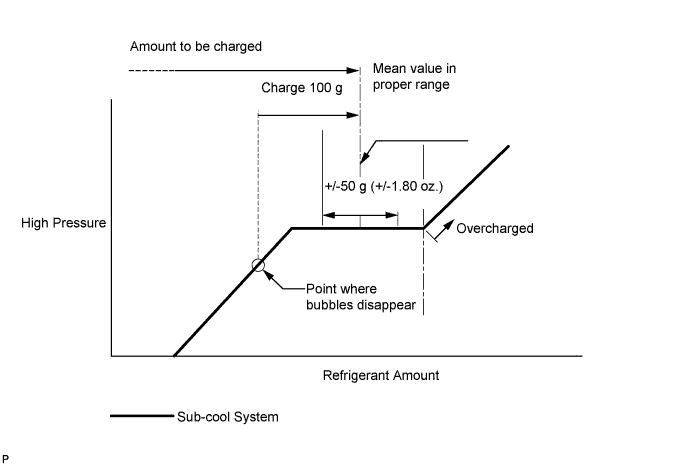
| 21. ADD ENGINE COOLANT |
Tighten the radiator drain cock plug by hand.
Tighten the 2 cylinder block drain cock plugs.
Loosen the air drain cock plug from the water inlet housing.
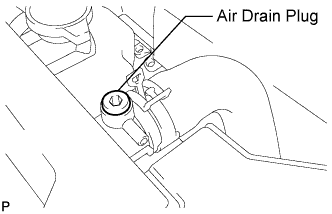 |
Loosen the air drain plug at the top of the radiator 3 or 4 turns.
Add TOYOTA Super Long Life Coolant (SLLC) to the radiator inlet opening until coolant overflows from the engine air drain cock hole. Then tighten the air drain cock plug to the water inlet housing.
Continue to add TOYOTA Super Long Life Coolant (SLLC) to the radiator inlet opening until coolant overflows from the radiator air drain hole. Then close the air drain plug at the top of the radiator.
Slowly fill the radiator with TOYOTA Super Long Life Coolant (SLLC).
| Condition | Specified Condition |
| w/ Rear Heater | 11.0 liters (11.6 US qts, 9.7 Imp. qts) |
| w/o Rear Heater | 8.8 liters (9.3 US qts, 7.7 Imp. qts) |
| Condition | Specified Condition |
| w/ Rear Heater | 11.7 liters (12.4 US qts, 10.3 Imp. qts) |
| w/o Rear Heater | 9.5 liters (10.1 US qts, 8.4 Imp. qts) |
Slowly pour coolant into the radiator reservoir tank until it reaches the FULL line.
Squeeze the No. 1 and No. 2 radiator hoses several times by hand, and then check the level of the coolant.
If the coolant level is low, add coolant.
Bleed air from the cooling system.
Warm up the engine until the thermostat opens. While the thermostat is open, circulate the coolant for several minutes.
Maintain the engine speed at 2500 to 3000 rpm.
Squeeze the inlet and outlet radiator hoses several times by hand to bleed air.
Stop the engine and wait until the engine coolant cools down.
Add engine coolant to the FULL line on the radiator reservoir.
| 22. INSPECT FOR COOLANT LEAK |
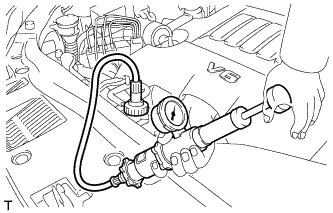 |
Fill the radiator with coolant and attach a radiator cap tester.
Warm up the engine.
Using the radiator cap tester, increase the pressure inside the radiator to 118 kPa (1.2 kgf/cm2, 17 psi), and check that the pressure does not drop.
If the pressure drops, check the hoses, radiator and water pump for leaks. If no external leaks are found, check the heater core, cylinder block and cylinder head.
| 23. INSPECT AUTOMATIC TRANSAXLE FLUID |
| 24. INSPECT FOR OIL LEAK |
| 25. WARM UP ENGINE |
Keep the A/C switch on for at least 2 minutes to warm up the compressor.
| 26. INSPECT FOR REFRIGERANT LEAK |
After recharging with refrigerant gas, inspect for refrigerant leak using a halogen leak detector.
Carry out the test under the following conditions:
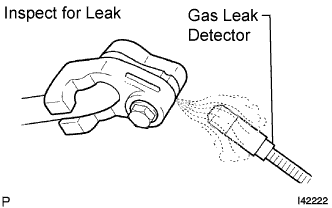 |
Using a gas leak detector, inspect for refrigerant leak from the refrigerant lines.
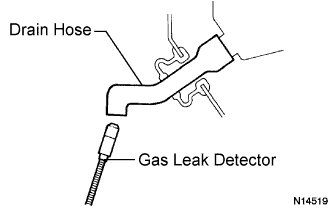 |
Bring the gas leak detector close to the drain hose with the detector's power off, and then turn the detector on.
If a gas leak is not detected from the drain hose, remove the blower motor from the cooling unit. Insert the gas leak detector into the unit and perform the test.
Disconnect the pressure switch connector and leave it for approximately 20 minutes. Bring the gas leak detector close to the pressure switch and perform the test.
| 27. INSTALL NO. 1 ENGINE UNDER COVER |
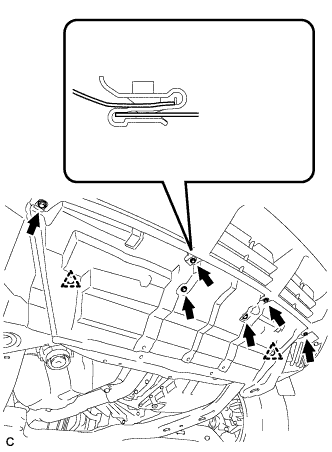 |
Install the No. 1 engine under cover with the 6 bolts and 2 clips.
| 28. INSTALL ENGINE UNDER COVER ASSEMBLY |
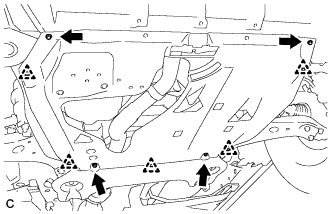 |
Install the engine under cover assembly with the 4 bolts and 5 clips.
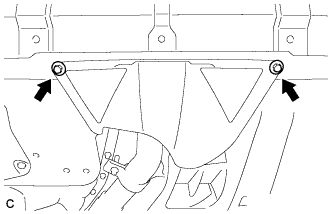 |
Install the engine under cover assembly RR with the 2 bolts.
| 29. INSTALL V-BANK COVER SUB-ASSEMBLY |
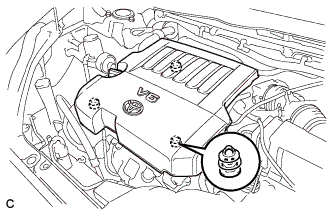 |
Fit the 3 retainers and install the V-bank cover.