 |
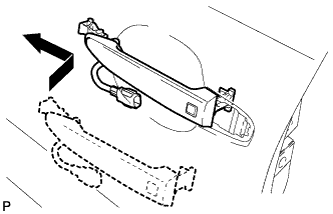
Insert the front end of the front door outside handle assembly into the front door outside handle frame.
ENTRY LOCK AND UNLOCK SWITCH (for Front Door) > INSTALLATION |
| 1. INSTALL FRONT DOOR OUTSIDE HANDLE ASSEMBLY |
|
Insert the front end of the front door outside handle assembly into the front door outside handle frame.
Insert the rear end of the front door outside handle assembly into the front door outside handle frame. Next, slide the front door outside handle assembly toward the front of the vehicle to install it.
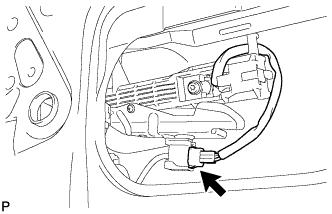 |
Connect the connector.
| 2. INSTALL FRONT DOOR OUTSIDE HANDLE COVER (for Driver Side) |
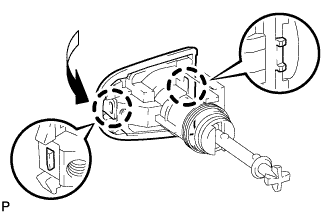 |
Engage the 2 claws to install the front door outside handle cover to the front door lock cylinder.
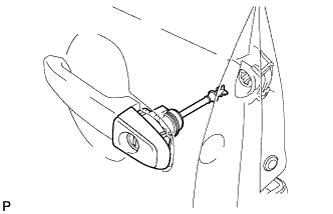 |
Install the front door lock cylinder.
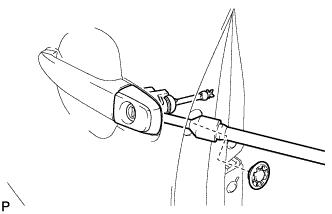 |
Using a "TORX" socket wrench (T30), install the front door lock cylinder with the screw.
Install the hole plug.
| 3. INSTALL FRONT DOOR OUTSIDE HANDLE COVER (for Front Passenger Side) |
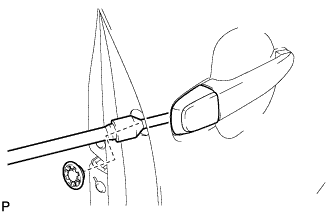 |
Using a "TORX" socket wrench (T30), install the front door lock cylinder with the screw.
Install the hole plug.
| 4. INSTALL FRONT DOOR REAR LOWER FRAME SUB-ASSEMBLY |
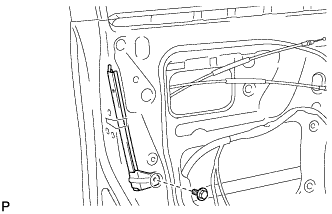 |
Install the front door rear lower frame sub-assembly with the bolt.
| 5. INSTALL FRONT DOOR GLASS RUN |
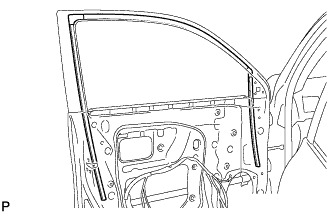 |
Install the front door glass run.
| 6. INSTALL FRONT DOOR GLASS SUB-ASSEMBLY |
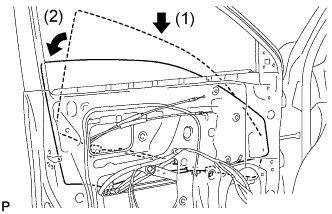 |
Insert the front door glass sub-assembly into the front door panel along the front door glass run as indicated in the order of the arrows in the illustration.
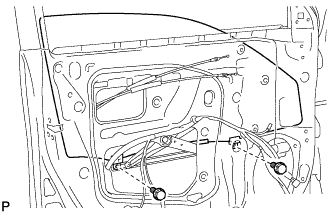 |
Install the front door glass sub-assembly with the 2 bolts.
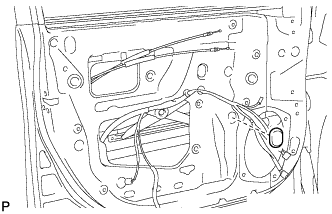 |
Install the hole plug.
| 7. INSTALL FRONT DOOR SERVICE HOLE COVER |
Apply butyl tape to the front door panel.
Pass the front door lock remote control cable and rear door inside the locking cable through a new front door service hole cover.
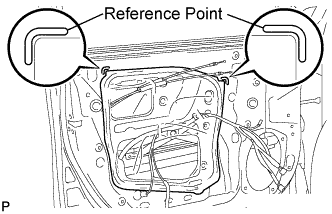 |
Attach the front door service hole cover according to the reference points on the front door panel.
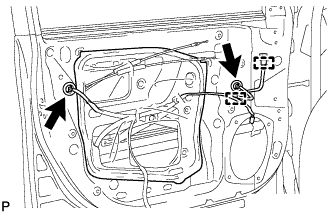 |
Connect each connector.
Engage the 2 clamps.
| 8. INSTALL FRONT DOOR INNER GLASS WEATHERSTRIP |
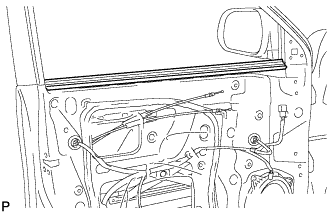 |
Install the front door inner glass weatherstrip.
| 9. INSTALL FRONT DOOR TRIM BOARD SUB-ASSEMBLY |
Connect the connector.
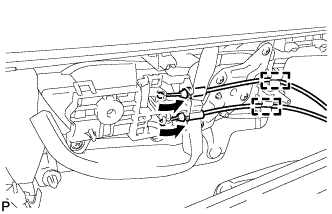 |
Connect the front door lock remote control cable and front door inside locking cable to the front door inside handle sub-assembly.
Engage the 2 clamps.
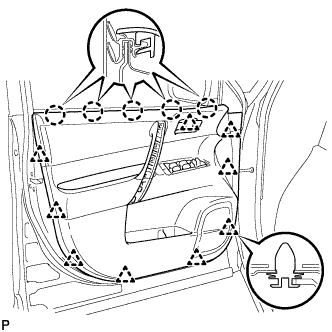 |
Engage the front door trim board with the 5 claws on the front door inner glass weatherstrip.
Engage the 9 clips.
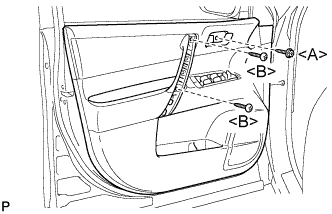 |
Install the 2 screws <B>.
Install the screw <A> and front door trim board to the front door panel.
| 10. INSTALL COURTESY LIGHT ASSEMBLY |
Connect the connector.
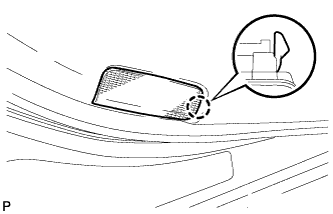 |
Engage the claw and install the courtesy light assembly.
| 11. INSTALL ASSIST GRIP COVER |
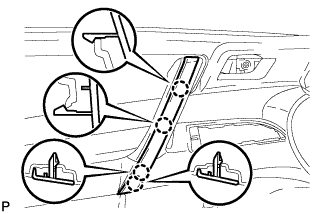 |
Engage the 4 claws and install the assist grip cover.
| 12. INSTALL FRONT DOOR INSIDE HANDLE BEZEL PLUG |
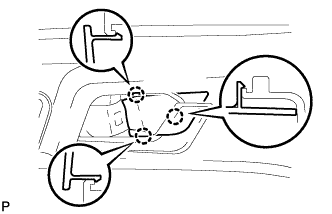 |
Engage the 3 claws and install the front door inside handle bezel plug.
| 13. INSTALL FRONT DOOR LOWER FRAME BRACKET GARNISH |
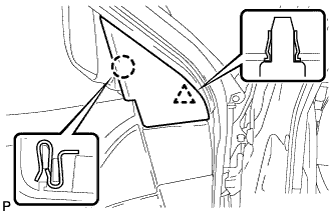 |
Engage the clip and claw, and install the front door lower frame bracket garnish.
| 14. CONNECT NEGATIVE BATTERY TERMINAL |