 |
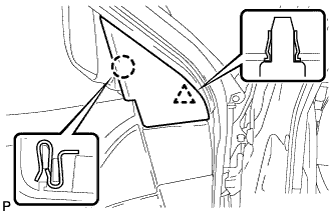
Disengage the claw and clip, and remove the front door lower frame bracket garnish.
ENTRY LOCK AND UNLOCK SWITCH (for Front Door) > REMOVAL |
| 1. DISCONNECT NEGATIVE BATTERY TERMINAL |
| 2. REMOVE FRONT DOOR LOWER FRAME BRACKET GARNISH |
|
Disengage the claw and clip, and remove the front door lower frame bracket garnish.
| 3. REMOVE FRONT DOOR INSIDE HANDLE BEZEL PLUG |
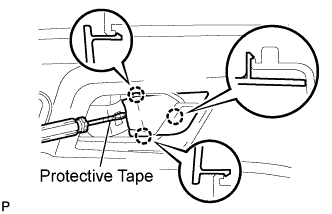 |
Using a screwdriver with the tip wrapped with protective tape, disengage the 3 claws, and remove the front door inside handle bezel plug.
| 4. REMOVE ASSIST GRIP COVER |
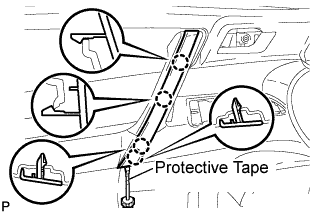 |
Using a screwdriver with the tip wrapped with protective tape, disengage the 4 claws and remove the assist grip cover.
| 5. REMOVE COURTESY LIGHT ASSEMBLY |
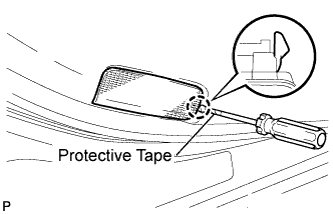 |
Using a screwdriver with the tip wrapped with protective tape, disengage the claw and remove the courtesy light assembly.
Disconnect the connector.
| 6. REMOVE FRONT DOOR TRIM BOARD SUB-ASSEMBLY |
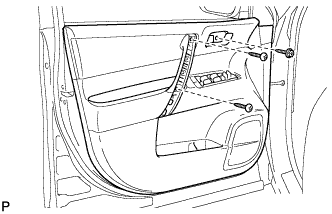 |
Remove the 3 screws.
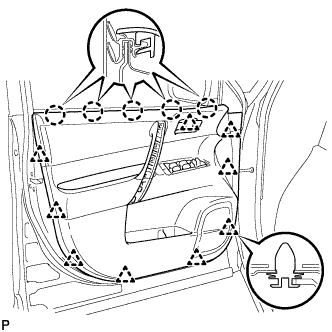 |
Using a clip remover, disengage the 9 clips.
Disengage the 5 claws and separate the front door trim board sub-assembly from the front door inner glass weatherstrip.
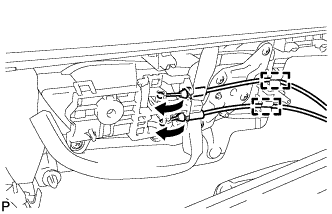 |
Disengage the 2 clamps.
Disconnect the front door lock remote control cable and front door inside locking cable.
Disconnect the connector.
| 7. REMOVE FRONT DOOR INNER GLASS WEATHERSTRIP |
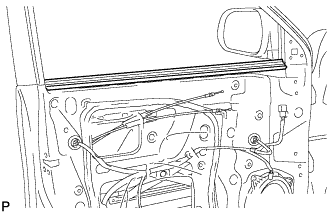 |
Remove the front door inner glass weatherstrip from the front door panel.
| 8. REMOVE FRONT DOOR SERVICE HOLE COVER |
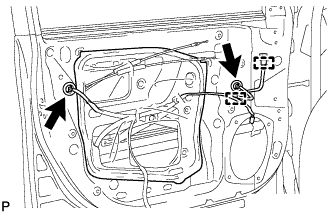 |
Disconnect the each connector and 2 clamps, and remove the front door service hole cover.
| 9. REMOVE FRONT DOOR GLASS SUB-ASSEMBLY |
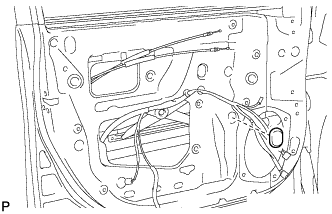 |
Remove the hole plug.
Connect the negative battery terminal.
Connect the power window regulator motor connector.
Connect the power window regulator master switch assembly and move the front door glass sub-assembly so that the door glass bolts can be seen.
Disconnect the negative battery terminal and power window regulator master switch assembly.
Disconnect the power window regulator motor connector.
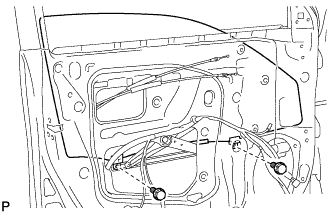 |
Remove the 2 bolts.
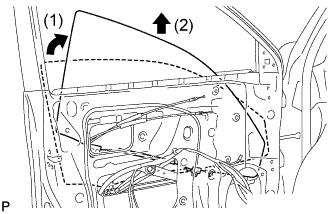 |
Remove the front door glass sub-assembly as shown in the illustration.
| 10. REMOVE FRONT DOOR GLASS RUN |
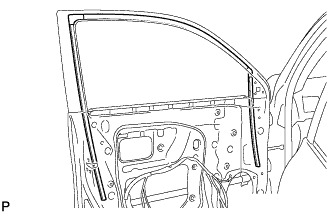 |
Remove the front door glass run.
| 11. REMOVE FRONT DOOR REAR LOWER FRAME SUB-ASSEMBLY |
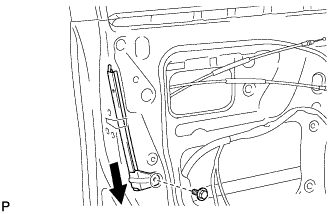 |
Remove the bolt and the front door rear lower frame sub-assembly as shown in the illustration.
| 12. REMOVE FRONT DOOR OUTSIDE HANDLE COVER (for Driver Side) |
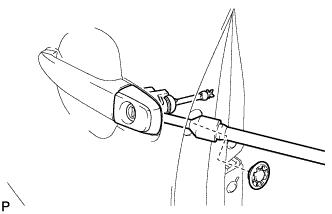 |
Remove the hole plug.
Using a "TORX" socket wrench (T30), loosen the screw and remove the front door outside handle cover and the door lock key cylinder as a unit.
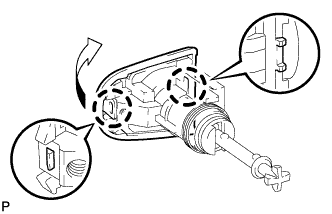 |
Using a screwdriver, disengage the 2 claws and remove the front door outside handle cover.
| 13. REMOVE FRONT DOOR OUTSIDE HANDLE COVER (for Front Passenger Side) |
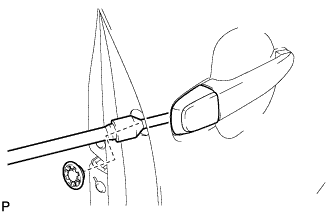 |
Remove the hole plug.
Using a "TORX" socket wrench (T30), loosen the screw and remove the front door outside handle cover and the door lock key cylinder as a unit.
| 14. REMOVE FRONT DOOR OUTSIDE HANDLE ASSEMBLY |
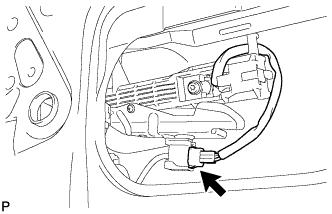 |
Disconnect the connector.
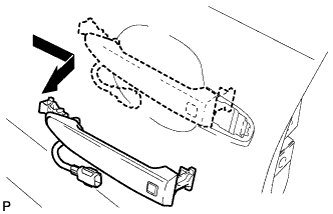 |
Remove the front door outside handle assembly as shown in the illustration.