 |
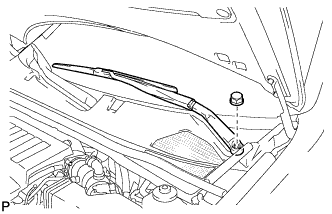
Remove the nut, and the front wiper arm and blade assembly LH.
TRANSAXLE CONTROL CABLE ASSEMBLY > REMOVAL |
| 1. PRECAUTION |
| 2. REMOVE FRONT WIPER ARM AND BLADE ASSEMBLY LH |
|
Remove the nut, and the front wiper arm and blade assembly LH.
| 3. REMOVE FRONT WIPER ARM AND BLADE ASSEMBLY RH |
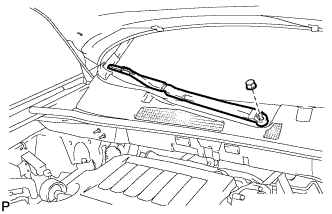 |
Remove the nut, and the front wiper arm and blade assembly RH.
| 4. REMOVE COWL TOP VENTILATOR LOUVER SUB-ASSEMBLY |
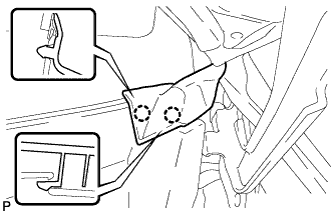 |
Disengage the 2 claws and disconnect the front fender to cowl side seal LH.
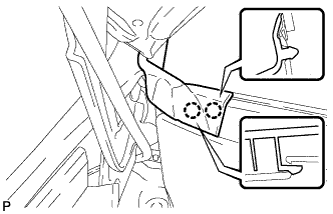 |
Disengage the 2 claws and disconnect the front fender to cowl side seal RH.
Remove the 2 clips.
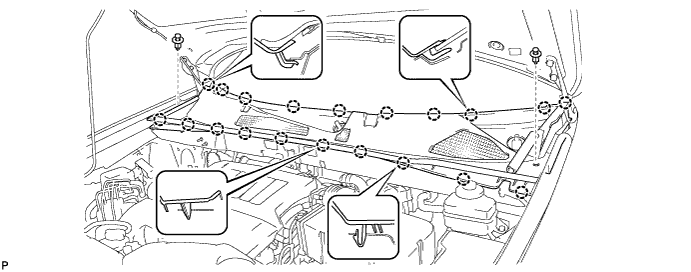
Disengage the 20 claws and remove the cowl top ventilator louver sub-assembly.
| 5. REMOVE WINDSHIELD WIPER MOTOR AND LINK ASSEMBLY |
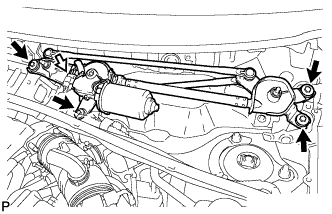 |
Disconnect the connector.
Remove the 4 bolts, and the windshield wiper motor and link assembly.
| 6. REMOVE OUTER COWL TOP PANEL SUB-ASSEMBLY |
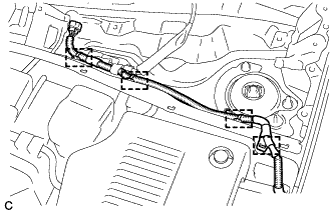 |
Disengage the 4 clamps and separate the wiper wire harness from the outer cowl top panel sub-assembly.
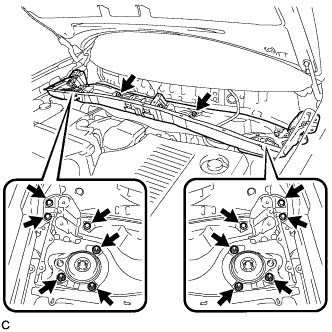 |
Remove the 8 bolts, 6 nuts, and the outer cowl top panel sub-assembly.
| 7. REMOVE COOL AIR INTAKE DUCT SEAL |
Remove the 11 clips and cool air intake duct seal.
| 8. REMOVE NO. 2 ENGINE ROOM SIDE COVER LH |
Remove the 4 bolts and No. 2 engine under cover.
| 9. REMOVE AIR CLEANER CAP SUB-ASSEMBLY |
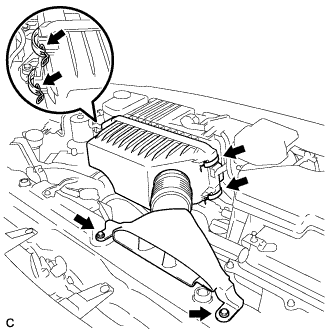 |
Remove the 2 bolts, 4 clamps and air cleaner cap sub-assembly.
Remove the air cleaner filter element from the air cleaner case.
| 10. REMOVE AIR CLEANER CASE SUB-ASSEMBLY |
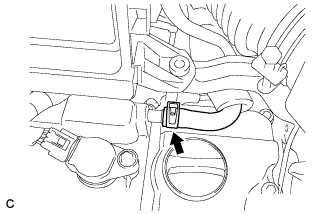 |
Separate the No. 1 ventilation hose.
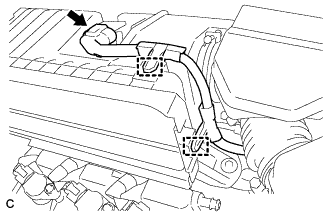 |
Disconnect the intake air flow meter connector.
Disconnect the 2 wire harness clamps from the air cleaner case sub-assembly.
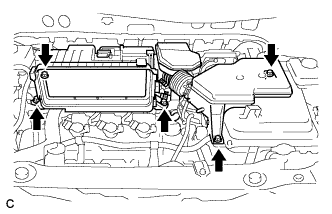 |
Remove the 5 bolts from the air cleaner case sub-assembly.
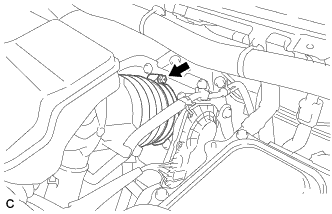 |
Loosen the hose clamp and separate the No. 1 air cleaner hose.
Remove the air cleaner case sub-assembly.
| 11. REMOVE NO. 1 ENGINE UNDER COVER |
Remove the 6 bolts, 2 screws, 2 clips and No. 1 engine under cover.
| 12. REMOVE INVERTER WITH CONVERTER ASSEMBLY |
| 13. REMOVE NO. 1 INVERTER BRACKET |
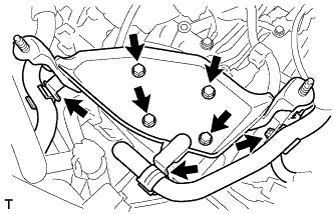 |
Separate the 3 hose clamps.
Remove the 4 bolts, harness clamp and No. 1 inverter bracket.
| 14. REMOVE AIR CONDITIONING UNIT |
| 15. REMOVE TRANSMISSION CONTROL CABLE ASSEMBLY |
In the engine compartment
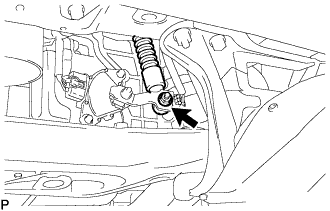 |
Remove the nut from the control shaft lever.
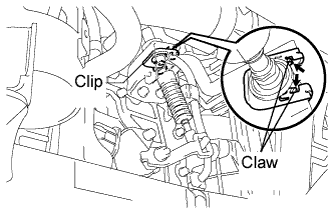 |
Remove the clip and disconnect the control cable from the control cable bracket.
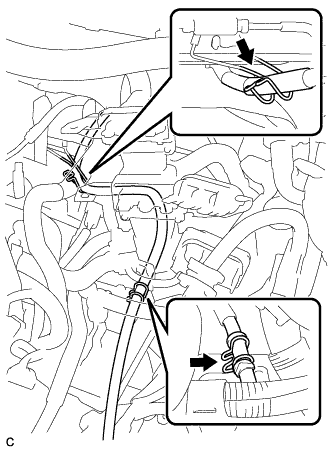 |
Disconnect the control cable from the 2 control cable brackets.
In the cabin
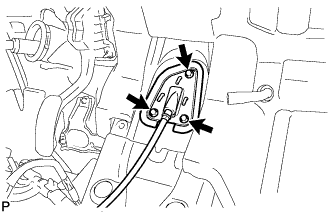 |
Remove the 3 bolts and disconnect the transmission control cable assembly from the vehicle.
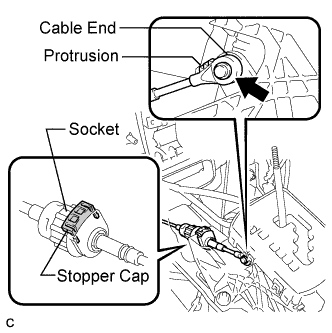 |
Using a screwdriver, disconnect the cable end from the shift lever assembly.
Turn the socket of the transmission control cable assembly counterclockwise and remove the stopper cap.
Disconnect the transmission control cable assembly from the shift lever assembly.