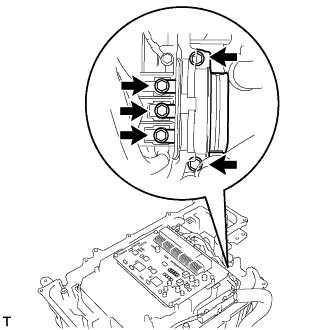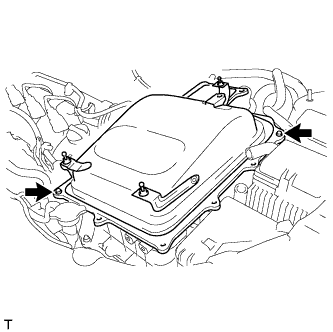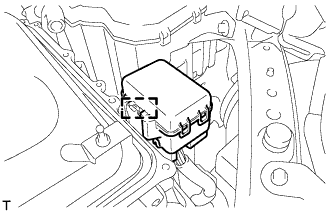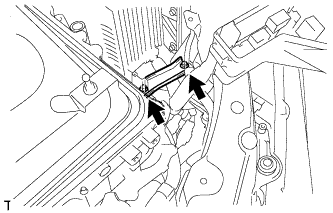
Home › HYBRID SYSTEM ยท P310 › HYBRID VEHICLE CONTROL › INVERTER WITH CONVERTER

INVERTER WITH CONVERTER > REMOVAL

for Preparation Click here


1. PRECAUTION
  1. Check for DTCs (Click here).

    NOTICE:
    Confirm the P0AA6 (Hybrid Battery Voltage System Isolation Fault) is not output before doing removal or installation work inside the battery. If the DTC is output, perform troubleshooting procedures first.


2. READ OUTPUT DTC
  1. Check for DTCs.

    NOTICE:
    Check for DTCs and confirm that P0AA6 (High voltage insulation is unusual) is not output before doing removal or installation inside the battery. If the DTC is output, perform troubleshooting first.


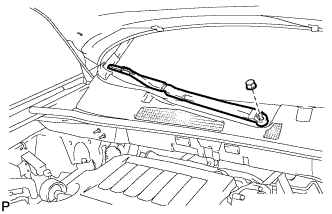
3. REMOVE FRONT WIPER ARM AND BLADE ASSEMBLY LH


    E150144
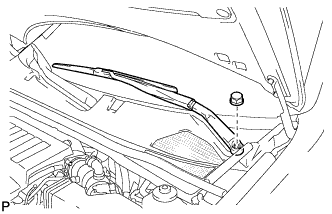
  1. Remove the nut, and the front wiper arm and blade assembly LH.


4. REMOVE FRONT WIPER ARM AND BLADE ASSEMBLY RH


    E150145
  1. Remove the nut, and the front wiper arm and blade assembly RH.


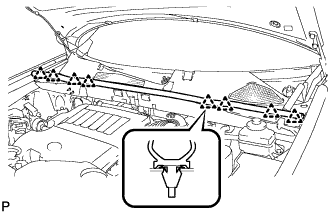
5. REMOVE HOOD TO COWL TOP SEAL


    E150148
  1. Disengage the 8 clips and remove the hood to cowl top seal.


6. REMOVE COWL TOP VENTILATOR LOUVER SUB-ASSEMBLY


    E150146
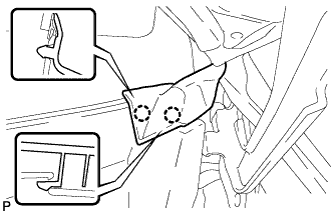
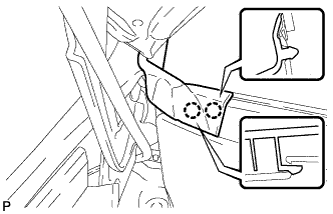
  1. Disengage the 2 claws and disconnect the front fender to cowl side seal LH.


    E150147
  1. Disengage the 2 claws and disconnect the front fender to cowl side seal RH.


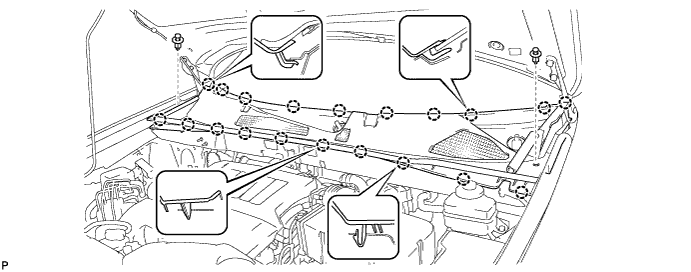
  1. Remove the 2 clips.


    E150149

  1. Disengage the 20 claws and remove the cowl top ventilator louver sub-assembly.


7. REMOVE WINDSHIELD WIPER MOTOR AND LINK ASSEMBLY


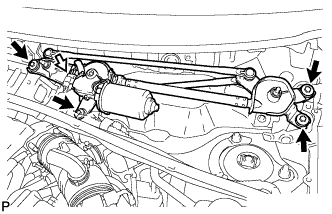
    E150150
  1. Disconnect the connector.

  1. Remove the 4 bolts, and the windshield wiper motor and link assembly.


8. REMOVE OUTER COWL TOP PANEL SUB-ASSEMBLY


    C175029
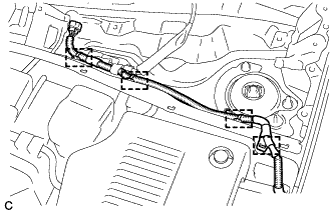
  1. Disengage the 4 clamps and separate the wiper wire harness from the outer cowl top panel sub-assembly.


    C175030
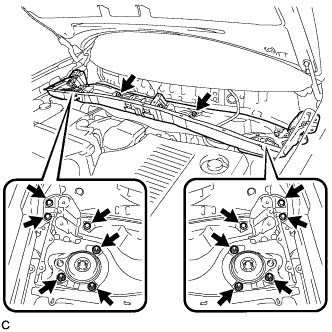
  1. Remove the 8 bolts, 6 nuts, and the outer cowl top panel sub-assembly.


9. REMOVE NO. 2 ENGINE ROOM SIDE COVER LH


    A173813
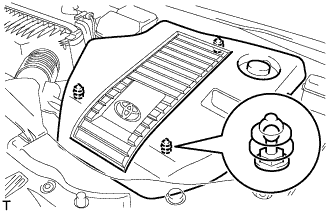
  1. Remove the engine room side cover.


10. DISCONNECT CABLE FROM NEGATIVE BATTERY TERMINAL

NOTICE:
When disconnecting the cable, some systems need to be initialized after the cable is reconnected (Click here).


11. REMOVE SERVICE PLUG GRIP

CAUTION:
  1. Remove the service plug to interrupt a high voltage circuit at the time of the check.
  2. Keep the removed service plug in your pocket to prevent other technicians from accidentally reconnecting it while you are servicing the vehicle.
  3. All the high voltage wiring connectors are colored in orange.


    A175634
  1. Remove the 5 clips and door scuff plate LH.



    A175635
  1. Remove the 2 clips and reclining hinge cover.


    A175636
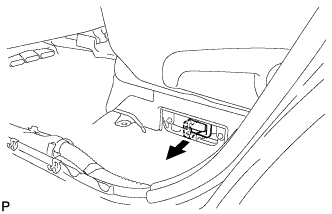
  1. Wear insulated glove and remove the service plug grip, after sliding up the lever of the service plug grip.

    CAUTION:
    1. Keep the removed service plug in your pocket to prevent other technicians from accidentally reconnecting it while you are servicing the vehicle.
    2. After removing the service plug grip, do not touch the high voltage connectors and terminals for 5 minutes.

    NOTICE:
    After removing the service plug grip, do not operate the power switch as it may damage the hybrid vehicle control ECU.


12. DRAIN COOLANT (for Inverter)

NOTICE:
  1. Do not reuse the drained coolant because it may contain foreign objects.
  2. Collect the drained coolant and measure its volume to establish a benchmark. When adding coolant, make sure to add more coolant than the measured amount.

  1. Remove the inverter reserve tank cap.

    CAUTION:
    To avoid the danger of being burned, do not remove the inverter reserve tank cap while the coolant for the inverter is still hot.


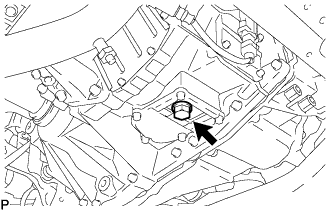
    C109300
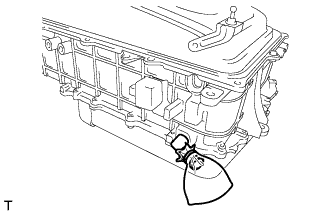
  1. Using a hexagon wrench (10 mm), remove the drain plug indicated in the illustration and drain the coolant.

    CAUTION:
    Use caution when handling coolant immediately after driving or in summer because it may be hot.

  1. Install the plug with a new gasket.

    Torque:
    39 N*m{ 398 kgf*cm , 29 ft.*lbf }


13. REMOVE COOL AIR INTAKE DUCT SEAL
  1. Remove the 11 clips and cool air intake duct seal.


14. REMOVE AIR CLEANER CAP SUB-ASSEMBLY


    A175875
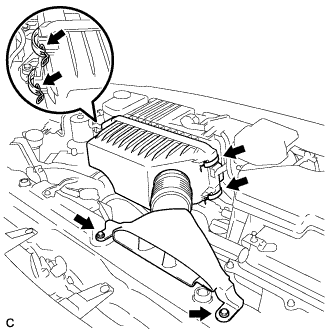
  1. Remove the 2 bolts, 4 clamps and air cleaner cap sub-assembly.

  1. Remove the air cleaner filter element from the air cleaner case.


15. REMOVE AIR CLEANER CASE SUB-ASSEMBLY


    A173490
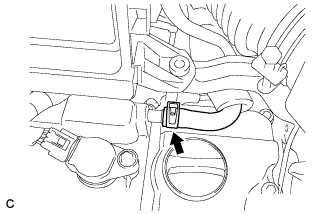
  1. Separate the No. 1 ventilation hose.


    A173491
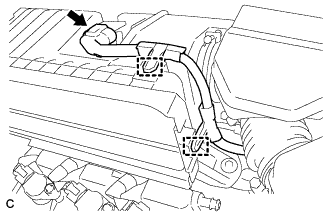
  1. Disconnect the intake air flow meter connector.

  1. Disconnect the 2 wire harness clamps from the air cleaner case sub-assembly.


    A173492
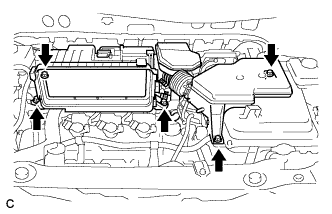
  1. Remove the 5 bolts from the air cleaner case sub-assembly.


    A173493
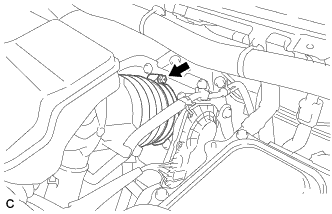
  1. Loosen the hose clamp and separate the No. 1 air cleaner hose.

  1. Remove the air cleaner case sub-assembly.


16. DISCONNECT NO. 1 CIRCUIT BREAKER SENSOR


    A175951E01
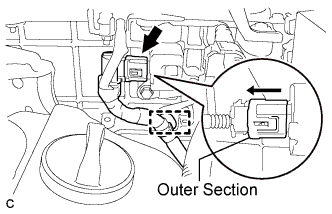
  1. Move the outer section to the wire harness side as illustrated, then disconnect the No. 1 circuit breaker sensor.


17. REMOVE INVERTER RESERVE TANK SUB-ASSEMBLY


    A108512
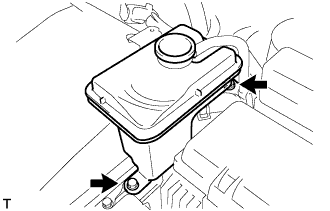
  1. Remove the 2 bolts and inverter reserve tank sub-assembly.


    A108513
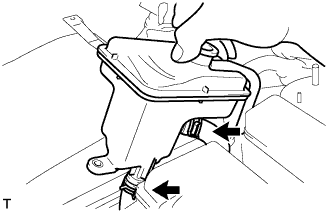
  1. Slide the 2 clamps, and disconnect the 2 water hoses from the inverter reserve tank sub-assembly.


18. DISCONNECT NO. 2 ENGINE ROOM WIRE
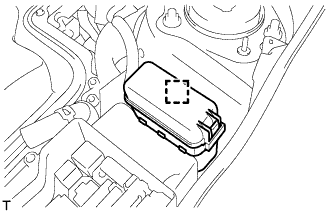
  1. Remove the relay block cover.


    A175852
  1. Disconnect the clamp, and release the engine room relay block assembly.
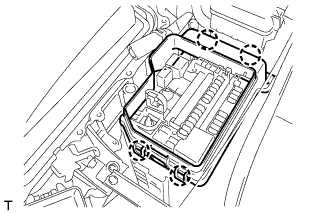


    A175854
  1. Disconnect the 4 claws, and disconnect the No. 2 relay block cover.
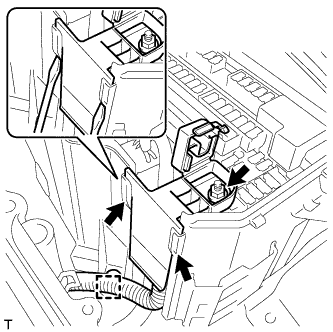


    A175855
  1. Remove the nut from the No. 2 engine room wire.

  1. Release the 2 claws, and disconnect the No. 2 engine room wire.

  1. Disconnect the clamp.


19. DISCONNECT WATER HOSE


    A181824
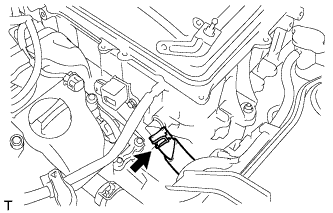
  1. Slide the clamp, and disconnect the water hose from the inverter with converter assembly.


20. REMOVE INVERTER COVER


    A175851
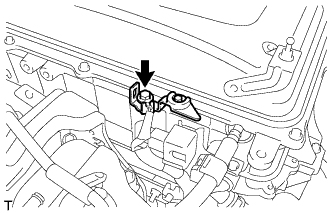
  1. Remove the bolt and interlock bracket.
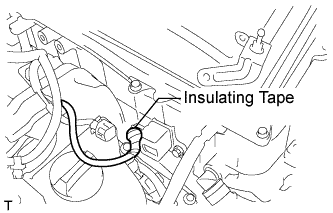


    A181825E01
  1. Insulate the removed terminal with insulating tape.
    NOTICE:
    Make sure that the terminal does not stick out from the insulating tape.


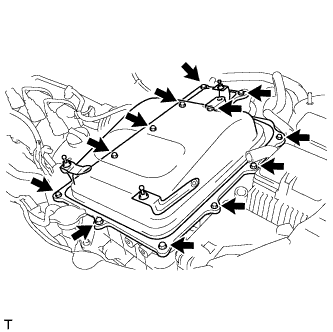
    A181826
  1. Remove the 12 bolts and inverter cover.


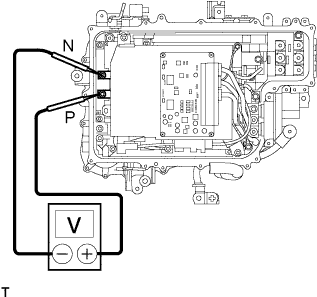
21. CHECK TERMINAL VOLTAGE

CAUTION:
Wear insulating gloves.

NOTICE:
  1. Make sure that the inverter with converter assembly is temporarily installed before working on the inverter with converter assembly (Click here).
  2. Do not allow any foreign objects or waterdrops to enter the inverter with converter assembly.


    A108528E01
  1. Using the voltmeter, measure the voltage between the terminals of the 2 phase connectors (N-P).

    Standard voltage:
    0 V

    HINT:
    Use measuring range of DC 750 V or more on the voltmeter.


22. SEPARATE NO. 4 ENGINE WIRE

CAUTION:
Wear insulating gloves.

NOTICE:
  1. Make sure that the inverter with converter assembly is temporarily installed before working on the inverter with converter assembly (Click here).
  2. Do not allow any foreign objects or waterdrops to enter the inverter with converter assembly.


    A177832
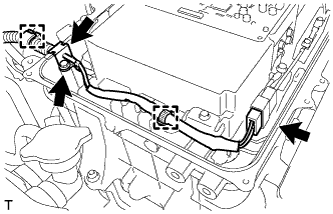
  1. Remove the bolt, and disconnect the No. 4 engine wire from the inverter with converter assembly.

  1. Disconnect the connector, clamps and grommet, and separate the No. 4 engine wire from the inverter with converter assembly.


23. DISCONNECT HIGH VOLTAGE CABLE OF FRONT MOTOR

CAUTION:
Wear insulating gloves.

NOTICE:
  1. Make sure that the inverter with converter assembly is temporarily installed before working on the inverter with converter assembly (Click here).
  2. Insulate the removed terminals with insulating tape.
  3. Do not allow any foreign objects or waterdrops to enter the inverter with converter assembly.


    A108519
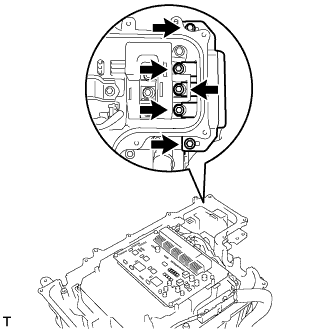
  1. Remove the 5 bolts, and disconnect the high voltage cables of the motor from the inverter with converter assembly.
    NOTICE:
    Cover the hole where the cable was connected with tape or equivalent (non-residue type) to prevent entry of foreign matter.


    A108520
  1. Remove the 5 bolts, and disconnect the high voltage cables of the generator (MG1) from the inverter with converter assembly.

    NOTICE:
    Cover the hole where the cable was connected with tape or equivalent (non-residue type) to prevent entry of foreign matter.


24. DISCONNECT MG ECU CONNECTOR

CAUTION:
Wear insulating gloves.

NOTICE:
  1. Make sure that the inverter with converter assembly is temporarily installed before working on the inverter with converter assembly (Click here).
  2. Do not allow any foreign objects or waterdrops to enter the inverter with converter assembly.


    A108518
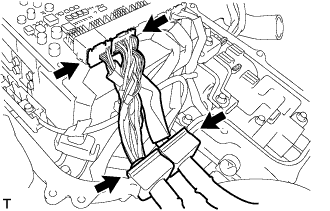
  1. Disconnect the 2 connectors and 2 grommets from the inverter with converter assembly.


25. DISCONNECT NO. 3 FRAME WIRE

CAUTION:
Wear insulating gloves.

NOTICE:
  1. Make sure that the inverter with converter assembly is temporarily installed before working on the inverter with converter assembly (Click here).
  2. Insulate the removed terminals with insulating tape.
  3. Do not allow any foreign objects or waterdrops to enter the inverter with converter assembly.


    A108521
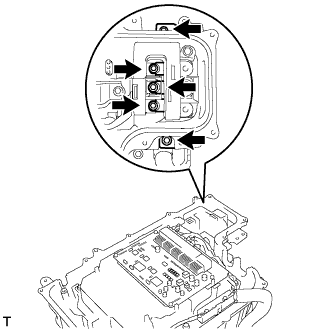
  1. Remove the 5 bolts, and disconnect the No. 3 frame wire (high voltage cables of the rear motor (MGR)) from the inverter with converter assembly.
    NOTICE:
    Cover the hole where the cable was connected with tape or equivalent (non-residue type) to prevent entry of foreign matter.


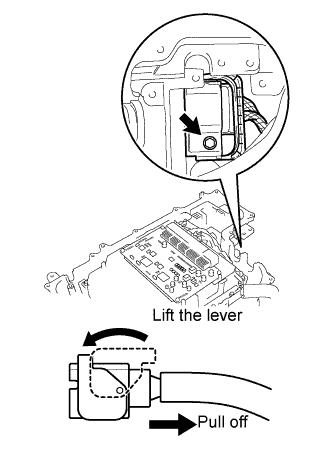
    A109799E01
  1. Remove the bolt and lift the lever to disconnect the No. 3 frame wire from the inverter with converter assembly.

    NOTICE:
    Cover the hole where the cable was connected with tape or equivalent (non-residue type) to prevent entry of foreign matter.


26. INSTALL INVERTER COVER


    A181827
  1. Temporarily install the inverter cover with the 2 bolts to prevent any foreign objects or waterdrops from entering the inverter with converter assembly.


27. SEPARATE ENGINE ROOM RELAY BLOCK ASSEMBLY


    A181828
  1. Disconnect the clamp, and release the engine room relay block assembly.


28. REMOVE NO. 4 INVERTER BRACKET


    A181829
  1. Remove the 2 bolts and No. 4 inverter bracket.


29. REMOVE INVERTER WITH CONVERTER ASSEMBLY

CAUTION:
Wear insulating gloves.


    A175858
  1. Disconnect the coolant hose from the inverter with converter assembly. Put a piece of cloth in the pipe and in the disconnected hose or cover the pipe and hose with plastic bags as shown in the illustration, in order to prevent coolant from spilling around the inverter with converter assembly.
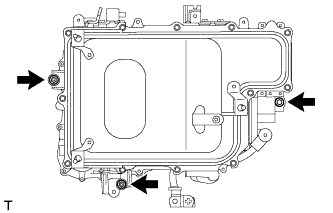


    A181830
  1. Remove the 2 nuts, bolt and inverter with converter assembly.

    NOTICE:
    1. Since the inverter with converter assembly is very heavy, 2 people are needed to remove the inverter with converter assembly. When removing the inverter with converter assembly, do not damage the parts around it.
    2. To prevent damage, do not hold the inverter with converter assembly by the connectors.
    3. To prevent damage due to static electricity, do not touch the terminals of the disconnected connectors.