 |
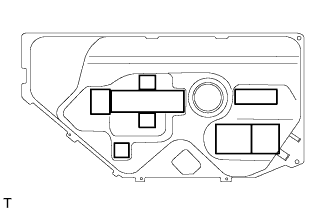
Install 8 new fuel tank cushions to the fuel tank.
FUEL TANK > INSTALLATION |
| 1. INSTALL FUEL TANK CUSHION |
|
Install 8 new fuel tank cushions to the fuel tank.
| 2. INSTALL FUEL HOSE CLAMP |
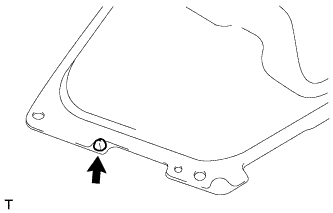 |
Install the clamp to the fuel tank.
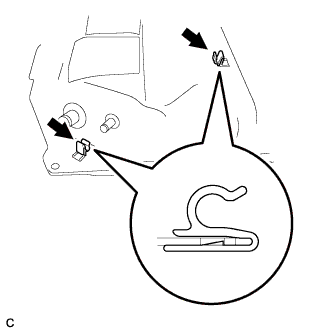 |
Install the 2 fuel tube clamps of the fuel pump tube to the fuel tank.
| 3. INSTALL FUEL PUMP TUBE SUB-ASSEMBLY |
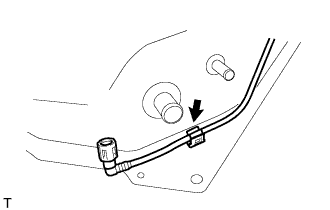 |
Install the fuel pump tube to the clamp.
| 4. INSTALL FUEL TANK WIRE |
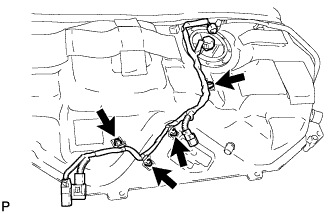 |
Connect the 4 clamps to install the fuel tank wire.
| 5. INSTALL FUEL VAPOR CONTAINMENT VALVE |
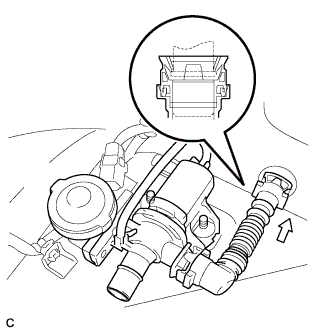 |
Connect the fuel tank vent hose to the fuel tank.
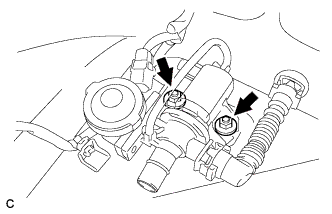 |
Install the fuel vapor containment valve with the 2 nuts.
Connect the fuel vapor containment valve connector.
| 6. INSTALL FUEL SUCTION TUBE ASSEMBLY WITH PUMP AND GAUGE |
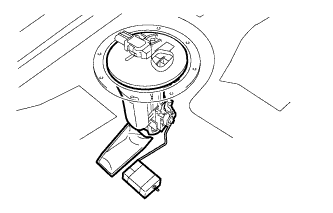 |
Install a new gasket to the fuel pump assembly.
Install the fuel pump assembly.
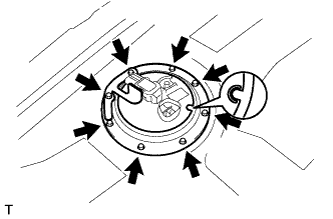 |
Install the fuel tank vent tube set plate by aligning it with the cutout on the fuel pump assembly.
Install the fuel tank vent tube set plate and fuel pump connector plate with the 8 bolts.
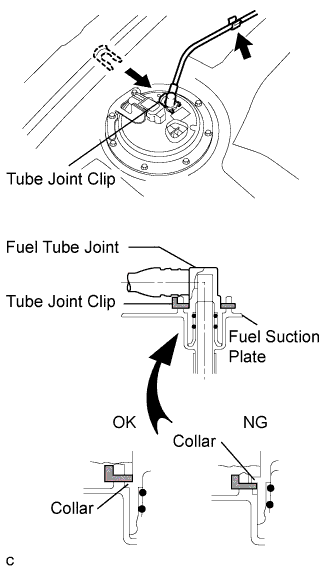 |
Connect the fuel pump tube with the tube joint clip and clamp.
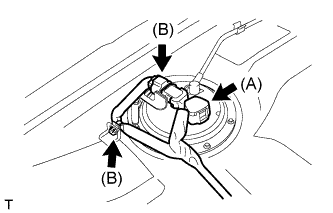 |
Connect the fuel tank wire connector (A).
Connect the vapor pressure sensor connector and clamp (B).
| 7. INSTALL FUEL TANK ASSEMBLY |
 |
Set the fuel tank on a transmission jack.
Operate the transmission jack, and install the fuel tank to the vehicle.
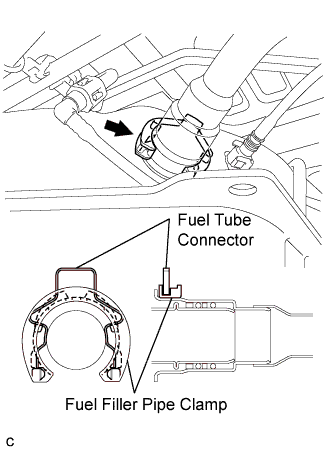
Operate the transmission jack, and connect the fuel tank inlet pipe with the tube connector and clamp.
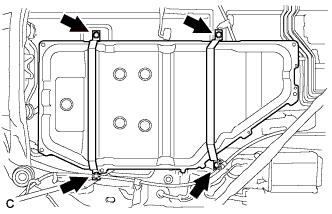 |
Install the 2 fuel tank bands with the 4 bolts.
| 8. CONNECT NO. 1 FUEL TANK BREATHER TUBE |
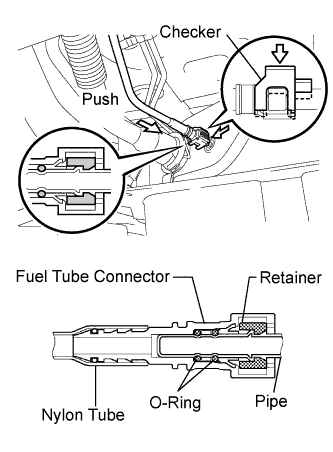 |
Connect the fuel tank breather tube.
Push in the tube connector to the pipe until the tube connector makes a "click" sound.
Install the checker to the pipe.
| 9. CONNECT FUEL PUMP TUBE SUB-ASSEMBLY |
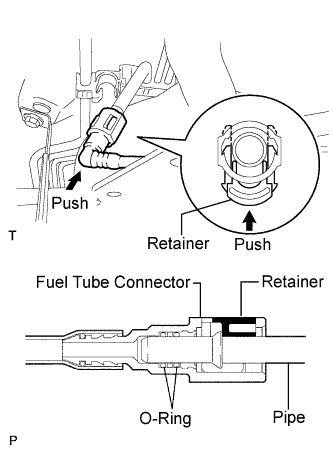 |
Connect the fuel pump tube sub-assembly.
Push in the fuel tube connector to the pipe and push up the retainer to engage the claws.
| 10. CONNECT FUEL TANK VENT HOSE |
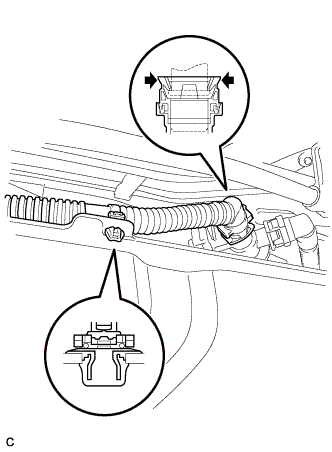 |
Align the quick connector with the pipe, then push in the quick connector until the retainer makes a "click" sound to connect the fuel tank vent hose to the fuel vapor containment valve.
| 11. CONNECT FUEL TANK WIRE |
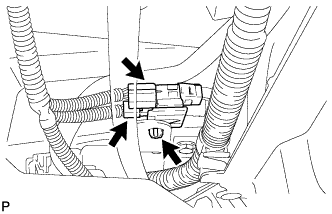 |
Connect the fuel tank wire connectors, and install them to the bracket.
| 12. INSTALL NO. 3 PARKING BRAKE CABLE ASSEMBLY |
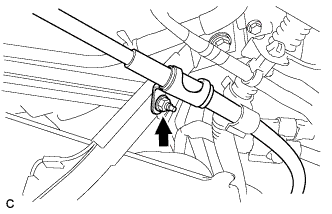 |
Install the No. 3 parking brake cable assembly with the nut.
| 13. INSTALL NO. 1 FUEL TANK PROTECTOR SUB-ASSEMBLY |
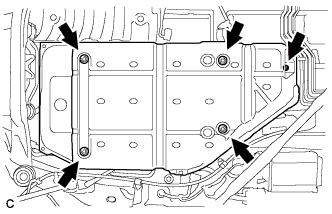 |
Install the No. 1 fuel tank protector sub-assembly with the screw and the 4 grommets.
| 14. INSTALL NO. 3 FRONT FLOOR HEAT INSULATOR |
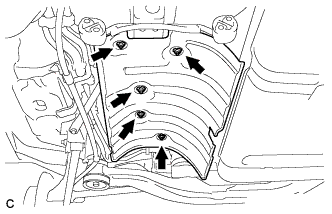 |
Install the No. 3 front floor heat insulator with the 5 nuts.
| 15. INSTALL CENTER EXHAUST PIPE ASSEMBLY |
| 16. CONNECT CABLE TO NEGATIVE BATTERY TERMINAL |
| 17. ADD FUEL |
| 18. INSPECT FOR FUEL LEAK |
Check fuel pump operation.
Connect the Techstream to the DLC3.
Turn the power switch on (IG) and push the Techstream main switch on.
Select the following menu items: Power train / Engine / Active Test / Control the Fuel Pump Speed.
Check for pressure in the fuel inlet tube from the fuel line. Check that sound of fuel flowing in the fuel tank can be heard. If no sound can be heard, check the integration relay, fuel pump, hybrid vehicle control ECU and wiring connector.
Check that there are no fuel leaks anywhere on the fuel system after performing maintenance.
Inspect for fuel leaks.
Check that there are no fuel leaks anywhere on the system after performing maintenance. If there is a fuel leak, repair or replace parts as necessary.
Turn the power switch off.
Disconnect the Techstream from the DLC3.
| 19. INSPECT FOR EXHAUST GAS LEAK |
| 20. INSTALL FRONT CENTER FLOOR COVER |
| 21. INSTALL FRONT FLOOR COVER LH |
| 22. PERFORM INITIALIZATION |