 |
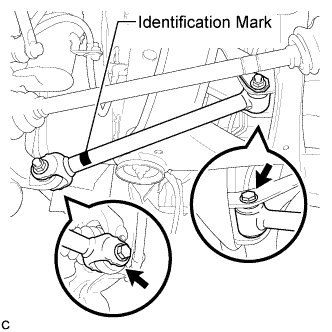
Temporarily install the rear No. 1 suspension arm assembly with the 2 bolts and the 2 nuts.
- NOTICE:
- Ensure that the identification mark faces the rear side of the vehicle.
- Since stopper nuts are used, temporarily tighten the bolts.
REAR LOWER ARM > INSTALLATION |
| 1. TEMPORARILY INSTALL REAR NO. 1 SUSPENSION ARM ASSEMBLY |
|
Temporarily install the rear No. 1 suspension arm assembly with the 2 bolts and the 2 nuts.
| 2. TEMPORARILY INSTALL REAR NO. 2 SUSPENSION ARM ASSEMBLY |
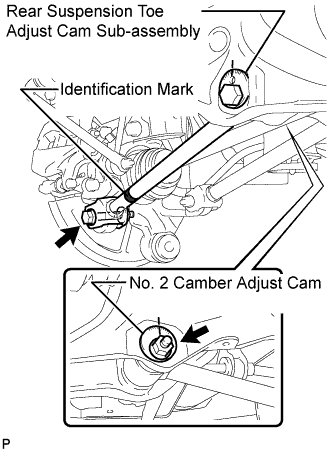 |
Temporarily install the rear No. 2 suspension arm assembly to the rear suspension member sub-assembly with the rear suspension toe adjust cam sub-assembly, the No. 2 camber adjust cam and the nut.
Temporarily install the rear No. 2 suspension arm assembly to the rear axle carrier sub-assembly with the bolt and the nut.
| 3. TEMPORARILY INSTALL REAR STRUT ROD ASSEMBLY |
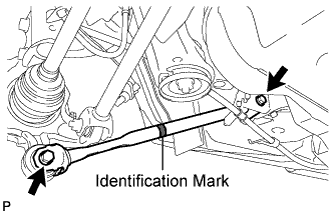 |
Check that the identification mark of the rear strut rod assembly is positioned on the inner side of the vehicle.
Temporarily install the rear strut rod assembly with the 2 bolts and the 2 nuts.
| 4. STABILIZE SUSPENSION |
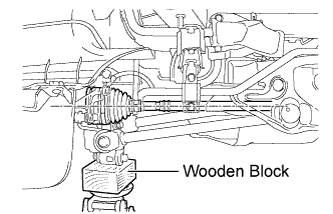 |
Jack up the rear axle carrier sub-assembly, placing a wooden block underneath to avoid damage. Apply load to the suspension so that the rear drive shaft assembly is positioned horizontally.
| 5. FULLY TIGHTEN REAR NO. 1 SUSPENSION ARM ASSEMBLY |
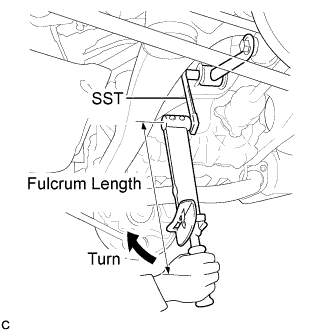 |
Using SST and a socket wrench (17 mm), fully tighten the bolt.
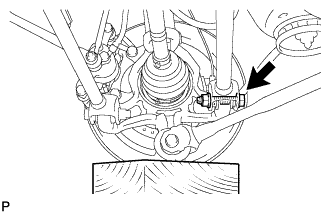 |
Fully tighten the bolt.
| 6. FULLY TIGHTEN REAR NO. 2 SUSPENSION ARM ASSEMBLY |
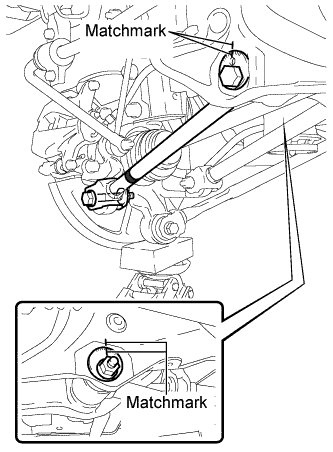 |
Align the matchmarks on the adjust cams and rear suspension member sub-assembly.
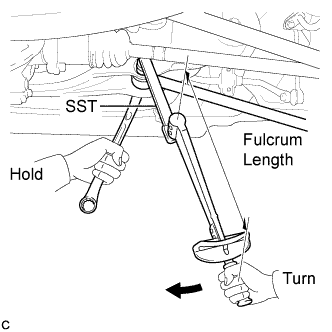 |
Using SST and a socket wrench (19 mm), fully tighten the nut.
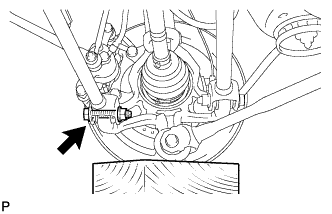 |
Fully tighten the bolt.
| 7. FULLY TIGHTEN REAR STRUT ROD ASSEMBLY |
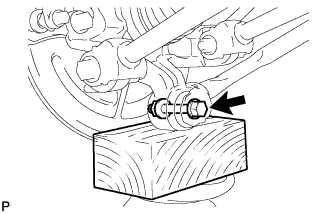 |
Fully tighten the bolt.
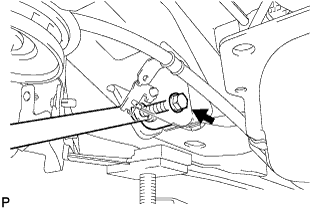 |
Fully tighten the bolt.
| 8. INSTALL NO. 3 PARKING BRAKE CABLE ASSEMBLY |
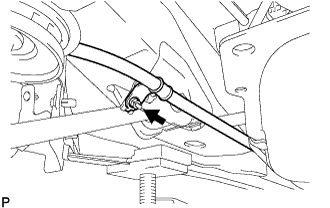 |
Install the No. 3 parking brake cable assembly with the nut.
| 9. INSTALL CENTER EXHAUST PIPE ASSEMBLY (for RH Side) |
Inspect the compression spring.
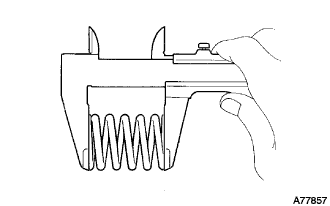 |
Using a vernier caliper, measure the free length of the compression spring.
| Minimum | 41.5 mm (1.634 in.) |
Fully insert a new gasket to the front No. 3 exhaust pipe sub-assembly.
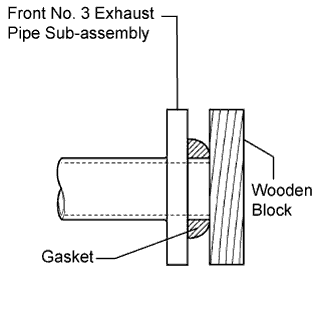 |
Using a plastic hammer and wooden block, tap in the new gasket until its surface is flush with the front No. 3 exhaust pipe sub-assembly.
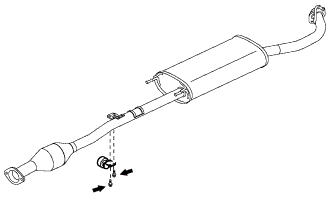 |
Install the damper with the 2 bolts.
Connect the center exhaust pipe assembly to the 3 exhaust pipe supports.
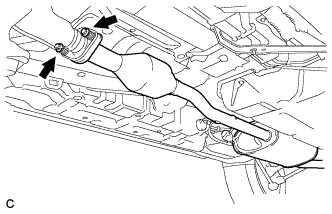 |
Tighten the 2 bolts and 2 compression springs.
| 10. INSTALL TAIL EXHAUST PIPE ASSEMBLY (for RH Side) |
Inspect the compression spring.
|
Using a vernier caliper, measure the free length of the compression spring.
| Minimum | 40.5 mm (1.594 in.) |
Fully insert a new gasket to the center exhaust pipe assembly.
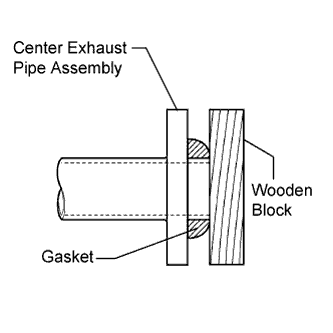 |
Using a plastic hammer and wooden block, tap in the new gasket until its surface is flush with the center exhaust pipe assembly
Connect the tail exhaust pipe assembly to the exhaust pipe support.
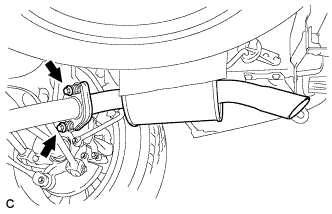 |
Tighten the 2 bolts and 2 compression springs.
| 11. INSPECT FOR EXHAUST GAS LEAK (for RH Side) |
| 12. INSTALL REAR WHEEL |
| 13. INSPECT AND ADJUST REAR WHEEL ALIGNMENT |