Home › HEATER & AIR CONDITIONING SYSTEM › AIR CONDITIONING › ELECTRIC INVERTER COMPRESSOR

ELECTRIC INVERTER COMPRESSOR > REMOVAL

for Preparation Click here


1. PRECAUTION
  1. Check for DTCs (Click here).

    NOTICE:
    Confirm the P0AA6 (Hybrid Battery Voltage System Isolation Fault) is not output before doing removal or installation work inside the battery. If the DTC is output, perform troubleshooting procedures first.


2. DTC OUTPUT DTC
  1. Check for DTCs.

    NOTICE:
    Check for DTCs and confirm that P0AA6 (High voltage insulation is unusual) is not output before doing removal or installation inside the battery. If the DTC is output, perform troubleshooting first.


3. REMOVE SERVICE PLUG GRIP

CAUTION:
  1. Remove the service plug to interrupt a high voltage circuit at the time of the check.
  2. Keep the removed service plug in your pocket to prevent other technicians from accidentally reconnecting it while you are servicing the vehicle.
  3. All the high voltage wiring connectors are colored in orange.


    A175634
  1. Remove the 5 clips and door scuff plate LH.



    A175635
  1. Remove the 2 clips and reclining hinge cover.


    A175636
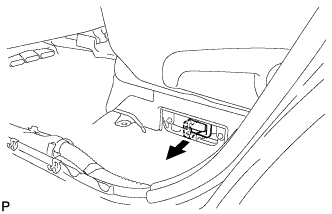
  1. Wear insulated glove and remove the service plug grip, after sliding up the lever of the service plug grip.

    CAUTION:
    1. Keep the removed service plug in your pocket to prevent other technicians from accidentally reconnecting it while you are servicing the vehicle.
    2. After removing the service plug grip, do not touch the high voltage connectors and terminals for 5 minutes.

    NOTICE:
    After removing the service plug grip, do not operate the power switch as it may damage the hybrid vehicle control ECU.


4. RECOVER REFRIGERANT FROM REFRIGERATION SYSTEM
  1. Turn the A/C switch on.

  1. Operate the A/C with the setting temperature at 25°C (77°F) and the blower level at LO for 10 minutes to circulate the refrigerant. This causes most of the compressor oil from the various components of the A/C system to collect in the A/C compressor.

  1. Turn the power switch off.

  1. Recover the refrigerant from the A/C system using a refrigerant recovery unit.


5. REMOVE BATTERY
  1. Disconnect the battery terminal.

    NOTICE:
    When disconnecting the cable, some systems need to be initialized after the cable is reconnected (Click here).

  1. Remove the bolt and battery clamp.

  1. Remove the battery and battery tray.


6. REMOVE BATTERY CARRIER SUB-ASSEMBLY


    A177162
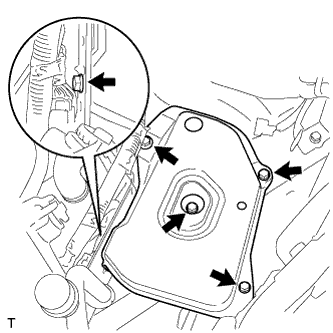
  1. Remove the 5 bolts and battery carrier.


7. DISCONNECT DISCHARGE HOSE SUB-ASSEMBLY


    E153510
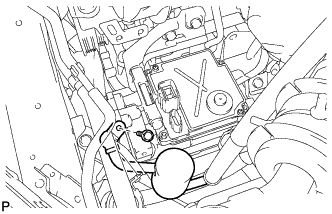
  1. Remove the bolt and disconnect the discharge hose sub-assembly from the electric inverter compressor.

  1. Remove the O-ring from the discharge hose sub-assembly.

    NOTICE:
    Seal the openings of the disconnected parts using vinyl tape to prevent moisture and foreign matter from entering.


8. DISCONNECT SUCTION HOSE SUB-ASSEMBLY


    E153511
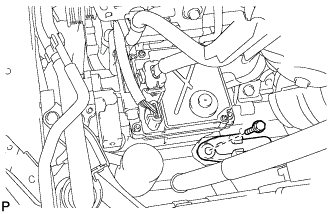
  1. Remove the bolt and disconnect the suction hose sub-assembly from the electric inverter compressor.

  1. Remove the O-ring from the suction hose sub-assembly.

    NOTICE:
    Seal the openings of the disconnected parts using vinyl tape to prevent moisture and foreign matter from entering.


9. REMOVE ELECTRIC INVERTER COMPRESSOR


    E153513E01
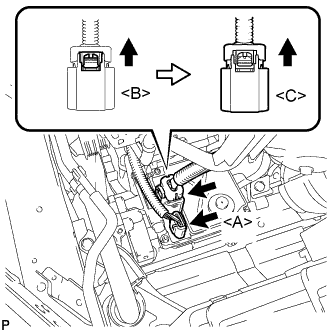
  1. Disconnect the connector <A>.

  1. Release the green-colored lock <B>.

    CAUTION:
    Wear insulated gloves when performing the procedures.

  1. Disconnect the connector <C>.

    NOTICE:
    Insulate the connector by sealing it with tape.


    E153514
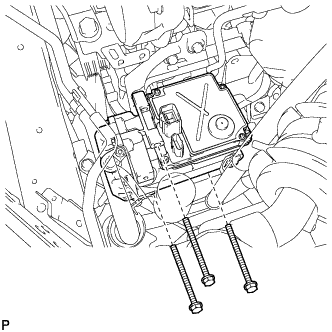
  1. Remove the 3 bolts and electric inverter compressor.


10. REMOVE SERVICE VALVE


    E153515
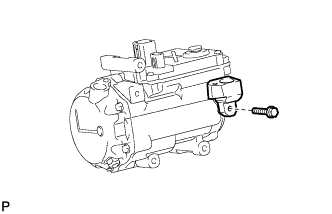
  1. Remove the bolt and service valve.

  1. Remove the O-ring from the service valve.