Home › ENGINE › 3MZ-FE LUBRICATION › OIL PUMP

OIL PUMP > REMOVAL

for Preparation Click here


1. REMOVE ENGINE ASSEMBLY WITH TRANSAXLE
(Click here)


2. REMOVE TIMING BELT


    A078326E01
  1. Set No. 1 cylinder to TDC/compression.

    1. Temporarily install the crankshaft pulley bolt and washer to the crankshaft.

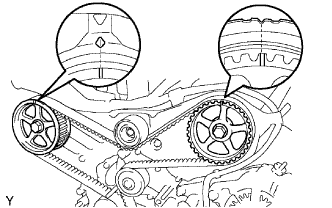
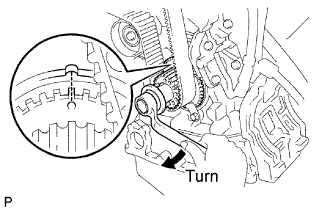
    2. Turn the crankshaft clockwise, and align the timing mark of the crankshaft timing pulley with the oil pump body.


    3. A005052E01
    4. Check that the timing marks of the camshaft timing pulleys and No. 3 timing belt cover are aligned.
      If not, turn the crankshaft 1 revolution (360°).

    5. Remove the crankshaft pulley bolt.


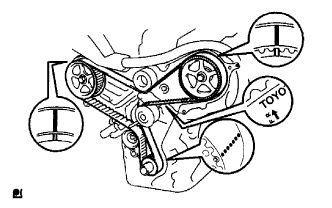
    A052840E01
  1. If reusing the timing belt, check that there are 4 installation marks on the timing belt as shown in the illustration.

    1. If the installation marks have disappeared, put new installation marks on the timing belt before removing.


    A078327E13
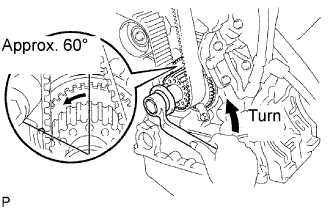
  1. Set No. 1 cylinder to approximately 60° BTDC/compression.

    1. Turn the crankshaft counterclockwise by approximately 60°.

      NOTICE:
      If the timing belt is disengaged, having the crankshaft pulley at a wrong angle can cause the piston head and valve head to come into contact with each other when you remove the camshaft timing pulley and camshaft, causing damage. So always set the crankshaft pulley at the correct angle.


    A078702E01
  1. Remove the 2 bolts and No. 1 chain tensioner.

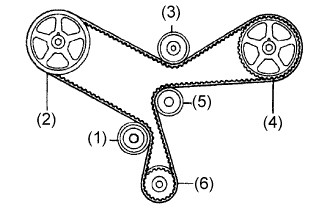
  1. Remove the timing belt in the following order.
    1st
    No. 1 idler pulley
    2nd
    RH camshaft timing pulley
    3rd
    No. 2 idler pulley
    4th
    LH camshaft timing pulley
    5th
    Water pump pulley
    6th
    Crankshaft timing pulley


3. REMOVE NO. 1 TIMING BELT IDLER SUB-ASSEMBLY
  1. Using a 10 mm socket hexagon wrench, remove the pivot bolt, timing belt idler No. 1 and distributor drive gear plate washer.


4. REMOVE CRANKSHAFT TIMING PULLEY


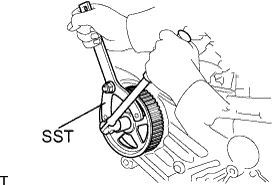
    A109771E01
  1. Using SST, remove the bolt and the RH timing pulley.

    SST
    09960-10010   (09962-01000, 09963-01000)


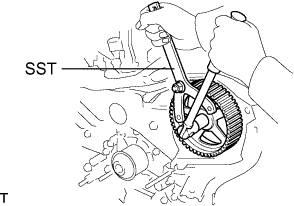
    A109772E01
  1. Using SST, remove the bolt and the LH timing pulley.

    SST
    09960-10010   (09962-01000, 09963-01000)

    HINT:
    Arrange the camshaft timing pulleys (RH and LH sides) so that they can be returned to the original locations when reassembling.


5. REMOVE OIL LEVEL GAUGE SUB-ASSEMBLY
  1. Remove the bolt and oil level dipstick guide.

  1. Remove the O-ring from the oil level dipstick guide.


6. REMOVE NO. 2 OIL PAN SUB-ASSEMBLY


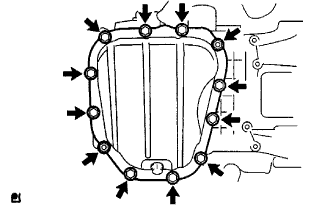
    A036750E01
  1. Remove the 10 bolts and 2 nuts.


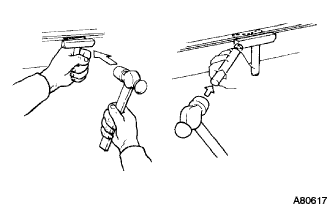
    A080617
  1. Insert the oil pan seal cutter blade between the oil pans. Cut through the applied sealer and remove the No. 2 oil pan sub-assembly.

    NOTICE:
    1. Be careful not to damage the contact surfaces of the oil pans.


7. REMOVE OIL STRAINER SUB-ASSEMBLY


    A108540
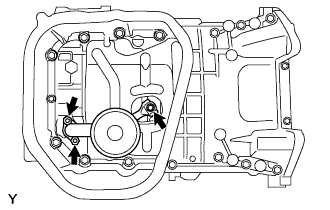
  1. Remove the bolt and 2 nuts, then remove the oil strainer and the gasket.


8. REMOVE OIL PAN SUB-ASSEMBLY


    A108539
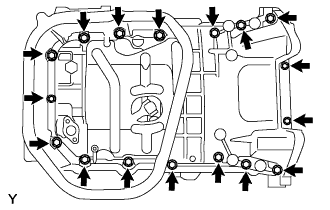
  1. Loosen and remove the 17 bolts uniformly.


    B004137E01
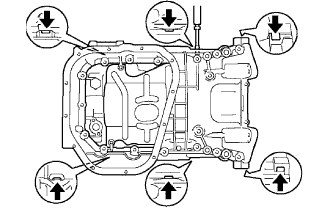
  1. Using a screwdriver, remove the oil pan by prying between the cylinder block and the oil pan.

    NOTICE:
    Do not damage the contact surfaces of the oil pan and cylinder block.


9. REMOVE CRANK POSITION SENSOR
  1. Remove the bolt and crankshaft position sensor.


10. REMOVE OIL PUMP ASSEMBLY


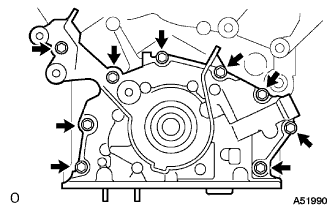
    A051990
  1. Remove the 9 bolts.

  1. Using a screwdriver, remove the oil pump by prying between the oil pump and the main bearing cap.


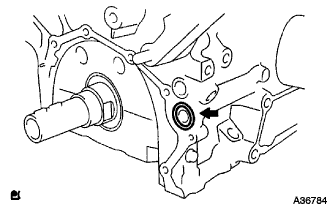
    A036784
  1. Remove the O-ring.


11. REMOVE OIL PUMP SEAL


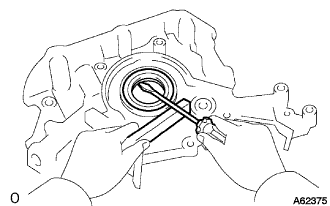
    A062375
  1. Using a screwdriver, pry out the oil seal.