 |
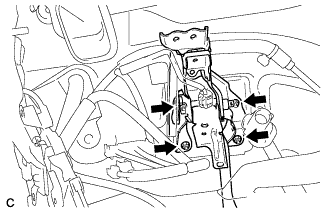
Install the brake pedal support sub-assembly with the 4 nuts.
- Torque:
- 13 N*m{ 132 kgf*cm , 10 ft.*lbf }
BRAKE PEDAL > INSTALLATION |
| 1. INSTALL BRAKE PEDAL SUPPORT SUB-ASSEMBLY |
|
Install the brake pedal support sub-assembly with the 4 nuts.
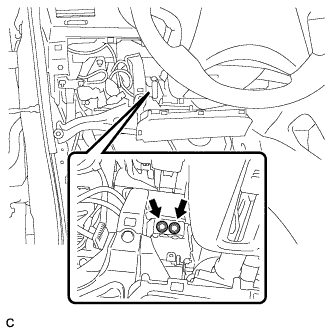 |
Install the brake pedal support sub-assembly to the instrument panel reinforcement with the 2 bolts.
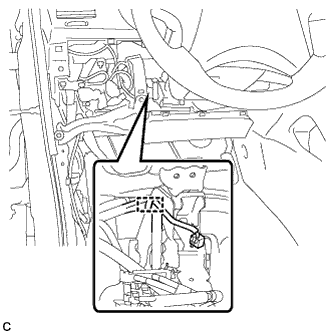 |
Connect the connector and engage the clamp.
| 2. INSTALL PUSH ROD PIN |
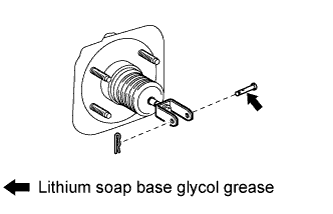 |
Apply lithium soap base glycol grease to the push rod pin.
Install the push rod pin to connect the brake master cylinder push rod clevis and brake pedal sub-assembly as shown in the illustration.
Install a new clip to the push rod pin.
| 3. INSTALL BRAKE PEDAL RETURN SPRING |
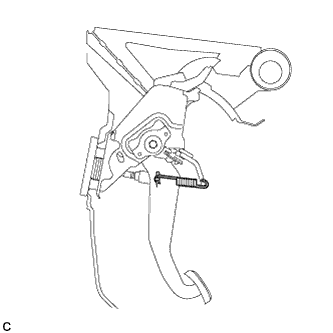 |
Install the brake pedal return spring between the instrument panel reinforcement and brake master cylinder push rod clevis.
| 4. INSTALL STOP LIGHT SWITCH ASSEMBLY |
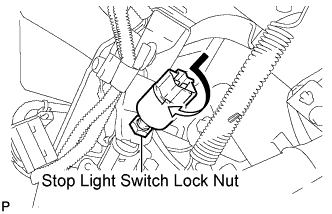 |
Temporarily install the stop light switch assembly with the stop light switch lock nut.
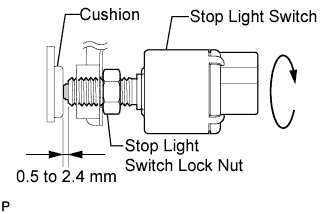 |
Turn the stop light switch assembly so that the clearance between the nut end and stop light switch cushion is between 0.5 to 2.4 mm (0.020 to 0.095 in.).
Tighten the stop light switch lock nut.
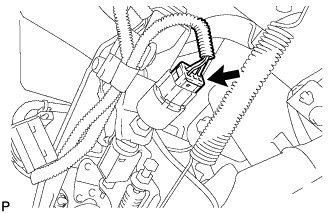 |
Connect the connector.
| 5. INSPECT AND ADJUST BRAKE PEDAL HEIGHT |
Check the brake pedal height.
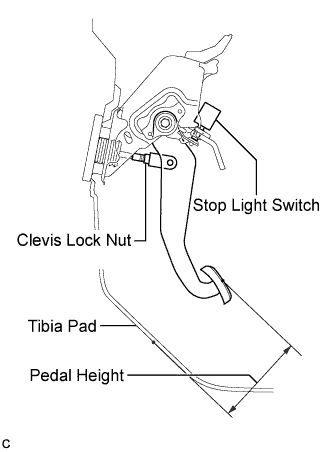 |
Turn back the carpet.
Measure the shortest distance between the brake pedal surface and tibia pad.
Adjust the brake pedal height.
Disconnect the stop light switch connector.
Remove the stop light switch assembly.
Loosen the push rod clevis lock nut.
Adjust the brake pedal height by turning the push rod.
Tighten the push rod clevis lock nut.
Install and adjust the stop light switch .
Connect the stop light switch connector.
| 6. INSTALL BRAKE PEDAL STROKE SENSOR ASSEMBLY |
When installing a new brake pedal stroke sensor assembly:
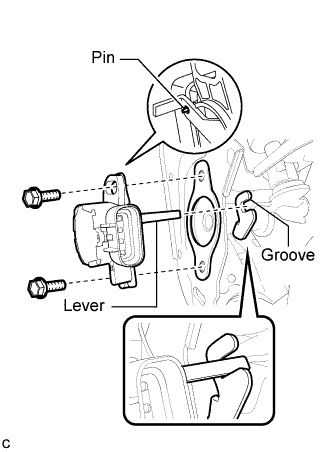 |
Connect the sensor connector.
Install a new sensor with the 2 bolts.
Firmly depress the brake pedal and break the sensor lever set pin.
Remove the broken lever set pin.
When reusing the brake pedal stroke sensor assembly:
Connect the sensor connector.
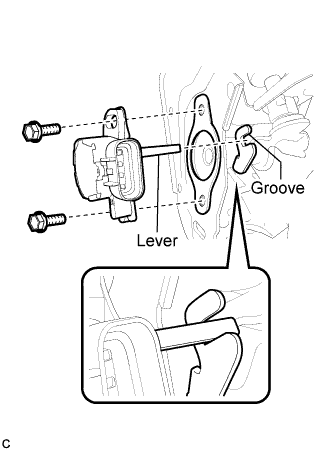 |
Temporarily install the sensor with the 2 bolts.
Connect the cable to the negative battery terminal.
Connect the Techstream to the DLC3.
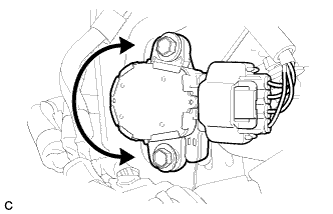 |
Turn the power switch on (IG). Reading the value of the stroke sensor shown in Data List, turn the sensor slowly to the right and left to adjust the output voltage to the standard voltage.
| Tester Display | Measurement Item/Range | Normal Condition | Diagnostic Note |
| Stroke Sensor | Stroke sensor / min.: 0 V, max.: 5 V | When brake pedal is released: 0.7 to 1.3 V | - |
Tighten the 2 bolts.
Disconnect the cable from the negative battery terminal.
Disconnect the Techstream.
| 7. INSPECT BRAKE PEDAL FREE PLAY |
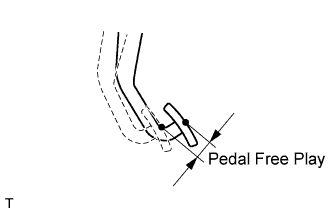 |
Depress the pedal until a slight resistance is felt. Measure the distance as shown in the illustration.
| 8. INSPECT BRAKE PEDAL RESERVE DISTANCE |
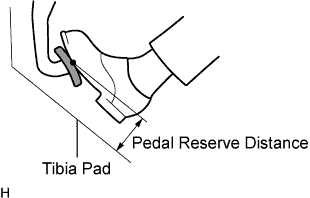 |
Release the parking brake lever.
With the engine running, depress the brake pedal and measure the pedal reserve distance as shown in the illustration.
| 9. PERFORM LINEAR VALVE OFFSET LEARNING |
| 10. INSTALL LOWER INSTRUMENT PANEL FINISH PANEL SUB-ASSEMBLY |
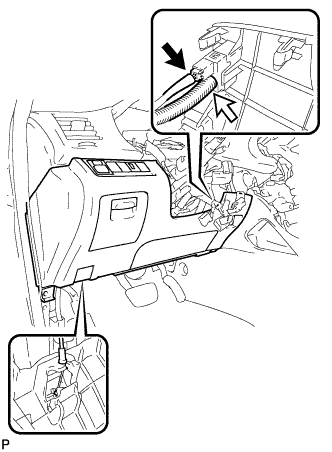 |
Connect the hood lock control cable assembly.
Connect each connector and the aspirator duct.
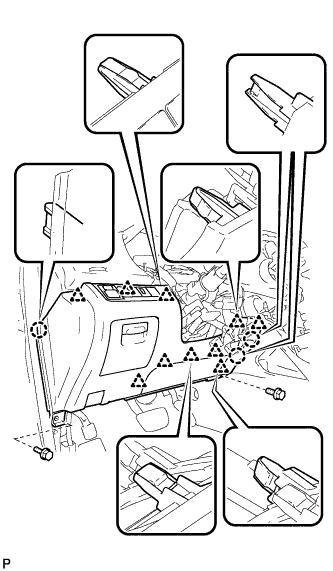 |
Engage the 3 claws and 10 clips.
Install the lower instrument panel finish panel sub-assembly with the 2 bolts <B>.
| 11. INSTALL COWL SIDE TRIM SUB-ASSEMBLY LH |
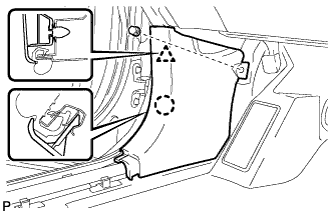 |
Engage the claw and clip, install the cowl side trim sub-assembly LH.
Install the clip.
| 12. INSTALL FRONT DOOR SCUFF PLATE LH |
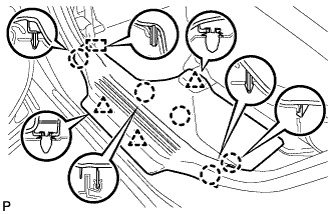 |
Engage the guide, 3 clips and 5 claws, and install the rear door scuff plate LH.