 |
Remove the 5 clips and door scuff plate LH.
YAW RATE AND ACCELERATION SENSOR > REMOVAL |
| 1. DISCONNECT CABLE FROM NEGATIVE BATTERY TERMINAL |
| 2. REMOVE SERVICE PLUG GRIP |
|
Remove the 5 clips and door scuff plate LH.
 |
Remove the 2 clips and reclining hinge cover.
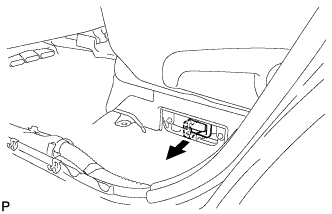 |
Wear insulated glove and remove the service plug grip, after sliding up the lever of the service plug grip.
| 3. REMOVE CENTER INSTRUMENT CLUSTER FINISH PANEL ASSEMBLY |
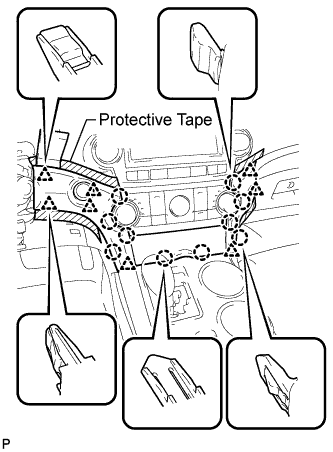 |
Apply protective tape to the areas shown in the illustration.
Using a moulding remover, disengage the 10 claws and 8 clips starting from the upper part of the center instrument cluster finish panel assembly.
Disconnect each connector and remove the center instrument cluster finish panel assembly.
| 4. REMOVE FRONT DOOR SCUFF PLATE LH |
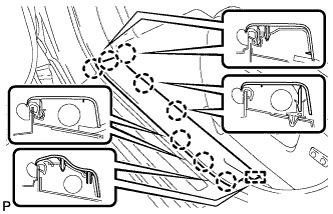 |
Disengage the 8 claws and guide, and remove the front door scuff plate LH.
| 5. REMOVE COWL SIDE TRIM SUB-ASSEMBLY LH |
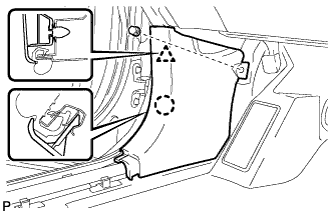 |
Remove the clip.
Disengage the clip and claw, and remove the cowl side trim sub-assembly LH.
| 6. REMOVE LOWER INSTRUMENT PANEL FINISH PANEL SUB-ASSEMBLY |
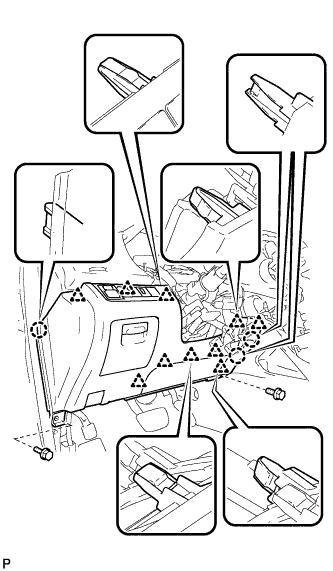 |
Remove the 2 bolts <B>.
Disengage the 3 claws and 10 clips.
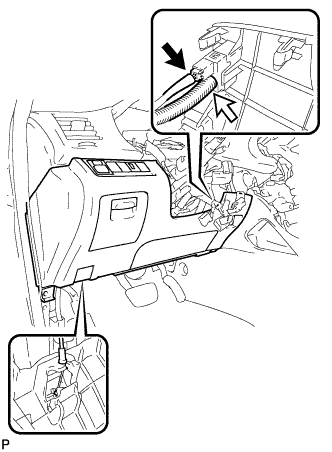 |
Disconnect each connector and the aspirator duct.
Disconnect the hood lock control cable assembly and remove the lower instrument panel finish panel sub-assembly.
| 7. REMOVE FRONT DOOR SCUFF PLATE RH |
| 8. REMOVE COWL SIDE TRIM SUB-ASSEMBLY RH |
| 9. REMOVE NO. 2 INSTRUMENT PANEL UNDER COVER SUB-ASSEMBLY |
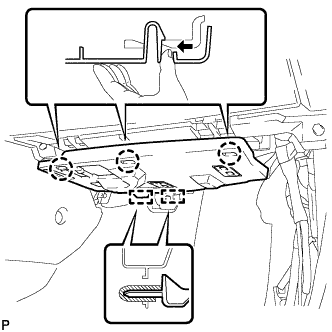 |
Disengage the 3 claws.
Disengage the 2 guides and remove the No. 2 instrument panel under cover sub-assembly.
| 10. REMOVE LOWER INSTRUMENT PANEL SUB-ASSEMBLY |
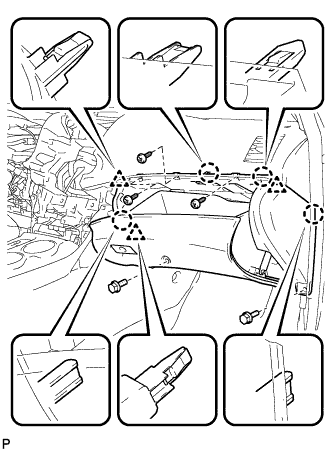 |
Remove the 2 bolts <B> and 3 screws <E>.
Disengage the 4 claws and 3 clips.
Disconnect each connector and clamp, and remove the lower instrument panel sub-assembly.
| 11. REMOVE UPPER CONSOLE PANEL SUB-ASSEMBLY |
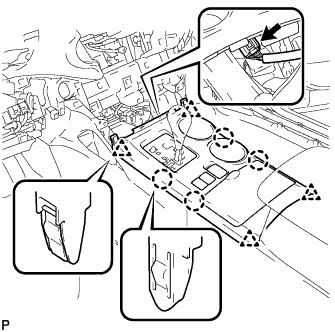 |
Disengage the 4 claws and 4 clips.
Disconnect the connector and remove the upper console panel sub-assembly.
| 12. REMOVE NO. 2 CONSOLE BOX DUCT (w/o Rear Air Conditioning System) |
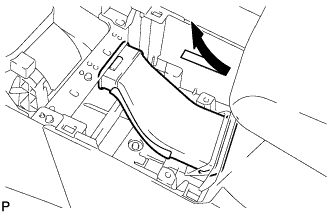 |
Remove the No. 2 console box duct as shown in the illustration.
| 13. REMOVE LOWER REAR CONSOLE BOX |
Remove the lower rear console box.
| 14. REMOVE CONSOLE BOX ASSEMBLY (w/o Rear Air Conditioning System) |
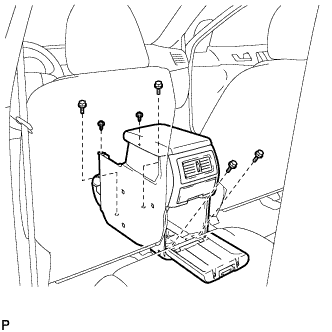 |
Remove the 4 bolts and 2 screws.
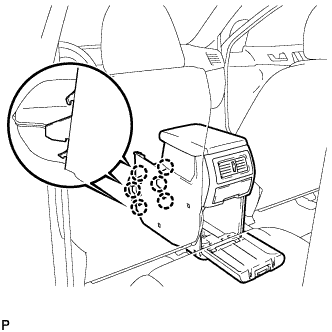 |
Disengage the 6 claws and remove the console box assembly.
| 15. REMOVE CONSOLE BOX ASSEMBLY (w/ Rear Air Conditioning System) |
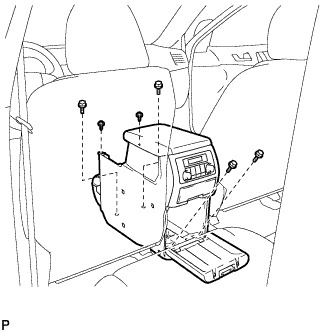 |
Remove the 4 bolts and 2 screws.
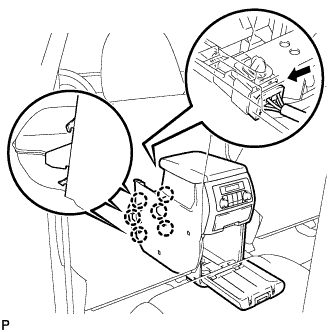 |
Disconnect the connector.
Disengage the 6 claws, and remove the console box assembly.
| 16. REMOVE FRONT NO. 1 CONSOLE BOX INSERT |
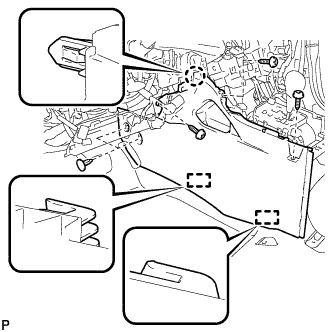 |
Using a clip remover, remove the 2 clips.
Remove the 3 screws <E>.
Disengage the claw and 2 guides, and then remove the front No. 1 console box insert.
| 17. REMOVE FRONT NO. 2 CONSOLE BOX INSERT |
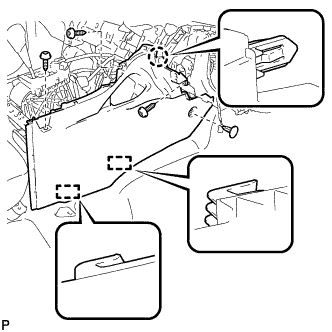 |
Using a clip remover, remove the clip.
Remove the 3 screws <E>.
Disengage the claw and 2 guides, and then remove the front No. 2 console box insert.
| 18. REMOVE YAW RATE AND ACCELERATION SENSOR |
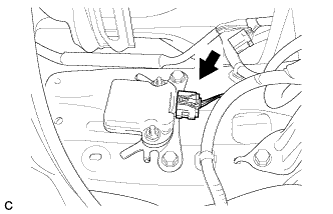 |
Disconnect the connector from the yaw rate and acceleration sensor.
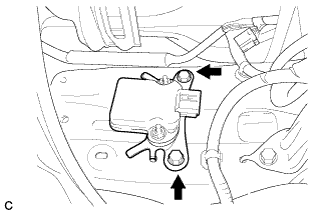 |
Remove the 2 bolts and yaw rate and acceleration sensor.