CRUISE CONTROL DRIVING SUPPORT ECU(for LHD) REMOVAL
PROCEDURE

 1. PRECAUTION
- NOTICE:
-
After turning the ignition switch off, waiting time may be required before disconnecting the cable from the negative (-) battery terminal. Therefore, make sure to read the disconnecting the cable from the negative (-) battery terminal notices before proceeding with work.
-
Click hereGeneral>INTRODUCTION>REPAIR INSTRUCTION>PRECAUTION
2.DISCONNECT CABLE FROM NEGATIVE BATTERY TERMINAL
- NOTICE:
-
When disconnecting the cable, some systems need to be initialized after the cable is reconnected.
-
Click hereGeneral>INTRODUCTION>REPAIR INSTRUCTION>INITIALIZATION
67913
3.REMOVE FRONT DOOR SCUFF PLATE RH
- HINT:
-
Use the same procedure as for the LH side.
-
Click hereVehicle Interior>INTERIOR PANELS / TRIM>ROOF HEADLINING>REMOVAL
62111A
4.REMOVE COWL SIDE TRIM SUB-ASSEMBLY RH
- HINT:
-
Use the same procedure as for the LH side.
-
Click hereVehicle Interior>INTERIOR PANELS / TRIM>ROOF HEADLINING>REMOVAL
5.DISCONNECT FRONT DOOR OPENING TRIM WEATHERSTRIP RH
55435A
6.REMOVE INSTRUMENT PANEL FINISH PANEL END RH
55607
7.REMOVE NO. 2 INSTRUMENT PANEL UNDER COVER SUB-ASSEMBLY
55303B
8.REMOVE LOWER INSTRUMENT PANEL SUB-ASSEMBLY
82877
9.REMOVE ECU INTEGRATION BOX RH
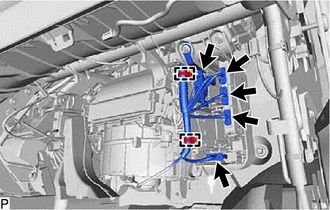
Disconnect each connector.
Disengage the 2 clamps.
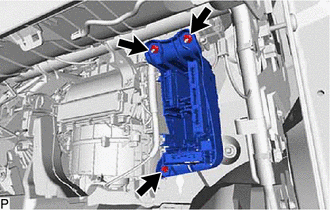
Remove the bolt, 2 nuts and ECU integration box RH.
88150A
10.REMOVE DRIVING SUPPORT ECU ASSEMBLY
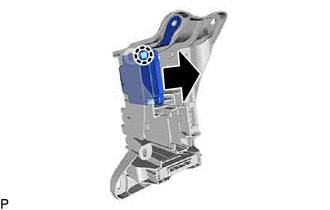
Disengage the claw to remove the driving support ECU assembly as shown in the illustration.