EXTERIOR PANELS / TRIM WINDSHIELD OUTSIDE MOULDING INSTALLATION
CAUTION / NOTICE / HINT
- HINT:
- ·
Use the same procedure for the RH side and LH side.
·The following procedure is for the LH side.
PROCEDURE

 75547C
1.INSTALL NO. 3 WINDSHIELD OUTSIDE MOULDING CLIP
- HINT:
-
Perform the following procedure only when replacement of a No. 3 windshield outside moulding clip is necessary.
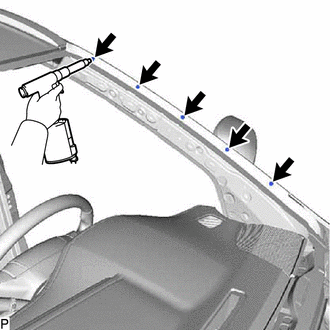
Using a riveter with a nose piece, install 5 new No. 3 windshield outside moulding clips.
- HINT:
-
If the mandrel of the No. 3 windshield outside moulding clip does not come off on the first operation of the rivet gun, slide the rivet gun forward on the mandrel and operate it again.
- NOTICE:
-
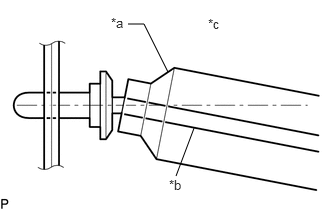 1.75,0.75 1.5,0.25 1.5,0.25 1.333,0.25 false 1.833,1.833 2.021,1.333 false 1.156,0.156 1.469,0.313 0.313,0.156 10 false *a 1.76,1.844 2.073,2 0.313,0.156 10 false *b 2.167,0.167 2.479,0.323 0.313,0.156 10 false *c
*a Riveter *b Mandrel *c Incorrect
- ·
Do not pry the No. 3 windshield outside moulding clip with the riveter, as this will cause damage to the riveter and mandrel.
- ·
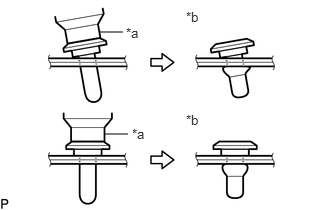 1.031,0.333 1.281,0.333 false 1.083,1.396 1.333,1.396 false 1.313,0.26 1.625,0.417 0.313,0.156 10 false *a 1.938,0.094 2.25,0.25 0.313,0.156 10 false *b 1.375,1.313 1.688,1.469 0.313,0.156 10 false *a 1.938,1.167 2.25,1.323 0.313,0.156 10 false *b
*a Riveter *b Incorrect
Confirm that the No. 3 windshield outside moulding clips are seated properly against the vehicle body.
- ·
Do not tilt the riveter when installing the No. 3 windshield outside moulding clip to the vehicle body.
Install the windshield glass sub-assembly.
Click hereVehicle Exterior>WINDOW / GLASS>WINDSHIELD GLASS>INSTALLATION
75545B
2.INSTALL NO. 1 WINDSHIELD OUTSIDE MOULDING CLIP
- HINT:
-
Perform the following procedure only when replacement of a No. 1 windshield outside moulding clip is necessary.
Engage the 5 claws to install 5 new No. 1 windshield outside moulding clips to the No. 3 windshield outside moulding clip as shown in the illustration.
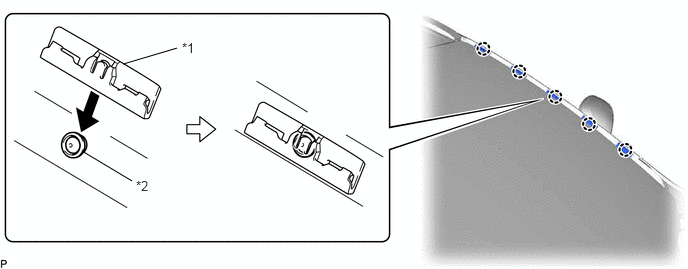
| *1 | No. 1 Windshield Outside Moulding Clip | *2 | No. 3 Windshield Outside Moulding Clip |
75534
3.INSTALL WINDSHIELD OUTSIDE MOULDING
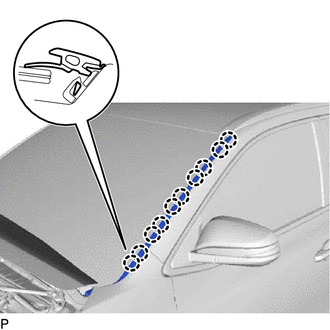
Engage the 10 claws.
Engage the guide and 2 claws to install the windshield outside moulding.
53867H
4.INSTALL FRONT FENDER TO COWL SIDE SEAL