SEAT FRONT POWER SEAT MOTOR ASSEMBLY REMOVAL
CAUTION / NOTICE / HINT
The necessary procedures (adjustment, calibration, initialization or registration) that must be performed after parts are removed and installed, or replaced during front power seat motor assembly removal/installation are shown below.
| Replaced Part or Performed Procedure | Necessary Procedure | Effect/Inoperative Function when Necessary Procedure not Performed | Link |
|---|---|---|---|
|
*: Even when not replacing the part, it is necessary to perform the specified necessary procedures after installation. *1: Learning can also be performed using the GTS. Click here( |
|||
| Disconnect cable from negative auxiliary battery terminal | Perform steering sensor zero point calibration | Lane Control System | ( ) |
| Parking Support Brake System*1 | |||
| Pre-collision System | |||
| Memorize steering angle neutral point | Parking Assist Monitor System | ()
|
|
| Panoramic View Monitor System | ()
|
||
| Initialize back door lock | Power Door Lock Control System | ()
|
|
| Reset back door close position | Power Back Door System | ()
|
|
·
Reclining motor (separate type front seatback spring assembly (driver seat))* ·
Slide motor (separate type front seat cushion spring assembly (driver seat))* ·
Front vertical motor (power seat tilt motor assembly (driver seat))* ·
Lifter motor (power seat lifter motor assembly (driver seat))* |
Initialize position control ECU | Front Power Seat Control System (w/ Memory) | ()
|
| Replaced Part or Performed Procedure | Necessary Procedure | Effect/Inoperative Function when Necessary Procedure not Performed | Link |
|---|---|---|---|
|
*: Even when not replacing the part, it is necessary to perform the specified necessary procedures after installation. *1: Learning can also be performed using the GTS. Click here( |
|||
| Disconnect cable from negative auxiliary battery terminal | Perform steering sensor zero point calibration | Lane Control System | ()
|
| Parking Support Brake System*1 | |||
| Pre-collision System | |||
| Memorize steering angle neutral point | Parking Assist Monitor System | ()
|
|
| Panoramic View Monitor System | ()
|
||
| Initialize back door lock | Power Door Lock Control System | ()
|
|
| Reset back door close position | Power Back Door System | ()
|
|
·
Reclining motor (separate type front seatback spring assembly (driver seat))* ·
Slide motor (separate type front seat cushion spring assembly (driver seat))* ·
Front vertical motor (power seat tilt motor assembly (driver seat))* ·
Lifter motor (power seat lifter motor assembly (driver seat))* |
Initialize position control ECU | Front Power Seat Control System (w/ Memory) | ()
|
- CAUTION:
-
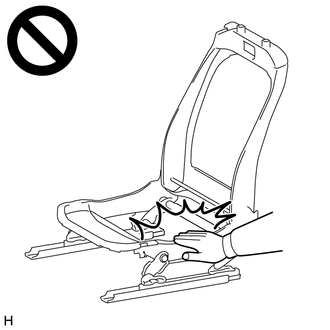
-
Wear protective gloves. Sharp areas on the parts may injure your hands.
- NOTICE:
-
After the ignition switch is turned off, the radio and display receiver assembly or the radio receiver assembly records various types of memory and settings. As a result, after turning the ignition switch off, make sure to wait at least 120 seconds before disconnecting the cable from the negative (-) auxiliary battery terminal.
PROCEDURE

 1. PRECAUTION
- NOTICE:
-
After turning the ignition switch off, waiting time may be required before disconnecting the cable from the negative (-) auxiliary battery terminal. Therefore, make sure to read the disconnecting the cable from the negative (-) auxiliary battery terminal notices before proceeding with work.
2.REMOVE FRONT SEAT ASSEMBLY
71074S
3.DISCONNECT SEPARATE TYPE FRONT SEATBACK COVER
71868N
4.REMOVE FRONT SEAT FRONT CUSHION SHIELD
71812D
5.REMOVE FRONT SEAT CUSHION SHIELD
71862
6.REMOVE FRONT SEAT INNER CUSHION SHIELD
7.REMOVE SEPARATE TYPE FRONT SEATBACK ASSEMBLY
8.REMOVE SEPARATE TYPE FRONT SEAT CUSHION COVER WITH PAD
71876
9.REMOVE RECLINING ADJUSTER INSIDE COVER LH (for LH Side)
82192
10.REMOVE FRONT SEAT WIRE
11.REMOVE POWER SEAT LIFTER MOTOR ASSEMBLY
Remove the power seat lifter motor assembly.
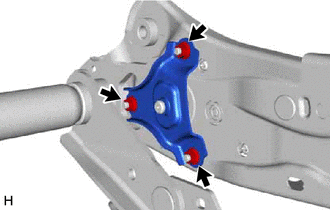
Remove the 3 nuts and front seat adjuster plate.
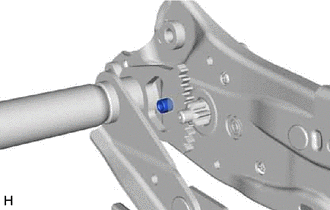
Remove the vertical adjuster spacer.
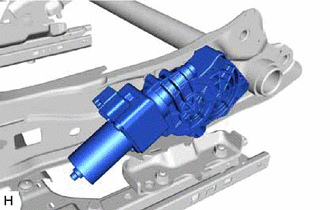
Remove the front seat vertical housing sub-assembly.
12.REMOVE POWER SEAT TILT MOTOR ASSEMBLY
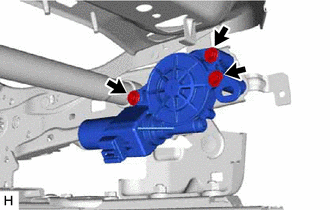
Remove the 3 bolts and power seat tilt motor assembly.