TELEMATICS COMMUNICATION TELEMATICS BOX INSTALLATION
PROCEDURE

 867E1
1.INSTALL COMMUNICATION TELEMATICS BOX
- NOTICE:
- ·
Prevention of static electricity is required during this procedure.
·Use static electricity countermeasures SST (desktop anti-static mat set) and observe all precautions to prevent damage to the system by electrostatic discharge (ESD).
Click hereAudio / Visual / Telematics>TELEMATICS>COMMUNICATION TELEMATICS BOX>PRECAUTION
Engage the 2 guides.
Using a T20 "TORX" socket wrench, install the communication telematics box with the 4 screws.
Connect the connector.
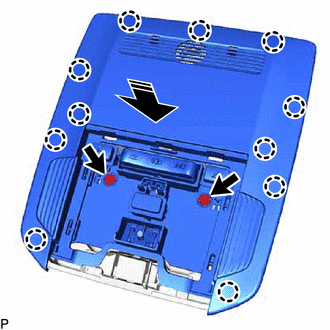

|
Install in this Direction |
Engage the 11 claws as shown in the illustration.
Using a T20 "TORX" socket wrench, install the map light bezel assembly with circuit plate assembly with the 2 screws.
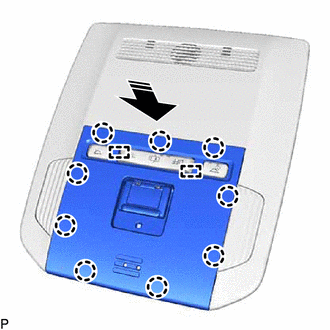
|
|
Install in this Direction |
Engage the 2 guides and 9 claws to install the trim plate as shown in the illustration.
Connect the connector.
81260A
2.INSTALL MAP LIGHT ASSEMBLY