A25A-FXS, A25B-FXS ENGINE CONTROL CAMSHAFT OIL CONTROL SOLENOID REMOVAL
CAUTION / NOTICE / HINT
- NOTICE:
-
This procedure includes the removal of small-head bolts. Refer to Small-Head Bolts of Basic Repair Hint to identify the small-head bolts.
-
Click hereGeneral>INTRODUCTION>REPAIR INSTRUCTION>PRECAUTION
PROCEDURE

 12601B
1.REMOVE NO. 1 ENGINE COVER SUB-ASSEMBLY
82286A
2.SEPARATE NO. 2 EARTH WIRE
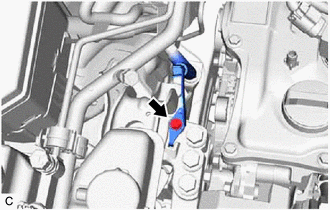
Remove the bolt and separate the No. 2 earth wire from the engine mounting insulator sub-assembly RH.
15370
3.REMOVE CAM TIMING OIL CONTROL SOLENOID ASSEMBLY
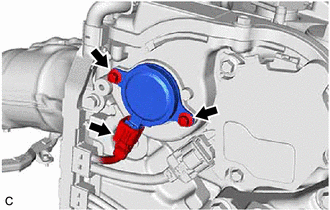
Disconnect the cam timing oil control solenoid assembly connector.
Using an 8 mm socket wrench, remove the 2 bolts and cam timing oil control solenoid assembly from the No. 2 timing gear cover assembly.
- NOTICE:
-
If the cam timing oil control solenoid assembly has been struck or dropped, replace it.
4.REMOVE O-RING
- HINT:
-
Perform this procedure only when replacement of the O-ring is necessary.
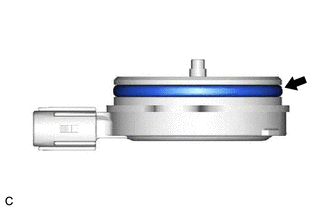
Remove the O-ring from the cam timing oil control solenoid assembly.
- NOTICE:
- ·
When removing the O-ring, be careful not to damage the O-ring groove of the cam timing oil control solenoid assembly.
·If the O-ring groove of the cam timing oil control solenoid assembly is damaged, replace the cam timing oil control solenoid assembly with a new one.