A25A-FXS, A25B-FXS INTAKE / EXHAUST EXHAUST MANIFOLD REMOVAL
CAUTION / NOTICE / HINT
The necessary procedures (adjustment, calibration, initialization or registration) that must be performed after parts are removed and installed, or replaced during exhaust manifold removal/installation are shown below.
| Replaced Part or Performed Procedure | Necessary Procedure | Effect/Inoperative Function when Necessary Procedure not Performed | Link |
|---|---|---|---|
·
Replacement of air fuel ratio sensor (sensor 1) ·
Gas leak from exhaust system is repaired |
Perform Inspection After Repair | ·
Poor idle, etc. ·
Engine start function, etc. |
( ) |
- CAUTION:
- ·
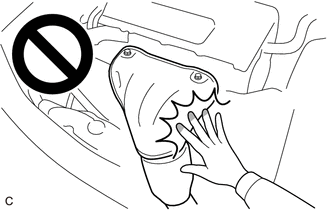
To prevent burns, do not touch the engine, exhaust manifold or other high temperature components while the engine is hot.
·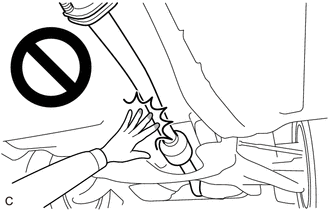
To prevent burns, do not touch the engine, exhaust pipe or other high temperature components while the engine is hot.
PROCEDURE

 51420
1.REMOVE NO. 2 ENGINE UNDER COVER ASSEMBLY
2.REMOVE WINDSHIELD WIPER MOTOR AND LINK ASSEMBLY
53808A
3.REMOVE FENDER SPLASH SHIELD SUB-ASSEMBLY REAR LH
53807A
4.REMOVE FENDER SPLASH SHIELD SUB-ASSEMBLY REAR RH
- HINT:
-
Perform the same procedure as for the LH side.
53892C
5.REMOVE FRONT FENDER SPLASH SHIELD SEAL FRONT LH
53891C
6.REMOVE FRONT FENDER SPLASH SHEILD SEAL FRONT RH
- HINT:
-
Perform the same procedure as for the LH side.
7.REMOVE FRONT UPPER SUSPENSION TO COWL BRACE SUB-ASSEMBLY LH
53607B
8.REMOVE FRONT UPPER SUSPENSION TO COWL BRACE SUB-ASSEMBLY RH
- HINT:
-
Perform the same procedure as for the LH side.
55704B
9.REMOVE COWL VENTILATOR PANEL SUB-ASSEMBLY
for LHD: Click hereSuspension>FRONT SUSPENSION>FRONT SHOCK ABSORBER>REMOVAL
for RHD: Click hereSuspension>FRONT SUSPENSION>FRONT SHOCK ABSORBER>REMOVAL
17410
10.REMOVE FRONT EXHAUST PIPE ASSEMBLY
- CAUTION:
-
To prevent burns, do not touch the engine, exhaust pipe or other high temperature components while the engine is hot.
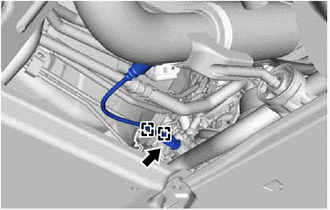
Disengage the 2 wire harness clamps.
Disconnect the air fuel ratio sensor (for sensor 2) connector.
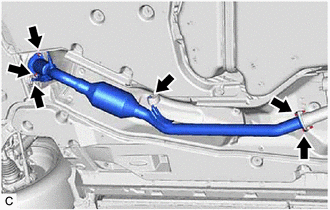
Remove the 2 bolts and 2 nuts and disconnect the front exhaust pipe assembly from the exhaust manifold and tail exhaust pipe assembly.
Remove the front exhaust pipe assembly from the 2 exhaust pipe supports.
Remove the 2 gaskets from the front exhaust pipe assembly.
89467B
11.REMOVE AIR FUEL RATIO SENSOR (for Sensor 1)
12.REMOVE WIRE HARNESS CLAMP BRACKET
- CAUTION:
-
To prevent burns, do not touch the engine, exhaust manifold or other high temperature components while the engine is hot.
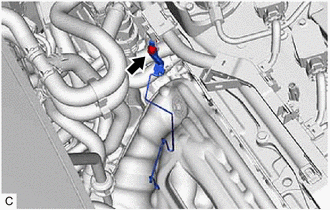
Remove the bolt and wire harness clamp bracket.
25706
13.SEPARATE NO. 1 VACUUM TRANSMITTING PIPE SUB-ASSEMBLY (w/ Differential Pressure Sensor)
- CAUTION:
-
To prevent burns, do not touch the engine, exhaust manifold or other high temperature components while the engine is hot.
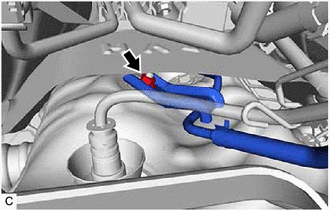
Remove the nut.
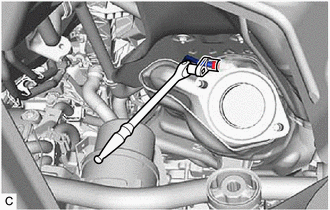
Using a 14 mm union nut wrench, separate the No. 1 vacuum transmitting pipe sub-assembly from the exhaust manifold.
17167
14.SEPARATE NO. 1 EXHAUST MANIFOLD HEAT INSULATOR
- CAUTION:
-
To prevent burns, do not touch the engine, exhaust manifold or other high temperature components while the engine is hot.
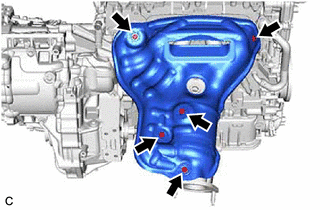
w/o Differential Pressure Sensor:
Remove the 5 bolts and separate the No. 1 exhaust manifold heat insulator from the exhaust manifold.
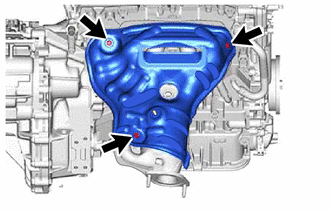
w/ Differential Pressure Sensor:
Remove the 3 bolts and separate the No. 1 exhaust manifold heat insulator from the exhaust manifold.
17118
15.REMOVE MANIFOLD STAY
- CAUTION:
-
To prevent burns, do not touch the engine, exhaust manifold or other high temperature components while the engine is hot.
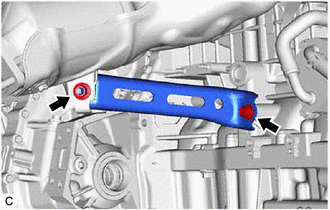
Remove the bolt, nut and manifold stay from the exhaust manifold and cylinder block sub-assembly.
17141
16.REMOVE EXHAUST MANIFOLD
- CAUTION:
-
To prevent burns, do not touch the engine, exhaust manifold or other high temperature components while the engine is hot.
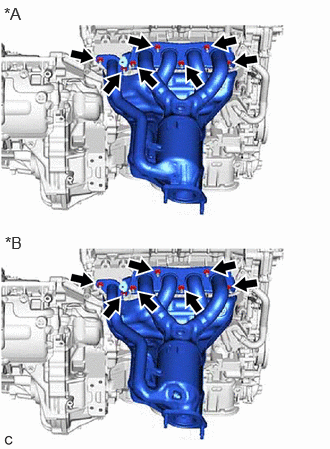
| *A | w/o Differential Pressure Sensor |
| *B | w/ Differential Pressure Sensor |
Remove the 7 nuts and separate the exhaust manifold from the cylinder head sub-assembly.
Remove the No. 1 exhaust manifold heat insulator and exhaust manifold.
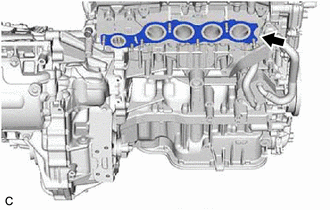
Remove the exhaust manifold to head gasket from the cylinder head sub-assembly.
17168
17.REMOVE NO. 2 EXHAUST MANIFOLD HEAT INSULATOR
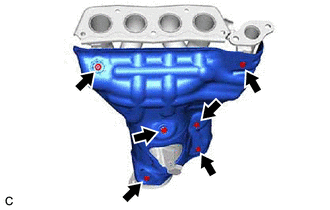
w/o Differential Pressure Sensor:
Remove the 6 bolts and No. 2 exhaust manifold heat insulator from the exhaust manifold.
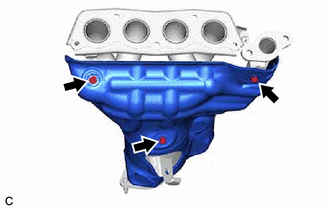
w/ Differential Pressure Sensor:
Remove the 3 bolts and No. 2 exhaust manifold heat insulator from the exhaust manifold.