Intercooler Assembly
Intercooler
COMPONENTS
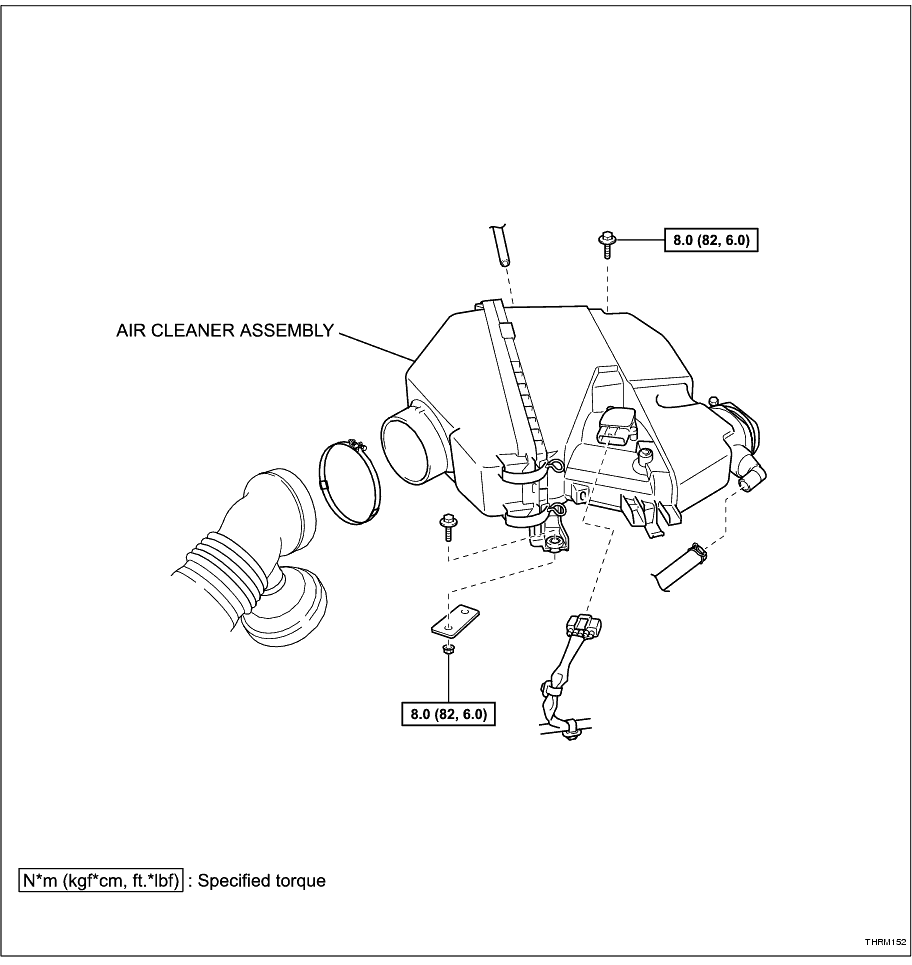
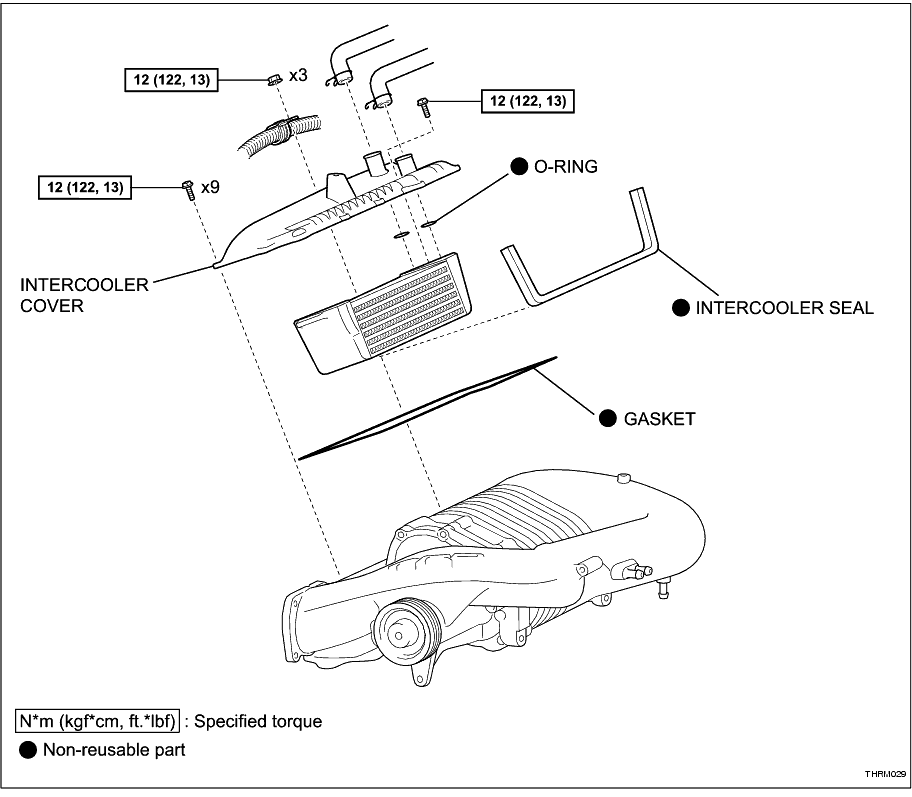
REMOVAL
1. DISCONNECT CABLE FROM NEGATIVE BATTERY TERMINAL
CAUTION:
Wait at least 90 seconds after disconnecting the cable from the negative (-) battery terminal to prevent airbag and seatbelt pretensioner activation.
HINT:
Obtain the audio system PIN from the vehicle owner, if applicable. Otherwise the audio system will be inoperable when the battery cable is reconnected.
2. DISCONNECT NO. 2 VENTILATION HOSE (
Click Here
)
3. REMOVE AIR CLEANER ASSEMBLY (
Click Here
)
4. DRAIN COOLANT (
Click Here
)
5. DISCONNECT INTERCOOLER COOLANT HOSES
HINT:
To avoid draining the intercooler cooling system, disconnect the intercooler coolant hoses only if the intercooler requires removal. As an alternative, remove the cover as described in the following steps with the hoses attached and move it to one side.
(a) Remove the screw attaching the hose clamp to the supercharger.
-
(b) Loosen the 2 clamps and remove the 2 intercooler coolant hoses.
-
6. REMOVE SUPERCHARGER INTERCOOLER COVER ASSEMBLY
(a) Remove the 9 screws and 3 nuts and the supercharger intercooler cover assembly.
NOTICE:
Do not remove the screw between the coolant hose inlet and outlet; this attaches the intercooler assembly to the cover.
-
(b) Remove the intercooler cover gasket and discard.
-
7. REMOVE INTERCOOLER ASSEMBLY
(a) Remove the bolt and intercooler assembly with the 2 O-rings.
-
(b) Discard the O-rings.
-
(c) Remove the intercooler seal and discard.
-
INSPECTION
1. INSPECT INTERCOOLER ASSEMBLY
(a) Inspect the intercooler assembly for dirt, signs of coolant leakage and corrosion.
-
(b) Inspect the intercooler cover coolant outlets for corrosion.
-
(c) Clean the intercooler assembly with compressed air.
-
INSTALLATION
1. INSTALL INTERCOOLER ASSEMBLY
(a) Install a new intercooler seal with oxygen sensor safe silicone sealer.
-
(b) Fit 2 new O-rings into the recesses in the intercooler.
-
(c) Install the intercooler assembly with the bolt.
Torque:
12 N*m
(122 kgf*cm,
13 ft.*lbf)
-
2. INSTALL SUPERCHARGER INTERCOOLER COVER ASSEMBLY
(a) Install a new gasket to the supercharger housing.
HINT:
Ensure the gasket is correctly seated within the groove in the housing.
-
(b) Install the supercharger intercooler cover assembly with the 9 screws and 3 nuts.
HINT:
Attach the wiring clamps to the studs.
Torque:
12 N*m
(122 kgf*cm,
13 ft.*lbf)
-
3. CONNECT INTERCOOLER COOLANT HOSES
(a) If removed, fit the 2 intercooler coolant hoses with the clamps.
-
(b) Attach the hose clamp to the supercharger with the screw.
Torque:
8.0 N*m
(82 kgf*cm,
6.0 ft.*lbf)
-
4. INSTALL AIR CLEANER ASSEMBLY (
Click Here
)
5. CONNECT NO. 2 VENTILATION HOSE (
Click Here
)
6. ADD COOLANT (
Click Here
)
7. CHECK FOR COOLANT LEAKS
(a) Check for engine coolant leaks (
Click Here
)
-
8. CONNECT CABLE TO NEGATIVE BATTERY TERMINAL
9. PERFORM INITIALISATION
(a) Enter the audio system PIN, if applicable. Refer to Section 1-8 "Audio System" in the TRD Hilux Driver's Manual for programming information.
-
(b) Calibrate the multi-information display compass. Refer to Section 1-10 "Other Equipment" in the TRD Hilux Driver's Manual for calibrating information.
-