 |
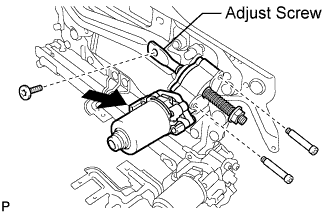
Using a 4 mm socket hexagon wrench, install the motor with the 2 bolts.
- Torque:
- 2.5 N*m{ 25 kgf*cm , 22 in.*lbf }
FRONT POWER SEAT MOTOR ASSEMBLY (for Rear Lifter) > INSTALLATION |
| 1. INSTALL FRONT POWER SEAT MOTOR ASSEMBLY (for Rear Lifter) |
|
Using a 4 mm socket hexagon wrench, install the motor with the 2 bolts.
Clean the threads of the "TORX" bolt for the adjust screw with non-residue solvent (when reusing the "TORX" bolt).
Apply adhesive to the threads of the "TORX" bolt for the adjust screw (when reusing the "TORX" bolt).
Using a T40 "TORX" socket wrench, install the "TORX" bolt.
Connect the connector.
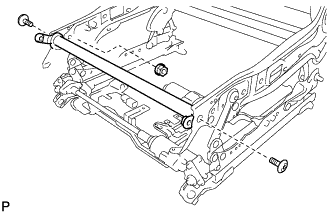 |
Using a T40 "TORX" socket wrench, install the tilt rod with the 2 "TORX" bolts for the tilt rod.
Install the nut.
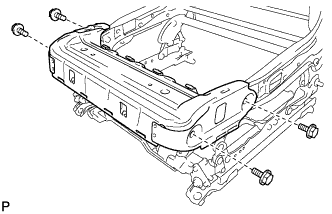 |
Install the seat cushion frame with the 4 bolts.
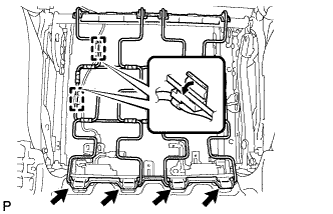 |
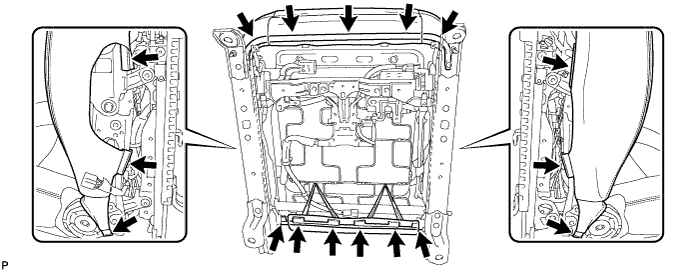
Attach the 4 clamps indicated by the arrows in the illustration to install the seat cushion spring.
Attach the 2 wire harness clamps.
| 2. INSTALL SEAT CUSHION COVER WITH PAD |
Set the seat cushion cover with pad in place.
Attach the hooks to install the seat cushion cover with pad.
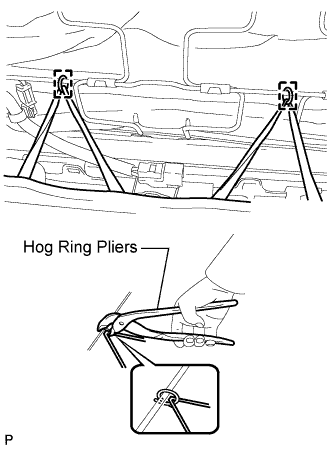 |
Using hog ring pliers, attach the rubber bands of the seatback cover to the seat frame with new hog rings.
| 3. INSTALL FRONT SEAT INNER BELT ASSEMBLY RH |
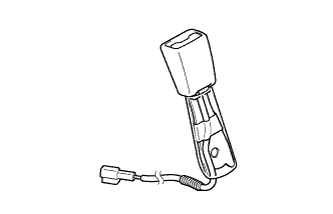 |
Install the buckle cover on the seat belt.
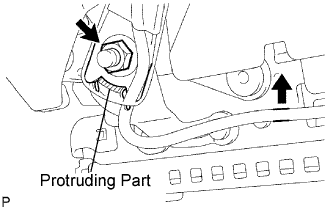 |
Attach the wire harness to the clamp.
Install the seat belt with the nut.
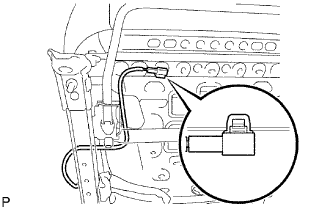 |
Attach the clamp as shown in the illustration.
| 4. INSTALL FRONT SEAT CUSHION INNER SHIELD RH |
Pass the wire harness of the front seat inner belt assembly below the claw and into the front seat cushion inner shield.
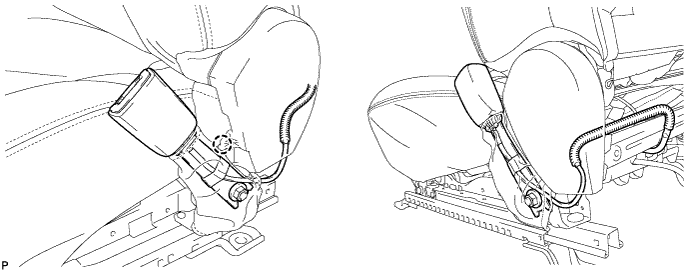
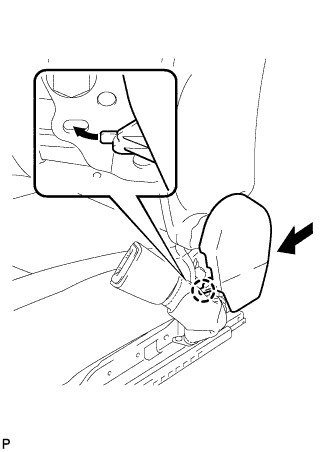 |
Attach the claw to temporarily install the cushion inner shield.
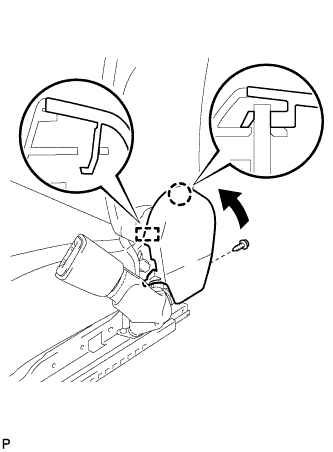 |
Attach the guide and claw.
Install the screw to the cushion inner shield.
| 5. INSTALL FRONT POWER SEAT SWITCH |
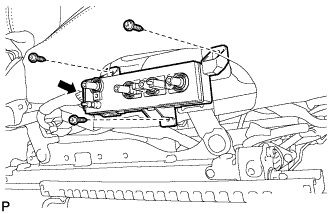 |
Connect the connector.
Install the switch with the 3 screws.
| 6. INSTALL FRONT SEAT CUSHION SHIELD RH |
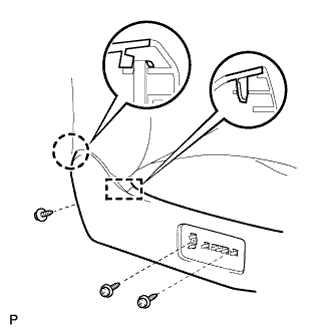 |
Attach the claw and guide to install the cushion shield.
Install the 3 screws.
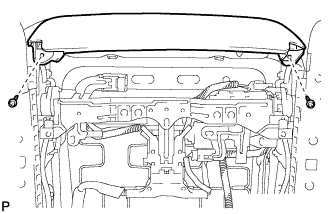 |
Install the 2 screws.
| 7. INSTALL SLIDE AND VERTICAL POWER SEAT SWITCH KNOB |
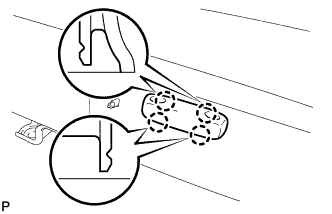 |
Attach the 4 claws to install the knob.
| 8. INSTALL RECLINING POWER SEAT SWITCH KNOB |
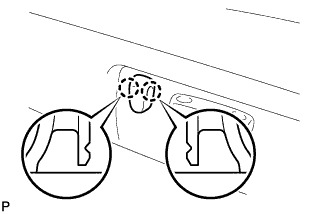 |
Attach the 2 claws to install the knob.
| 9. INSTALL FRONT SEAT ASSEMBLY |
Install the front seat assembly (Click here).
| 10. INSPECT FRONT SEAT ASSEMBLY |
Check the power seat operation (Click here).