 |
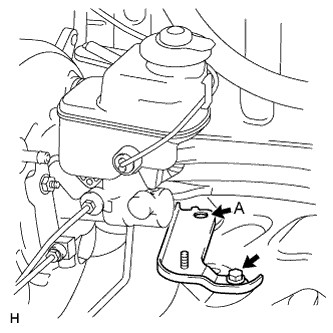
Install the No. 3 brake actuator bracket with the bolt.
- Torque:
- 19 N*m{ 195 kgf*cm , 14 ft.*lbf }
- NOTICE:
- Do not install the bolt for the hole labeled A as it is installed together with the actuator with bracket.
BRAKE ACTUATOR (for LHD with VSC) > INSTALLATION |
| 1. INSTALL NO. 3 BRAKE ACTUATOR BRACKET |
|
Install the No. 3 brake actuator bracket with the bolt.
| 2. INSTALL BRAKE ACTUATOR ASSEMBLY |
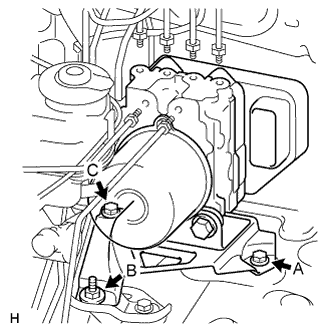 |
Install the actuator with bracket with the 2 bolts and nut.
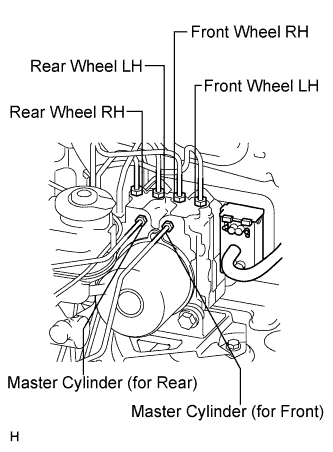 |
Set each brake line in the correct position on the brake actuator as shown in the illustration.
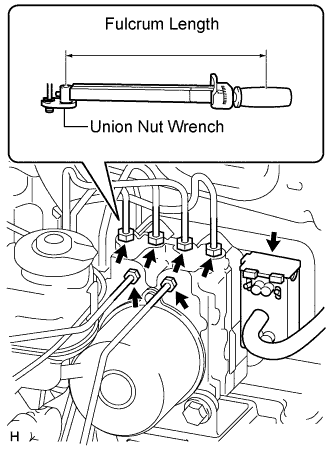 |
Using a union nut wrench, connect the 6 brake lines.
Connect the actuator connector.
| 3. FILL RESERVOIR WITH BRAKE FLUID |
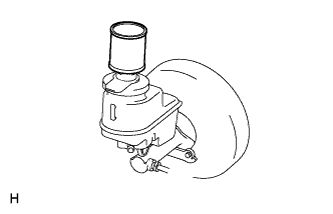 |
| 4. BLEED AIR FROM BRAKE MASTER CYLINDER |
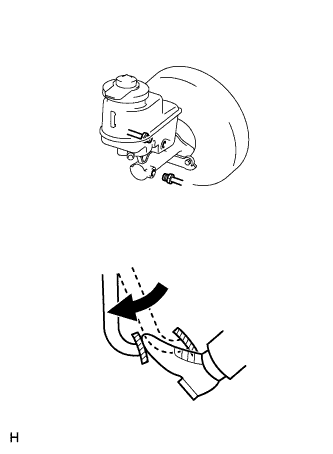 |
Using a union nut wrench, disconnect the 2 brake lines from the master cylinder.
Slowly depress and hold the brake pedal.
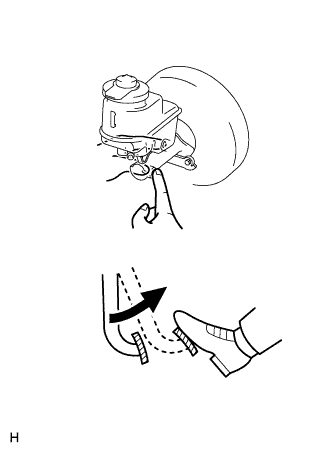 |
Cover the outer holes with your fingers, and release the pedal.
Repeat the 2 previous steps 3 or 4 times.
Using a union nut wrench, connect the 2 brake lines to the master cylinder.
| 5. BLEED AIR FROM BRAKE LINE |
Remove the bleeder plug cap.
Connect a vinyl tube to the bleeder plugs.
Depress the pedal several times, and then loosen the bleeder plug with the pedal depressed.
When fluid stops coming out, immediately tighten the bleeder plug. Then release the pedal.
Repeat the 2 previous steps until all the air in the brake fluid is gone.
Tighten the bleeder plug.
Install the cap.
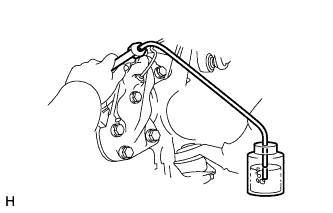 |
Bleed air from the brake line for each wheel by repeating the above procedures.
| 6. BLEED AIR FROM CLUTCH LINE (for Manual Transmission) |
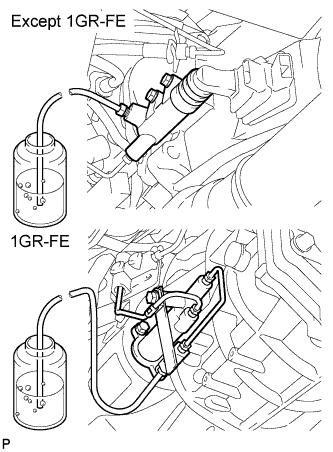 |
Remove the bleeder plug cap.
Connect the vinyl tube to the bleeder plug.
Depress the clutch pedal several times, and then loosen the bleeder plug with the pedal depressed.
At the point when fluid stops coming out, tighten the bleeder plug, and then release the clutch pedal.
Repeat the previous 2 steps until all the air in the fluid is completely bled out.
Tighten the bleeder plug.
Install the bleeder plug cap.
Check that all the air has been bled out of the clutch line.
| 7. CHECK BRAKE FLUID LEVEL IN RESERVOIR |
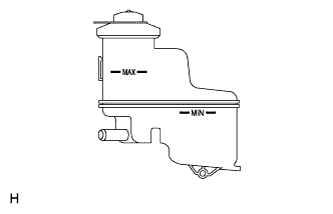 |
Check the fluid level and add fluid if necessary.
| 8. CHECK FOR BRAKE FLUID LEAKAGE |
| 9. CONNECT CABLE TO NEGATIVE BATTERY TERMINAL |
| 10. CHECK BRAKE ACTUATOR WITH INTELLIGENT TESTER |
Check the brake actuator with the intelligent tester (Click here).