ENGINE OIL COOLER (w/o EGR Cooler) > INSTALLATION |
| 1. INSTALL OIL COOLER ASSEMBLY |
|
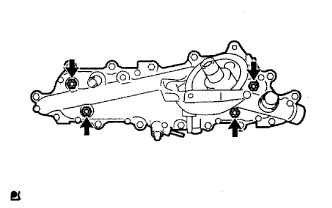
Install 2 new gaskets to the oil cooler.
Install the oil cooler to the oil cooler cover with the 4 nuts.
| 2. INSTALL OIL COOLER COVER SUB-ASSEMBLY |
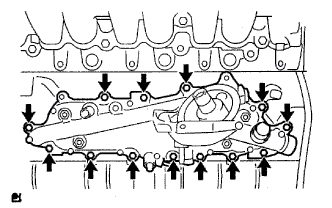 |
Install a new gasket and the oil cooler cover with the 13 bolts and 2 nuts.
Connect the oil pressure connector and install the wire harness.
| 3. INSTALL COMMON RAIL ASSEMBLY |
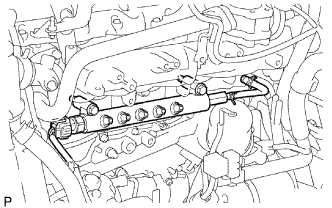 |
Install the common rail with the 2 bolts.
Connect the fuel pressure sensor connector.
| 4. INSTALL FUEL SUPPLY PUMP ASSEMBLY |
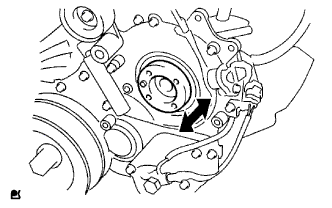 |
Check that the supply pump gear in the timing gear case moves back and forth smoothly.
Install a new O-ring to the pump.
Apply a light coat of engine oil to the O-ring.
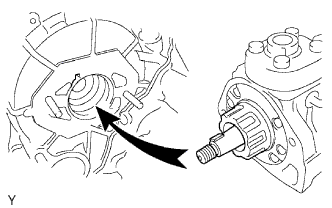 |
Align the set key on the drive shaft with the groove of the injection gear.
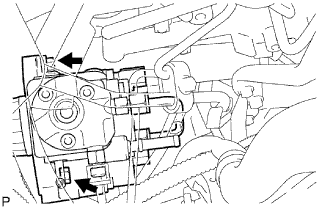 |
Install the pump with the 2 nuts.
Set a new O-ring before tightening the set nut.
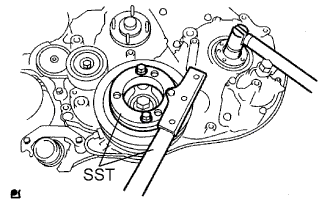 |
Using SST, hold the crankshaft pulley and install the set nut.
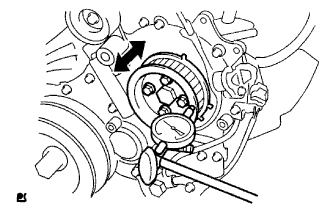 |
Move the pump drive shaft pulley back and forth to check the thrust clearance of the injection pump drive shaft.
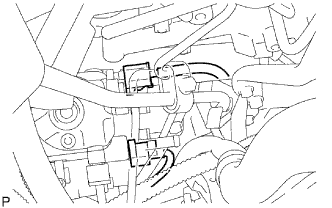 |
Connect the 2 connectors.
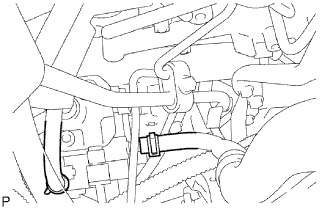 |
Connect the 2 fuel hoses.
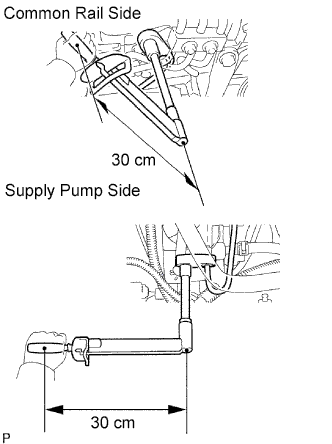 |
Temporarily install the fuel inlet pipe with the union nuts.
Using a 17 mm union nut wrench, tighten the injection pipe union nut on the common rail side.
Using a 17 mm union nut wrench, tighten the injection pipe union nut on the supply pump side.
Install the oil level gauge guide with the 2 bolts.
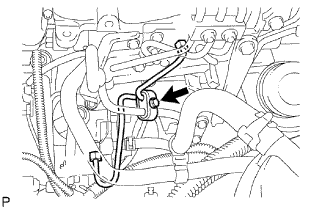 |
Install the clamp with the bolt.
| 5. INSTALL STARTER ASSEMBLY |
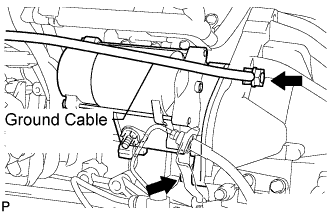 |
Connect the ground cable and install the starter with the nut and bolt.
Install the starter wire to terminal 30 with the nut.
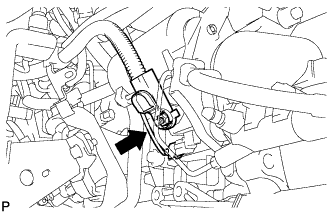 |
Connect the starter connector.
| 6. INSTALL OIL FILTER SUB-ASSEMBLY |
Check and clean the oil filter installation surface.
Apply clean engine oil to the gasket of a new oil filter.
Lightly screw the oil filter into place by hand. Tighten it until the gasket contacts the seat.
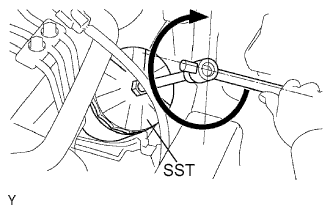 |
Using SST, tighten the oil filter. Depending on the work space available, choose from the following.
If enough space is available, use a torque wrench to tighten the oil filter.
If enough space is not available to use a torque wrench, tighten the oil filter 3/4 turn by hand or with a common wrench.
| 7. INSTALL INJECTION PIPE |
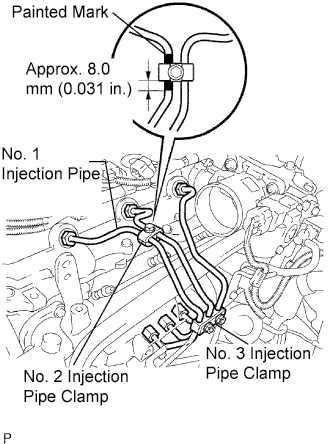 |
Temporarily install the No. 1, No. 2 and No. 3 injection pipes with the union nuts.
Install the No. 2 and No. 3 injection pipe clamps with the bolt and 2 nuts, as shown in the illustration.
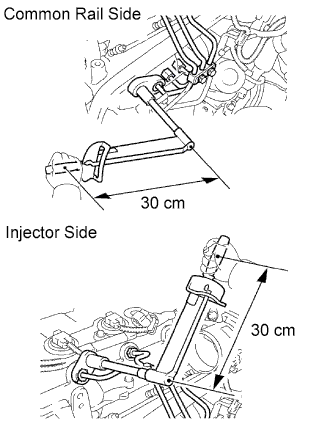 |
Using a 17 mm union nut wrench, tighten the injection pipe union nuts on the common rail side.
Using a 17 mm union nut wrench, tighten the injection pipe union nuts on the injector side.
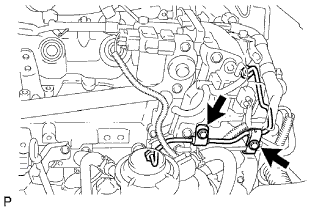 |
Temporarily install the No. 4 injection pipe with the union nuts.
Install 2 new injection pipe clamps with the 2 bolts.
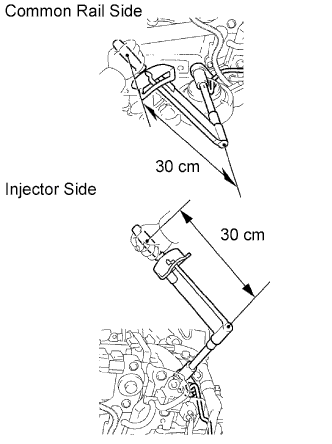 |
Using a 17 mm union nut wrench, tighten the injection pipe union nuts on the common rail side.
Using a 17 mm union nut wrench, tighten the injection pipe union nuts on the injector side.
| 8. INSTALL FUEL INLET PIPE SUB-ASSEMBLY |
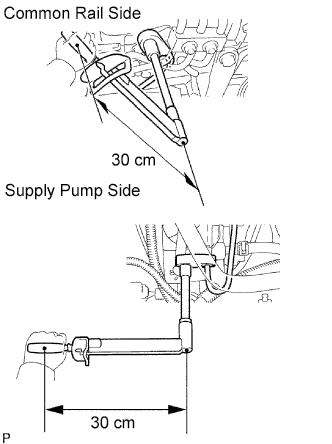 |
Temporarily install the fuel inlet pipe with the union nuts.
Using a 17 mm union nut wrench, tighten the inlet pipe union nut on the common rail side.
Using a 17 mm union nut wrench, tighten the inlet pipe union nut on the supply pump side.
Install the oil dipstick guide with the bolt.
|
Install the clamp with the bolt.
| 9. INSTALL OIL LEVEL GAUGE SUB-ASSEMBLY |
Apply clean engine oil to a new O-ring.
Install the O-ring to the dipstick.
Install the level gauge with the bolt.
| 10. INSTALL MANIFOLD STAY |
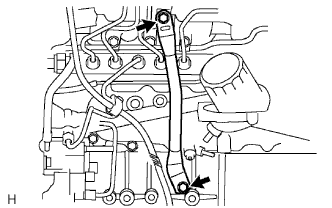 |
Install the stay with the 2 bolts.
| 11. ADD FUEL |
| 12. TIGHTEN FUEL TANK CAP ASSEMBLY |
| 13. ADD ENGINE OIL |
| 14. BLEED AIR FROM FUEL SYSTEM |
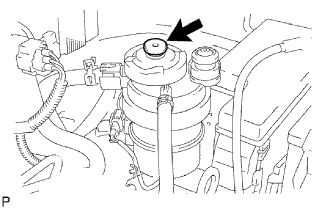 |
Using the hand pump, bleed air from the fuel system until pumping becomes difficult.
| 15. CONNECT CABLE TO NEGATIVE BATTERY TERMINAL |
| 16. PERFORM INITIALIZE |
Perform initialization (Click here).
| 17. CHECK FOR FUEL LEAKS |
| 18. CHECK FOR ENGINE OIL LEAKS |
| 19. INSTALL NO. 2 ENGINE UNDER COVER (for 4WD) |
Install the under cover with the 2 bolts.
| 20. INSTALL NO. 1 ENGINE UNDER COVER (for 4WD) |
Install the under cover with the 4 bolts.