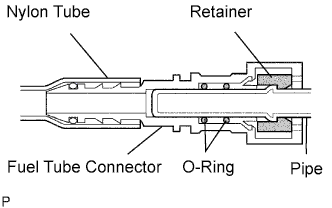
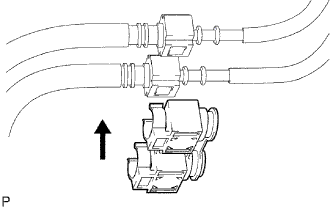
1.
INSTALL FUEL SUCTION WITH PUMP AND GAUGE TUBE ASSEMBLY
Set the fuel pump gauge retainer on the fuel tank. While holding the fuel suction with pump and gauge tube, tighten the retainer one complete turn by hand.
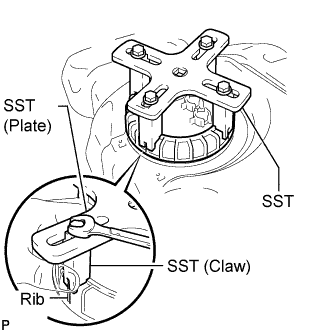
Temporarily install SST (plate and 4 claws) to the fuel pump gauge retainer.
SST
09808-14030
HINT:
Be sure to use 4 SST (claws) as shown in the illustration.
Engage SST (claws) securely with the fuel pump gauge retainer ribs to secure SST.
While pressing SST (claws) against the fuel pump gauge retainer ribs securely, install the 4 bolts.
HINT:
Install SST while pressing SST (claws) against the fuel pump gauge retainer (toward the center of SST).
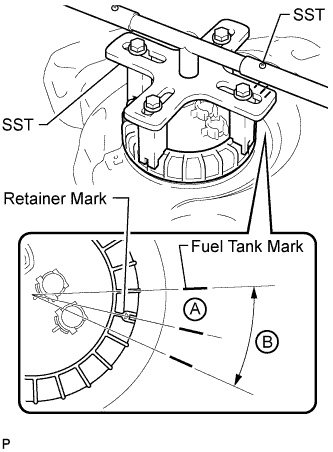
Install SST (handle).
Using SST, tighten the retainer until the mark on the retainer aligns with mark A on the fuel tank as shown in the illustration.
SST
09808-14030
NOTICE:
Do not use any tools other than those specified in this operation. Damage to the fuel pump gauge retainer or fuel tank may result.
Do not press down on SST excessively as this may make the fuel pump gauge retainer hard to rotate, and may damage components.
Make sure to rotate SST (handle) horizontally. If SST (handle) is rotated at an angle, SST may come off.
Do not spin SST too fast or use an impact wrench as this may result in damage to components.
If SST comes off of the fuel pump gauge retainer, loosen SST (bolts) and reinstall SST.
HINT:
If the alignment is difficult, make sure the mark on the retainer is within range B on the fuel tank.
Lightly press down on SST to prevent it from separating from the fuel pump gauge retainer. While pressing SST, rotate the handle slowly to tighten the fuel pump gauge retainer.
The tips of SST (claws) can be fitted onto the ribs of the fuel pump gauge retainer.
Install the fuel tank return tube and fuel tank main tube to the fuel tank.
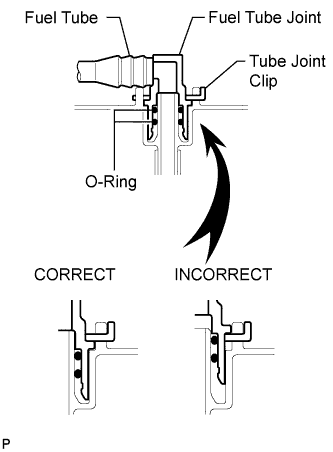
Install the 2 fuel tank tubes with the 2 tube joint clips.
NOTICE:
Check that there are no scratches or foreign objects on the connecting parts.
Check that the fuel tube joints are inserted securely.
Check that the tube joint clips are on the collars of the fuel tube joints.
After installing the tube joint clips, check that the fuel tube joints have not been pulled off.
2.
INSTALL NO. 1 FUEL TANK CUSHION
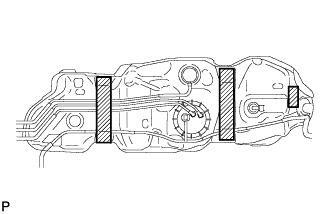
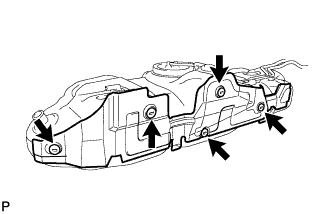
Install 3 new fuel tank cushions.
Install the heat insulator with 5 new clips.
3.
INSTALL FUEL TANK
Set the fuel tank on a mission jack.
Lift up the mission jack.
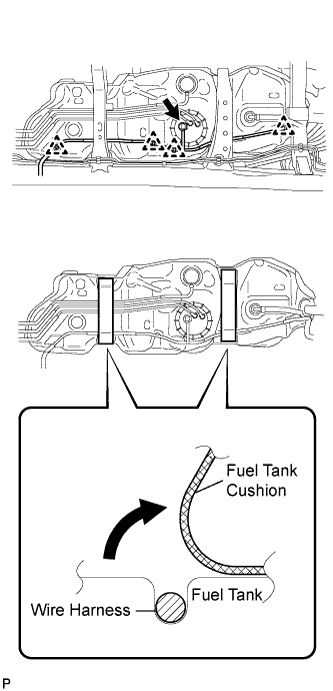
Connect the 4 harness clips and fuel pump connector to the fuel tank.
NOTICE:
Be careful not to cut the wirings.
Fold back the 2 cushion rubbers.
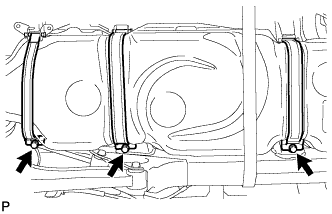
Install the 3 fuel tank bands with the 3 pins and 3 clips.
Connect the 3 fuel tank bands with the 3 bolts.
Torque:
61 N*m{
622 kgf*cm
, 45 ft.*lbf
}
4.
INSTALL FUEL TANK FILLER PIPE
Install the filler pipe with the bolt.
Torque:
19 N*m{
194 kgf*cm
, 14 ft.*lbf
}
5.
CONNECT FUEL TANK TO FILLER PIPE HOSE
Connect the filler pipe hose to the fuel tank filler pipe.
6.
CONNECT FUEL TANK BREATHER HOSE
Connect the fuel tank breather hose to the fuel tank filler pipe.
7.
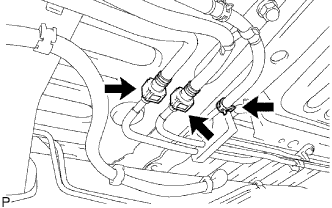
CONNECT FUEL MAIN TUBE AND FUEL RETURN TUBE
NOTICE:
Before installing the tube connectors to the pipes, check the connectors for damage and foreign matter.
Connect the return tube connector to the pipe. Then connect the main tube connector to the pipe. Push the 2 parts together firmly until a "click" sound is heard.
NOTICE:
Check that the connectors and pipes are securely connected by trying to pull them apart.