REASSEMBLY
Removal / installation · Vehicles built from Jun 2011
| 1. INSTALL UNIVERSAL JOINT SPIDER ASSEMBLY |

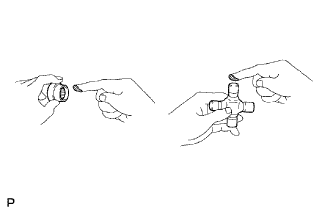  |
Apply MP grease to a new spider and 2 new spider bearings.
Fit the spider into the flange yoke.
Using SST, install the 2 spider bearings to the spider.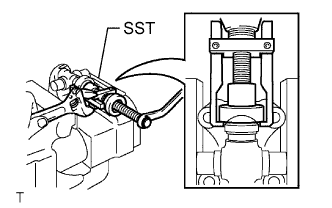
- SST
- 09332-25010
Using SST, adjust the spider bearings so that: 1) the flange yoke does not overlap the snap ring grooves of the spider bearings, and the grooves are as wide as possible; and 2) the groove width on both sides is the same.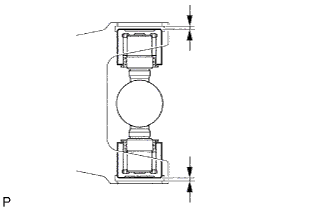
- SST
- 09332-25010
Install 2 new snap rings to the installed spider bearings. The snap rings must have equal thickness which will allow 0 to 0.05 mm (0 to 0.0020 in.) of axial play.
- Standard snap ring thickness:
Part No.
Thickness
Color
90080-52174
1.38 mm (0.0543 in.)
Green
90080-52044
1.384 mm (0.0545 in.)
Green
90080-52043
1.435 mm (0.0565 in.)
Red
90080-52175
1.45 mm (0.0571 in.)
Orange
90080-52176
1.48 mm (0.0583 in.)
Black
90080-52041
1.486 mm (0.0585 in.)
Black
90080-52176
1.48 mm (0.0583 in.)
Black
90080-52042
1.511 mm (0.0595 in.)
Copper
90080-52040
1.537 mm (0.0605 in.)
Silver
90080-52178
1.54 mm (0.0606 in.)
Yellow
90080-52039
1.588 mm (0.0625 in.)
Yellow
90080-52179
1.63 mm (0.0642 in.)
Red
90080-52038
1.638 mm (0.0645 in.)
Blue
90080-52180
1.68 mm (0.0661 in.)
Blue
- NOTICE:
- New snap rings must be used.
- The snap ring thickness must be the same on both ends.
- New snap rings must be used.
Using a hammer, tap the flange yoke until there is no clearance between the spider bearings and snap rings.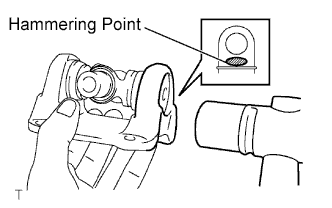
Align the matchmarks on the flange yoke and sleeve yoke.
Install new spider bearings on the sleeve yoke side.
- HINT:
- Use the procedures described above.
- HINT:
- Perform the installation of the other universal joint spider using the same procedures.
| 2. INSPECT UNIVERSAL JOINT SPIDER ASSEMBLY |
Check the spider bearings for wear or damage.
Check each spider bearing's axial play by turning the yoke while holding the shaft tightly.
- Maximum bearing axial play:
- 0.05 mm (0.0020 in.)
| 3. INSTALL SLIDING SHAFT BOOT |
Temporarily install the boot (with 2 new clamps) to the propeller shaft.
Mount the propeller shaft in a soft vise.
Coat the splines of the propeller shaft with MP grease.
Align the matchmarks on the propeller shaft and sleeve yoke.
Install the sleeve yoke to the propeller shaft and connect the boot.
Secure one of the boot clamps onto the boot.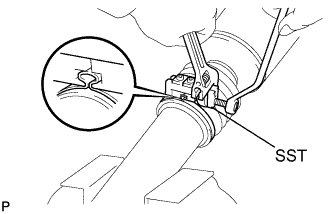
Place SST onto the boot clamp.
- SST
- 09521-24010
Tighten SST so that the boot clamp is pinched as shown in the illustration.
- NOTICE:
- Do not overtighten SST.
Using SST, adjust the clearance of the boot clamp.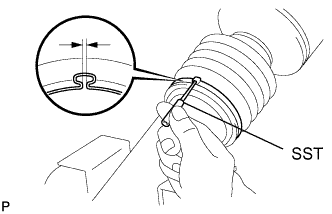
- SST
- 09240-00020
- Standard clearance:
- 0.8 mm (0.031 in.) or less
For the remaining boot clamp, use the same procedures described above.
| 4. INSPECT PROPELLER SHAFT GREASE FITTING DIRECTION |
- HINT:
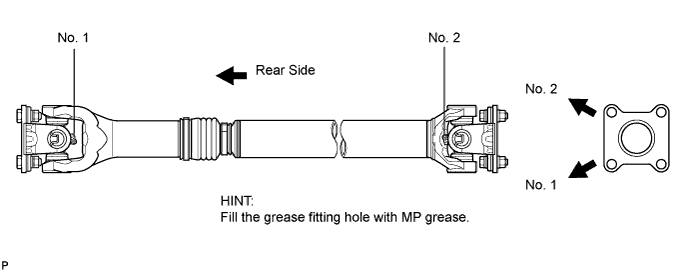
- When replacing a spider bearing, be sure that the grease fitting hole is facing the direction shown in the illustration.