REMOVAL
Removal / installation · Vehicles built from Jun 2011
- HINT:
- Use the same procedures for the RH side and LH side.
- The procedures listed below are for the LH side.
- Use the same procedures for the RH side and LH side.
| 1. REMOVE FRONT WHEEL |
| 2. DRAIN DIFFERENTIAL OIL |
| 3. REMOVE FRONT AXLE HUB GREASE CAP |

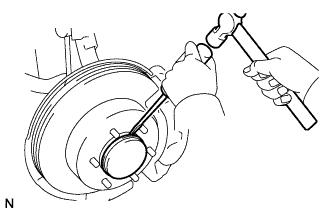  |
Using a screwdriver and hammer, remove the grease cap.
- NOTICE:
- Do not damage the axle hub.
| 4. REMOVE FRONT AXLE HUB NUT |
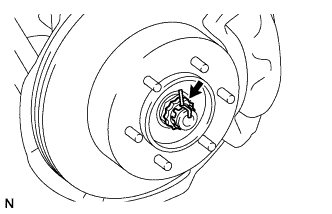 |
Remove the cotter pin and adjusting cap.
Remove the axle hub nut.
| 5. REMOVE FRONT SPEED SENSOR LH |
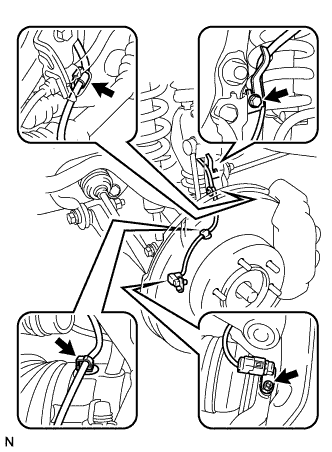 |
Remove the bolt and speed sensor.
Disconnect the 2 clamps.
Remove the bolt and disconnect the speed sensor wire harness from the steering knuckle.
| 6. DISCONNECT TIE ROD END SUB-ASSEMBLY LH |
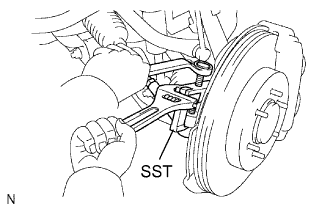 |
Remove the cotter pin and nut.
Using SST, disconnect the tie rod end from the steering knuckle.
- SST
- 09628-62011
| 7. DISCONNECT FRONT SUSPENSION LOWER ARM ASSEMBLY WITH ATTACHMENT LH |
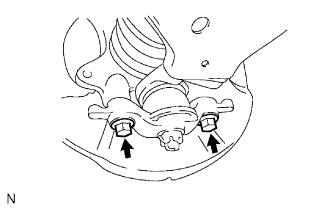 |
Remove the 2 bolts and disconnect the suspension arm from the steering knuckle.
| 8. REMOVE FRONT DRIVE SHAFT ASSEMBLY LH |
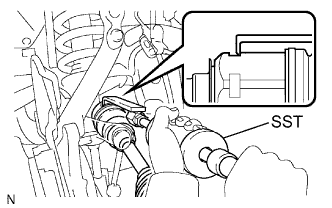 |
Using SST, tap out the drive shaft.
- SST
- 09520-01010
09520-24010 (09520-32040)
- NOTICE:
- Be careful not to damage the oil seal.
| 9. INSPECT FRONT DRIVE SHAFT ASSEMBLY LH |
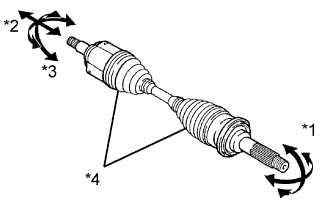 |
*1:
Check that there is no excessive play in the outboard joint.
*2:
Check that the inboard joint slides smoothly in the thrust direction.
*3:
Check that there is no excessive play in the radial direction of the inboard joint.
*4:
Check the boots for damage.