DISASSEMBLY
Removal / installation · Vehicles built from Jun 2011
- HINT:
- Use the same procedures for the RH side and LH side.
- The procedures listed below are for the LH side.
| 1.
REMOVE FRONT AXLE INBOARD JOINT BOOT CLAMP |
 |
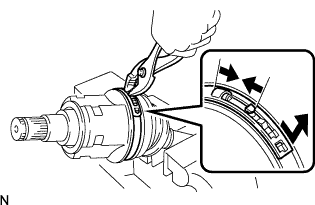
Using pliers, detach the hooks together and remove the large clamp.
Using a side cutter, cut the small boot clamp.
| 2.
SEPARATE INBOARD JOINT BOOT |
|
Slide the inboard joint boot toward the outboard joint.
| 3.
REMOVE INBOARD JOINT |
|
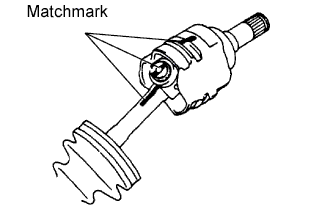
Place matchmarks on the tripod, inboard and outboard joints.
- NOTICE:
- Do not punch the marks.
Remove the inboard joint from the outboard joint.
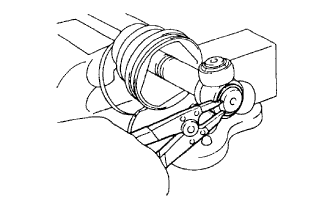
- Using a snap ring expander, remove the snap ring.
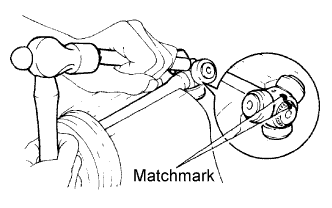
- Place matchmarks on the outboard joint and tripod.
- NOTICE:
- Do not punch the marks.
Using a brass bar and hammer, tap out the tripod from the outboard joint.
- NOTICE:
- Do not tap the rollers.
| 4.
REMOVE FRONT AXLE OUTBOARD JOINT BOOT CLAMP |
|
Using a side cutter, cut the boot clamps.
| 5.
REMOVE OUTBOARD JOINT BOOT |
|
Remove the outboard joint boot from the outboard joint shaft.
| 6.
REMOVE HOLE SNAP RING |
|
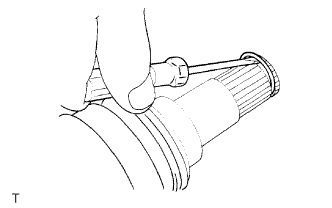
Using a screwdriver, pry out the snap ring.
| 7.
REMOVE FRONT DRIVE SHAFT DUST COVER |
|
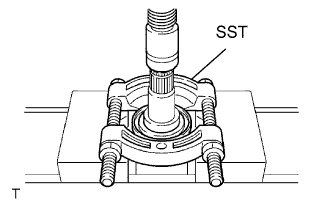
Using SST and a press, press out the dust cover.
- SST
- 09950-00020
| 8.
REMOVE FRONT AXLE HUB DUST SEAL |
|
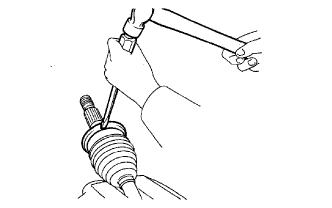
Using a screwdriver and hammer, tap out the dust seal.