REMOVAL
Removal / installation · Vehicles built Jun 2011 – Jul 2012
Versions by build date: Jun 2011 – Jul 2012 Aug 2012 – Jul 2013 from Aug 2013
- NOTICE:
- Release the vacuum from the booster by depressing the brake pedal several times. Then remove the brake master cylinder sub-assembly from the brake booster assembly.
| 1. DISCONNECT CABLE FROM NEGATIVE BATTERY TERMINAL |

- CAUTION:
- Wait at least 90 seconds after disconnecting the cable from the negative (-) battery terminal to prevent airbag and seat belt pretensioner activation.
- NOTICE:
- When disconnecting the cable, some systems need to be initialized after the cable is reconnected (Click here).
| 2. DRAIN BRAKE FLUID |
- NOTICE:
- Wash off brake fluid immediately if it comes in contact with any painted surface.
| 3. REMOVE BRAKE MASTER CYLINDER SUB-ASSEMBLY |
Remove the brake master cylinder (Click here).
| 4. REMOVE BRAKE BOOSTER ASSEMBLY |
Disconnect the vacuum warning switch connector and remove the vacuum warning switch and grommet from the booster.
Slide the clip and disconnect the vacuum hose.
Remove the check valve and grommet from the booster.
Remove the return spring, clip and clevis pin.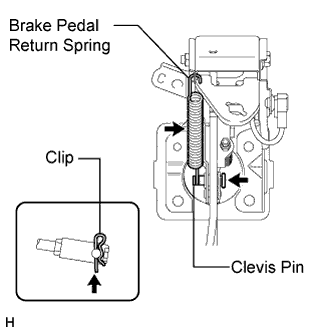

Loosen the push rod clevis lock nut.
Remove the 4 nuts and push rod clevis.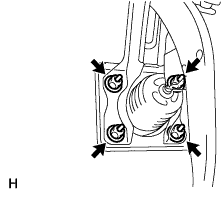
Remove the booster and gasket.