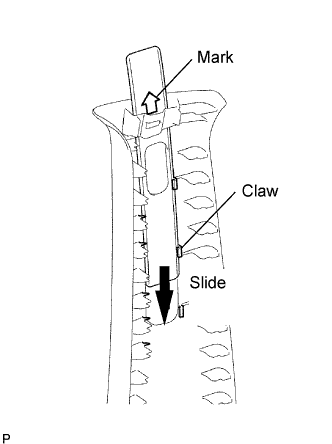
Install the plate cover as shown in the illustration.
HINT:
Make sure the plate cover is firmly set into the garnish's claws.
2.
INSTALL FRONT SHOULDER BELT ANCHOR ADJUSTER ASSEMBLY
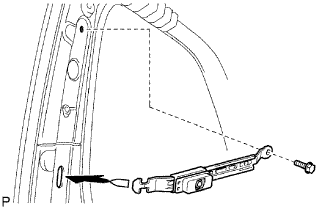
Insert the tip of the adjuster to the pillar, and align the adjuster's bolt hole to the pillar's bolt hole.
Install the bolt as shown in the illustration.
Torque:
42 N*m{
428 kgf*cm
, 31 ft.*lbf
}
3.
INSTALL CENTER PILLAR GARNISH LH
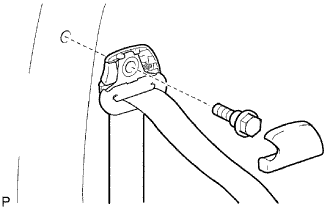
Attach the guide and clip to install the center pillar garnish LH.
Connect the front seat belt shoulder anchor with the bolt.
Torque:
42 N*m{
428 kgf*cm
, 31 ft.*lbf
}
Attach the 4 claws to install the front seat belt shoulder anchor cover.
4.
INSTALL FRONT SEAT OUTER BELT ASSEMBLY LH
NOTICE:
Do not disassemble the retractor.
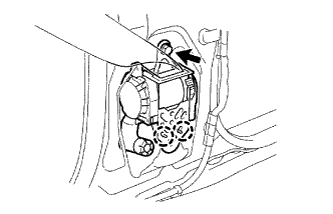
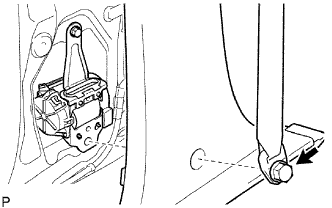
w/o Pretensioner: Align the claws with the seat belt positioning holes and install the ELR of the seat belt with the bolt as shown in the illustration.
Torque:
4.8 N*m{
49 kgf*cm
, 42 in.*lbf
}
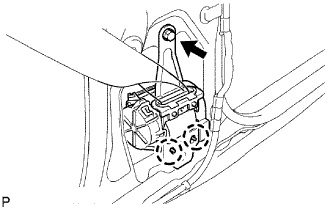
w/ Pretensioner: Align the claws with the seat belt positioning holes and install the ELR of the seat belt with the bolt as shown in the illustration.
Torque:
4.8 N*m{
49 kgf*cm
, 42 in.*lbf
}
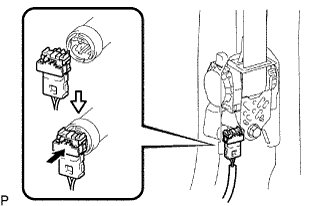
w/ Pretensioner: Connect the pretensioner connector as shown in the illustration.
Extra cab and double cab: Install the anchor with the bolt.
Torque:
42 N*m{
428 kgf*cm
, 31 ft.*lbf
}
Install the cap.
Double cab: Install the anchor of the seat belt with the built-in bolt after installing the center pillar garnish lower.
Torque:
42 N*m{
428 kgf*cm
, 31 ft.*lbf
}
5.
CONNECT CABLE TO NEGATIVE BATTERY TERMINAL
NOTICE:
When disconnecting the cable, some systems need to be initialized after the cable is reconnected (Click here).