INSTALLATION
Removal / installation · Vehicles built Jun 2011 – Jul 2012
Versions by build date: Jun 2011 – Jul 2012 Aug 2012 – Jul 2013 from Aug 2013
| 1.
INSTALL REAR NO. 1 SEAT BELT ASSEMBLY OUTER LH |
 |
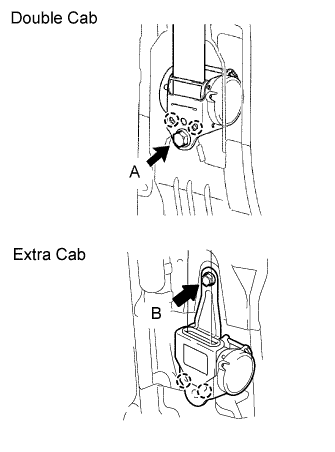
Align the claws with the seat belt positioning holes and install the ELR of the seat belt with the bolt as shown in the illustration.
-
Torque:
- 42 N*m{
428 kgf*cm
, 31 ft.*lbf
}
for bolt A
-
Torque:
- 4.8 N*m{
49 kgf*cm
, 42 in.*lbf
}
for bolt B
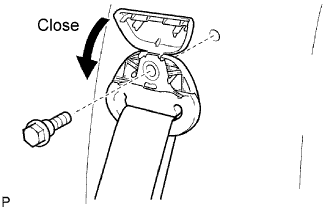
- Install the bolt and close the cover as shown in the illustration.
-
Torque:
- 42 N*m{
428 kgf*cm
, 31 ft.*lbf
}
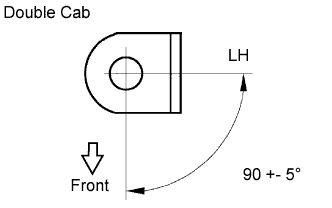
- Install the floor anchor with the bolt, as shown in the illustration.
-
Torque:
- 42 N*m{
428 kgf*cm
, 31 ft.*lbf
}
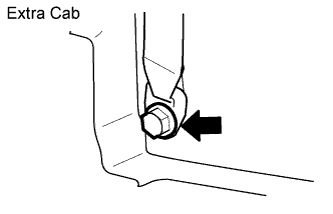
- Install the floor anchor with the bolt, as shown in the illustration.
-
Torque:
- 42 N*m{
428 kgf*cm
, 31 ft.*lbf
}
| 2.
INSTALL QUARTER TRIM PANEL LOWER LH (for Double Cab)
|
|
Attach the 3 clips and claw to install the lower quarter trim panel.
| 3.
INSTALL REAR DOOR OPENING TRIM LH (for Double Cab) |
|
| 4.
INSTALL REAR DOOR SCUFF PLATE LH (for Double Cab)
|
|
Attach the 2 clips and 7 claws to install the rear door scuff plate.
| 5.
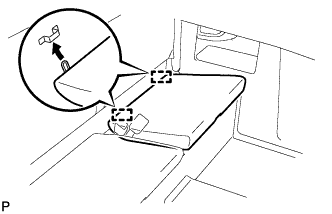
INSTALL REAR SEAT ASSEMBLY (for Extra Cab)
|
|
- Attach the 2 hooks.
- Attach the hook to install the rear seat cushion assembly LH.
| 6.
INSTALL QUARTER INSIDE TRIM BOARD LH (for Extra Cab)
|
|
Attach the 7 clips, 3 guides and 4 claws to install the quarter inside trim board.
Connect the front seat outer belt floor anchor with the bolt.
-
Torque:
- 42 N*m{
428 kgf*cm
, 31 ft.*lbf
}
| 7.
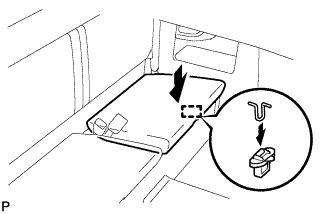
INSTALL REAR SEAT CUSHION ASSEMBLY RH (for Extra Cab)
|
|
- Attach the 2 hooks.
- Attach the hook to install the rear seat cushion assembly LH.
| 8.
INSTALL REAR SEAT CUSHION ASSEMBLY LH (for Extra Cab)
|
|
- HINT:
- Use the same procedures described for the LH side.
| 9.
INSTALL REAR SEAT ASSEMBLY (for Double Cab) |
|
Install the rear seat assembly (Click here).
| 10.
CONNECT CABLE TO NEGATIVE BATTERY TERMINAL |
|
| 11.
PERFORM INITIALIZATION |
|
Perform initialization (Click here).
- NOTICE:
- Certain systems need to be initialized after disconnecting and reconnecting the cable from the negative (-) battery terminal.