INSTALLATION
Removal / installation · Vehicles built from Aug 2013
Versions by build date: Jun 2011 – Jul 2012 Aug 2012 – Jul 2013 from Aug 2013
- HINT:
- Use the same procedure for RHD and LHD vehicles.
- The procedure listed below is for LHD vehicles.
- A bolt without a torque specification is shown in the standard bolt chart (Click here).
| 1.
INSTALL FRONT SEAT CUSHION COVER LH |
 |
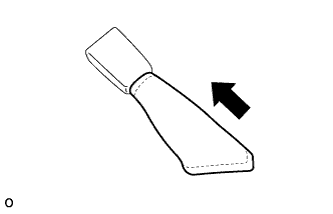
- Install the front seat cushion cover LH.
| 2.
INSTALL FRONT SEAT INNER BELT ASSEMBLY |
|
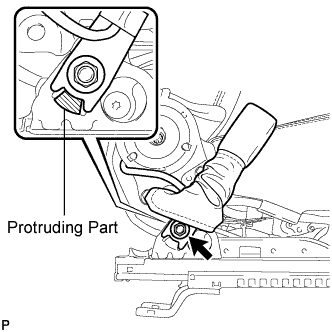
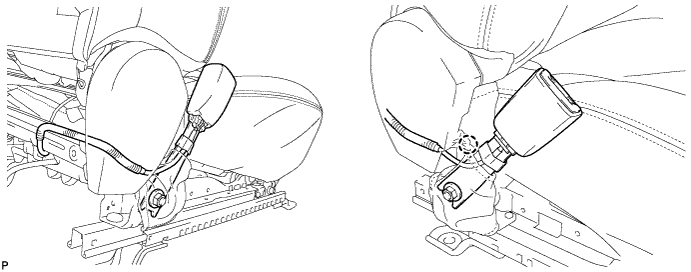
Install the front seat inner belt assembly LH with the nut.
-
Torque:
- 42 N*m{
428 kgf*cm
, 31 ft.*lbf
}
- NOTICE:
- Do not allow the anchor part of the front seat inner belt assembly to overlap the protruding part of the front seat adjuster.
Connect the connector and attach the 3 clamps.
| 3.
INSTALL FRONT SEAT INNER CUSHION SHIELD LH |
|
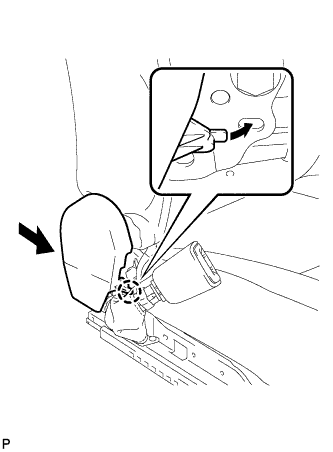
Pass the wire harness of the front seat inner belt assembly below the claw and into the front seat inner cushion shield LH.

- Attach the claw to temporarily install the front seat inner cushion shield LH.
- NOTICE:
- Make sure that the wire harness of the front seat inner belt assembly is not being pinched inside the front seat inner cushion shield.
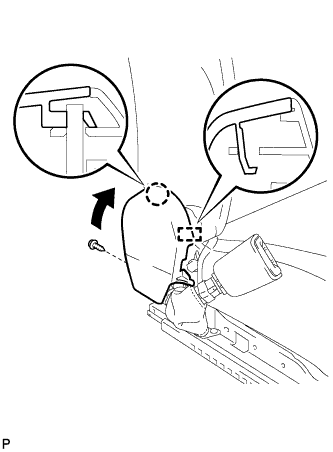
- Attach the guide and claw.
- NOTICE:
- Make sure that the wire harness of the front seat inner belt assembly is not being pinched inside the front seat inner cushion shield.
Install the screw.
| 4.
INSTALL FRONT SEAT ASSEMBLY LH |
|
Install the front seat assembly LH (Click here).
| 5.
CONNECT CABLE TO NEGATIVE BATTERY TERMINAL |
|
- NOTICE:
- When disconnecting the cable, some systems need to be initialized after the cable is reconnected (Click here).