DISASSEMBLY
Removal / installation · Vehicles built Aug 2012 – Jul 2013
Versions by build date: Jun 2011 – Jul 2012 Aug 2012 – Jul 2013 from Aug 2013
- HINT:
- Use the same procedure for RHD and LHD vehicles.
- The procedure listed below is for LHD vehicles.
| 1.
REMOVE BLOWER ASSEMBLY |
 |
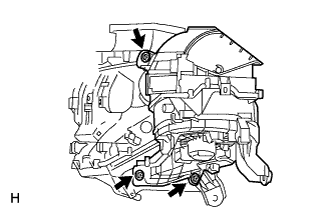
- Remove the 3 screws and blower assembly.
| 2.
REMOVE QUICK HEATER ASSEMBLY (w/ PTC Heater)
|
|
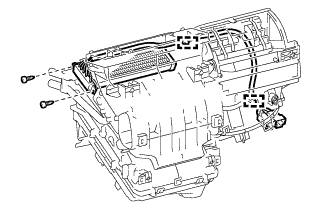
- Detach the 2 clamps.
Remove the 2 screws and quick heater assembly.
| 3.
REMOVE HEATER RADIATOR UNIT SUB-ASSEMBLY |
|
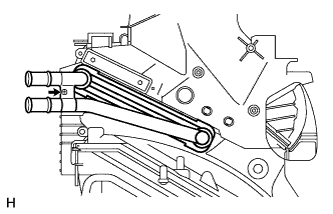
- Remove the screw and heater radiator unit subassembly.
| 4.
REMOVE AIR MIX DAMPER SERVO SUB-ASSEMBLY |
|
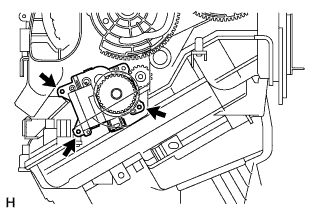
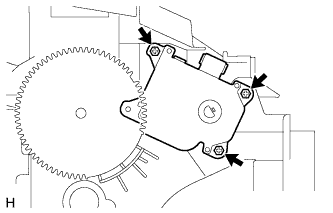
- Remove the 3 screws and damper servo.
| 5.
REMOVE MODE DAMPER SERVO SUB-ASSEMBLY |
|
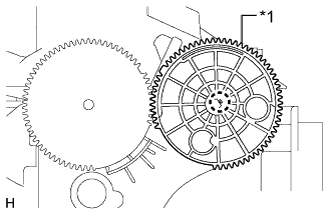
Detach the claw and remove the lever.
Text in Illustration
*1
|
Lever
|
- Remove the 3 screws and mode damper servo subassembly.
| 6.
REMOVE NO. 1 COOLER EVAPORATOR SUB-ASSEMBLY |
|
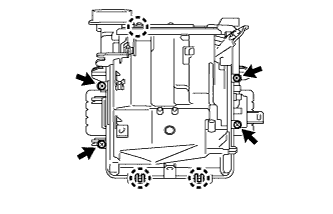
- Remove the 4 screws.
Detach the 3 claws and remove the lower heater case.
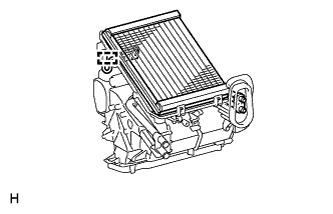
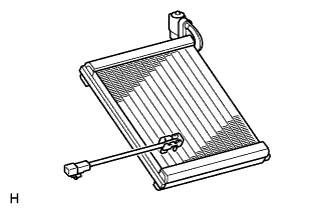
- Detach the clamp and remove the No. 1 cooler evaporator sub-assembly.
| 7.
REMOVE COOLER EXPANSION VALVE |
|
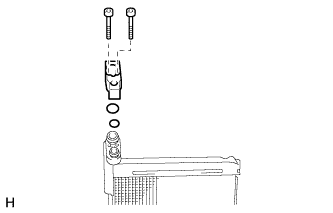
- Using a 4 mm socket hexagon wrench, remove the 2 hexagon bolts.
Remove the cooler expansion valve and 2 O-rings from the cooler evaporator.
| 8.
REMOVE NO. 1 COOLER THERMISTOR
|
|
- Remove the No. 1 cooler thermistor (front evaporator temperature sensor).