INSTALLATION
Removal / installation · Vehicles built Aug 2012 – Jul 2013
Versions by build date: Jun 2011 – Jul 2012 Aug 2012 – Jul 2013 from Aug 2013
| 1. INSTALL TRANSMISSION WIRE |

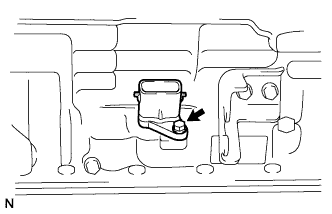  |
Install the transmission wire with the bolt.
- Torque:
- 5.4 N*m{ 55 kgf*cm , 48 in.*lbf }
Connect the transmission wire connector.
| 2. CONNECT TRANSMISSION WIRE |
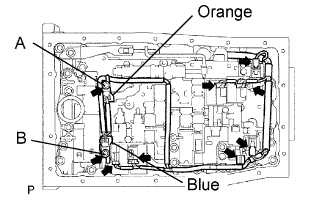 |
Connect the 7 connectors to the solenoid valves.
Install the clamp with the 2 bolts.
- Torque:
- 10 N*m{ 100 kgf*cm , 7 ft.*lbf } for bolt A
- 11 N*m{ 110 kgf*cm , 8 ft.*lbf } for bolt B
- Bolt length:
- 36 mm (1.42 in.) for bolt A
- 12 mm (0.47 in.) for bolt B
Connect the ATF temperature sensor.
| 3. INSTALL VALVE BODY OIL STRAINER ASSEMBLY |
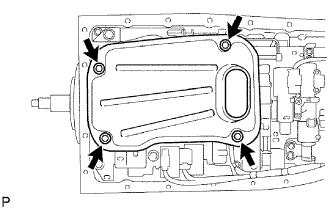 |
Install a new O-ring and oil strainer with the 4 bolts.
- Torque:
- 10 N*m{ 100 kgf*cm , 7 ft.*lbf }
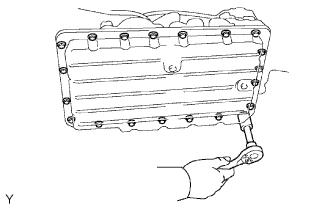
| 4. INSTALL AUTOMATIC TRANSMISSION OIL PAN SUB-ASSEMBLY |
 |
- HINT:
- Remove the gasket and be careful not to spill oil on the contacting surfaces of the transmission case and oil pan.
Install the oil pan with the 20 bolts.
- Torque:
- 4.4 N*m{ 45 kgf*cm , 39 in.*lbf }
| 5. CONNECT CABLE TO NEGATIVE BATTERY TERMINAL |
| 6. PERFORM INITIALIZATION |
Perform initialization (Click here).
- NOTICE:
- Certain systems need to be initialized after disconnecting and reconnecting the cable from the negative (-) battery terminal.
| 7. ADD AUTOMATIC TRANSMISSION FLUID |
Add automatic transmission fluid (Click here).
| 8. INSPECT AUTOMATIC TRANSMISSION FLUID |
Inspect the automatic transmission fluid (Click here).