2014 Hilux · Service Manual ENGINE

INSTALLATION

Removal / installation · Vehicles built Jun 2011 – Jul 2012

Versions by build date: Jun 2011 – Jul 2012 Aug 2012 – Jul 2013 from Aug 2013


1. INSTALL FUEL PRESSURE REGULATOR ASSEMBLY
  1. Install the vacuum hose.

  1. Apply a light coat of spindle oil or gasoline to a new O-ring and install it to the fuel pressure regulator.

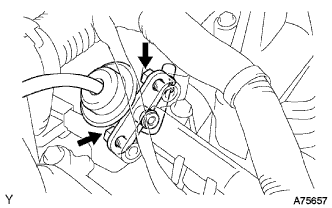
  1. A075657
    Install the fuel pressure regulator with the 2 bolts.

    Torque:
    9.0 N*m{ 92 kgf*cm , 80 in.*lbf }


2. CONNECT NO. 2 FUEL PIPE SUB-ASSEMBLY

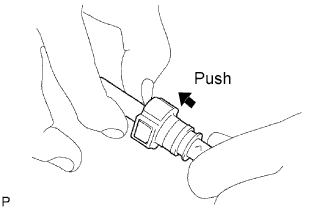
  1. Connect the fuel pipe.

    1. A071366E09
      Check that there is no damage or contamination in the connected part of the pipe.

    2. Align the axis of the connector with the axis of the pipe. Push the pipe into the connector until the connector makes a "click" sound. If the connection is tight, apply a little amount of fresh engine oil on the tip of the pipe.

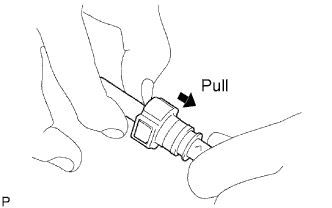
    3. A071366E10
      After having finished the connection, try to pull apart the pipe and the connector and confirm that they are securely connected.

  1. Install the fuel pipe clamp.


3. INSTALL INTAKE AIR SURGE TANK

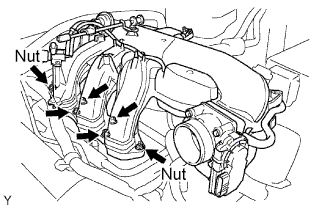
A075648E01
  1. Install a new gasket and the surge tank with the 2 nuts.

    Torque:
    28 N*m{ 286 kgf*cm , 21 ft.*lbf }

  1. Using an 8 hexagon wrench, install the 4 bolts.

    Torque:
    28 N*m{ 286 kgf*cm , 21 ft.*lbf }

  1. A075647E01
    Install the 3 upper bolts which are used to secure the 2 surge tank stays and throttle body bracket.

    Torque:
    21 N*m{ 214 kgf*cm , 16 ft.*lbf }

  1. A075646E01
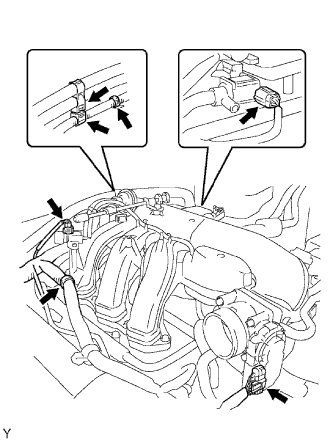
    Install the 3 wire harness clamps and hose clamp.

  1. Connect the throttle motor connector.

  1. Connect the 2 VSV connectors.

  1. A075645E01
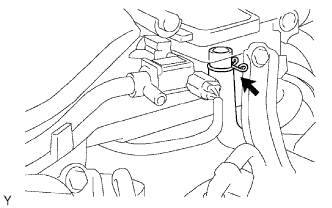
    Connect the ventilation hose.

  1. A075644E01
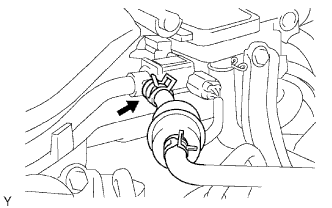
    Connect the vapor feed hose assembly.

  1. A075598E01
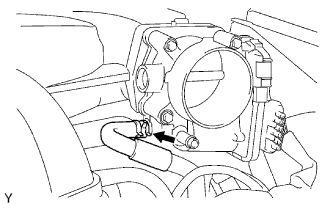
    Connect the No. 4 water by-pass hose.

  1. A075597E01
    Connect the No. 5 water by-pass hose.


4. INSTALL AIR CLEANER ASSEMBLY

Torque:
8.0 N*m{ 82 kgf*cm , 71 in.*lbf }


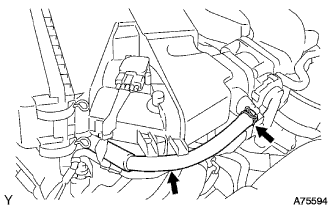
5. CONNECT NO. 2 VENTILATION HOSE

A075594

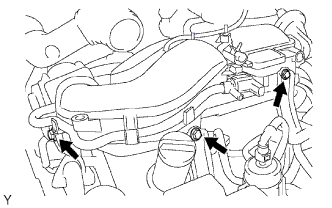
6. INSTALL V-BANK COVER
  1. Install the cover with the 2 nuts.

    Torque:
    7.5 N*m{ 76.5 kgf*cm , 66 in.*lbf }


7. CONNECT CABLE TO NEGATIVE BATTERY TERMINAL

8. PERFORM INITIALIZATION
  1. Perform initialization (Click here).

    NOTICE:
    Certain systems need to be initialized after disconnecting and reconnecting the cable from the negative (-) battery terminal.


9. CHECK FOR FUEL LEAKS
  1. Connect the intelligent tester to the DLC3.

    1. Turn the ignition switch ON.

      NOTICE:
      Do not start the engine.

    2. Push the intelligent tester main switch ON.

    3. Select Active Test and enter the following menus: Powertrain / Engine and ECT / Active Test / Control the Fuel Pump / Speed.

  1. Check for fuel leaks.

    1. Check that there are no fuel leaks after performing maintenance anywhere on the fuel system.

← REMOVAL (from Jun 2011)INSTALLATION (Aug 2012 – Jul 2013) →