2014 Hilux · Service Manual ENGINE

REMOVAL

Removal / installation · Vehicles built from Aug 2013

Versions by build date: Jun 2011 – Jul 2012 Aug 2012 – Jul 2013 from Aug 2013

NOTICE:
  1. When replacing the injectors (including shuffling the injectors between the cylinders), common rail or cylinder head, it is necessary to replace the injection pipes with new ones.
  2. When replacing the fuel supply pump, common rail, cylinder block, cylinder head, cylinder head gasket or timing gear case, it is necessary to replace the fuel inlet pipe with a new one.
  3. After removing the injection pipes, clean them with a brush and compressed air.


1. DISCONNECT CABLE FROM NEGATIVE BATTERY TERMINAL

NOTICE:
When disconnecting the cable, some systems need to be initialized after the cable is reconnected (Click here).


2. DRAIN ENGINE OIL
  1. Remove the oil filler cap.

  1. Remove the oil pan drain plug and gasket, and then drain the engine oil into a container.

  1. Wipe the oil pan and drain plug.

  1. Install a new gasket and the oil pan drain plug.

    Torque:
    34 N*m{ 347 kgf*cm , 25 ft.*lbf }


3. DRAIN ENGINE COOLANT

CAUTION:
Do not remove the radiator reservoir cap while the engine and radiator are still hot. Pressurized, hot engine coolant and steam may be released and cause serious burns.

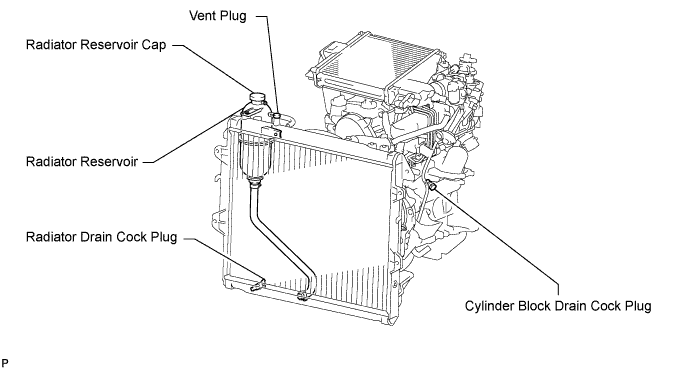
  1. Loosen the radiator drain cock plug.

    HINT:
    Collect the coolant in a container and dispose of it according to the regulations in your area.

  1. A099591E01
    Drain the coolant by removing the reservoir cap and, using a wrench, remove the vent plug.

  1. Loosen the cylinder block drain cock plug.

    A147246E01


4. REMOVE ENGINE ASSEMBLY
(Click here)

5. REMOVE NO. 1 TIMING BELT COVER

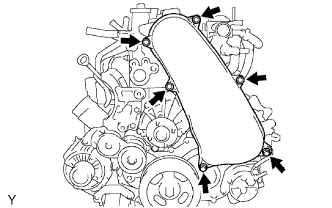
  1. A015094E01
    Remove the 6 bolts, 6 washers and timing belt cover.


6. REMOVE TIMING BELT

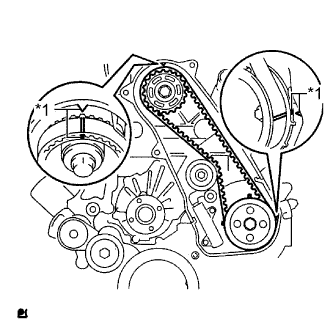
  1. A070549E05
    Turn the crankshaft clockwise and align the timing marks as shown in the illustration.
    Text in Illustration 
    *1
    Timing Mark

    HINT:
    If reusing the timing belt, place matchmarks on the timing belt so that it can be installed exactly as before.

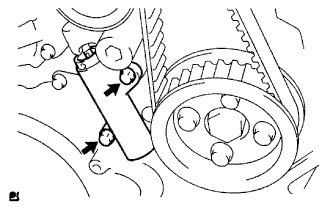
  1. A070550E01
    Uniformly loosen and remove the 2 bolts and No. 1 timing belt tensioner.

  1. Remove the timing belt.

    HINT:
    A070551E02
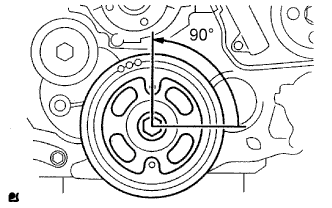
    1. If turning the camshaft while the timing belt is removed, turn the crankshaft 90° counterclockwise as shown in the illustration.
    2. When installing the timing belt, turn the camshaft to align the timing marks, and then turn the crankshaft clockwise to align the timing marks.


7. REMOVE NO. 1 TIMING BELT IDLER SUB-ASSEMBLY

NOTICE:
When inspecting the No. 1 timing belt idler, do not remove it unless absolutely necessary.

  1. Using a 10 mm hexagon wrench, remove the bolt, No. 1 timing belt idler and washer.


8. REMOVE VISCOUS HEATER WITH MAGNET CLUTCH ASSEMBLY (w/ Viscous Heater)
(Click here)

9. REMOVE NO. 1 VISCOUS HEATER BRACKET SUB-ASSEMBLY (w/ Viscous Heater)
  1. Remove the 4 bolts and No. 1 viscous heater bracket.


10. REMOVE NO. 2 IDLE PULLEY ASSEMBLY
  1. Remove the bolt, pulley plate, No. 2 idle pulley and spacer.


11. REMOVE GENERATOR ASSEMBLY

A111821
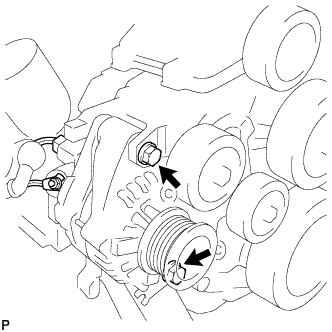
  1. Remove the nut and generator wire.

  1. Disconnect the generator connector.

  1. Remove the 2 bolts and generator.


12. REMOVE GENERATOR BRACKET
  1. Remove the bolt and generator bracket.


13. REMOVE V-RIBBED BELT TENSIONER ASSEMBLY

  1. A098937E01
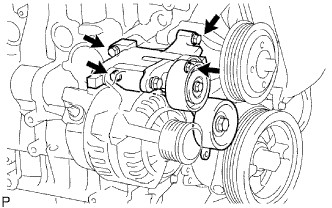
    Remove the 4 bolts and V-ribbed belt tensioner.


14. REMOVE NO. 1 COMPRESSOR MOUNTING BRACKET (w/ Air Conditioning System)
  1. Remove the 4 bolts and No. 1 compressor mounting bracket.


15. REMOVE ELECTRIC EGR CONTROL VALVE ASSEMBLY WITH NO. 2 EGR VALVE AND COOLER
(Click here)

16. REMOVE NO. 4 INJECTION PIPE SUB-ASSEMBLY

  1. A252273
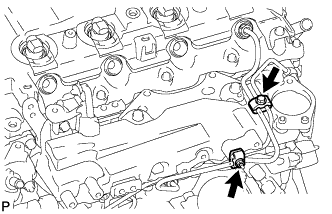
    Remove the bolt, nut and 2 No. 2 injection pipe clamps.

  1. A252274
    Using a 17 mm union nut wrench, loosen the union nuts and remove the No. 4 injection pipe.


17. REMOVE NO. 2 FUEL PIPE

  1. A252276
    Disconnect the vacuum switching valve connector and 2 vacuum transmitting hoses.

  1. A252278
    Using a 6 mm hexagon wrench, remove the supply pump hollow screw and gasket.
    Text in Illustration 
    V100135
    Bolt
    V100136
    Supply Pump Hollow Screw
    V100137
    Fuel Check Valve
    V100138
    Union Bolt

  1. Remove the fuel check valve, union bolt and 2 gaskets.

  1. Remove the 3 bolts and No. 2 fuel pipe.


18. REMOVE NO. 3 NOZZLE LEAKAGE PIPE

  1. A252280
    Disconnect the 3 fuel hoses.
    Text in Illustration 
    V100136
    Fuel Check Valve

  1. Remove the 2 bolts.

  1. Remove the fuel check valve, gasket and No. 3 nozzle leakage pipe.


19. REMOVE NO. 2 NOZZLE LEAKAGE PIPE ASSEMBLY

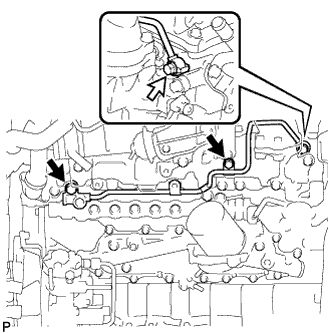
  1. A252281
    Remove the 2 bolts.
    Text in Illustration 
    V100136
    Union Bolt

  1. Remove the union bolt, gasket and No. 2 nozzle leakage pipe.


20. REMOVE NO. 2 CYLINDER HEAD COVER SUB-ASSEMBLY

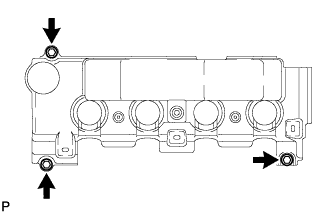
  1. A252282
    Remove the 3 bolts and No. 2 cylinder head cover.


21. REMOVE CYLINDER HEAD COVER SUB-ASSEMBLY

NOTICE:
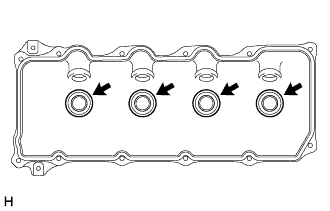
If the cylinder head cover is removed, replace the 4 No. 3 cylinder head cover gaskets with new ones.

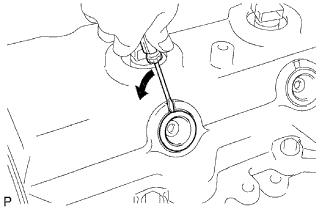
  1. A060180E01
    Using a small screwdriver, remove the nozzle holder seal by prying between the nozzle holder seal and the cutout part of the cylinder head cover.

  1. Disconnect the ventilation hose.

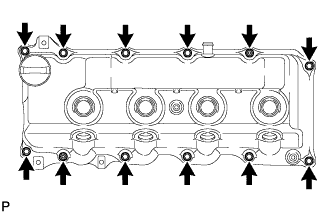
  1. A223193
    Remove the 10 bolts, 2 nuts, cylinder head cover and cylinder head cover gasket.

  1. A289511
    Remove the 4 No. 3 cylinder head cover gaskets from the cylinder head cover.


22. REMOVE CAMSHAFT TIMING PULLEY

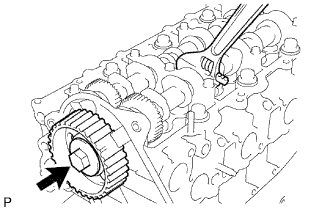
  1. A060182E01
    Remove the bolt of the camshaft timing pulley while holding the camshaft with a wrench.

    NOTICE:
    Make sure the timing belt is not installed when removing the bolt of the camshaft timing pulley.

  1. Remove the camshaft timing pulley.


23. REMOVE NO. 2 TIMING BELT COVER
  1. Remove the 4 bolts, nut and No. 2 timing belt cover.


24. REMOVE WATER PUMP ASSEMBLY

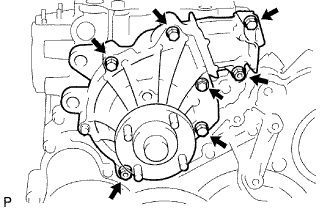
  1. A225339
    Remove the 5 bolts, 2 nuts, water pump and gasket.


25. REMOVE VACUUM PUMP ASSEMBLY

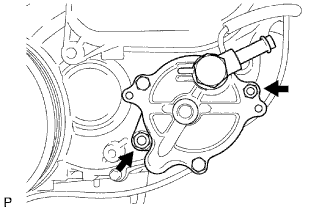
  1. A098930E01
    Remove the 2 nuts, vacuum pump and 2 O-rings.


26. REMOVE VANE PUMP ASSEMBLY

  1. A233594
    Remove the 2 nuts, vane pump and O-ring.


27. REMOVE CAMSHAFT POSITION SENSOR

A112046
  1. Disconnect the sensor connector.

  1. Remove the bolt and sensor.


28. REMOVE CRANKSHAFT POSITION SENSOR
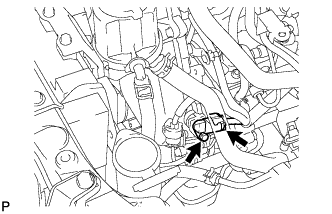
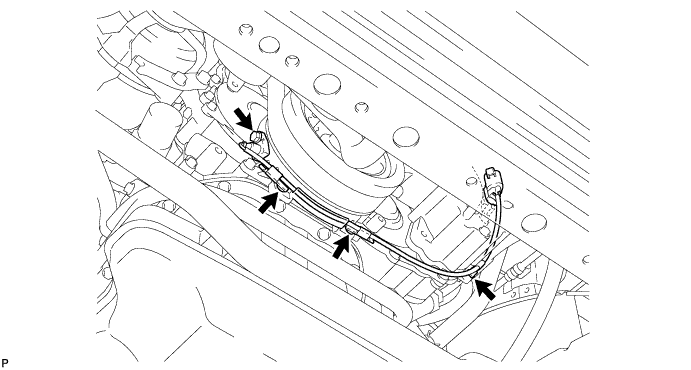
  1. Disconnect the sensor connector.

  1. Remove the 3 clips, bolt and sensor.

    A112048


29. REMOVE PUMP DRIVE SHAFT PULLEY

  1. A038747E01
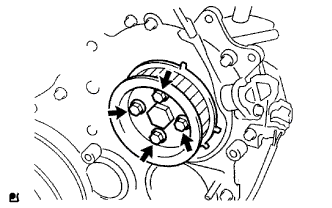
    Remove the 4 bolts, No. 2 camshaft timing pulley flange and pump drive shaft pulley.

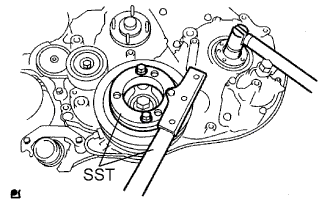
  1. A070711E01
    Using SST, hold the crankshaft pulley and remove the nut and O-ring.
    SST
    09213-58014  
    09330-00021  


30. REMOVE CRANKSHAFT PULLEY

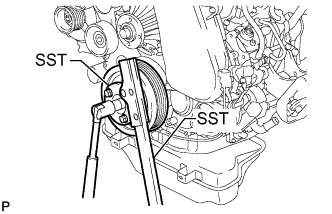
  1. A251844E01
    Using SST, hold the crankshaft pulley and loosen the pulley bolt.
    SST
    09213-58014  
    09330-00021  

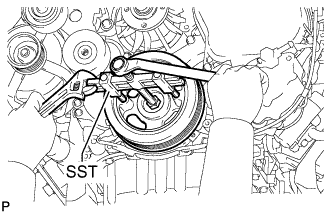
  1. A251845E01
    Using SST, remove the pulley bolt and crankshaft pulley.
    SST
    09950-50013   (09951-05010, 09952-05010, 09953-05020, 09954-05021)

    NOTICE:
    Apply oil or grease to the threads and tip of SST (center bolt) before using it.


31. REMOVE TIMING GEAR COVER

NOTICE:
As the fuel supply pump is not installed, the injection gear is loose inside the timing gear case. Do not allow the injection gear to fall.

HINT:
To prevent the injection gear from falling, temporarily install the fuel supply pump.

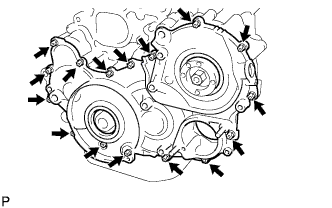
  1. A100853
    Remove the 14 bolts and 2 nuts.

  1. A102800
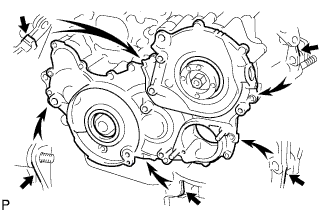
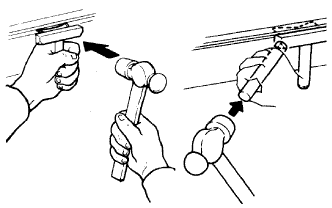
    Pry the timing gear cover at the locations shown in the illustration and remove the timing gear cover.

    NOTICE:
    Be careful not to drop the injection gear.

  1. A051310E01
    Remove the O-ring from the timing gear case.


32. REMOVE INJECTION GEAR

  1. A222329
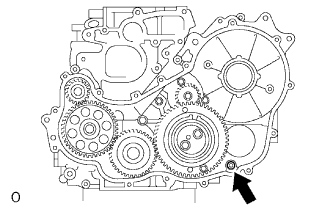
    Secure the No. 2 idle sub gear to the No. 1 idle gear with a service bolt.

    Torque:
    8.0 N*m{ 82 kgf*cm , 71 in.*lbf }

    NOTICE:
    If the bolt hole of the No. 2 idle sub gear is not aligned with the bolt hole of the No. 1 idle gear, rotate the crankshaft counterclockwise to align the bolt holes. Then install the service bolt.

  1. A222330
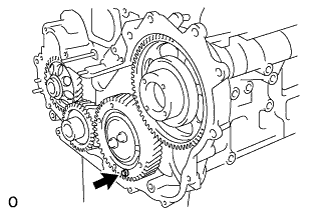
    Remove the injection gear.


33. REMOVE NO. 1 CRANKSHAFT POSITION SENSOR PLATE

  1. A239296
    Remove the No. 1 crankshaft position sensor plate.


34. REMOVE CRANKSHAFT TIMING GEAR

  1. A222332E01
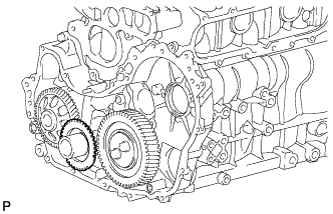
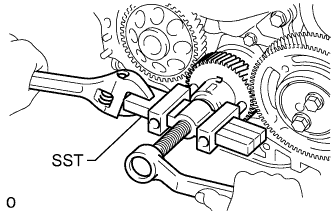
    Using SST, remove the crankshaft timing gear.
    SST
    09950-50013   (09951-05010, 09952-05010, 09953-05010, 09954-05021)


35. REMOVE IDLE GEAR THRUST PLATE

  1. A238857
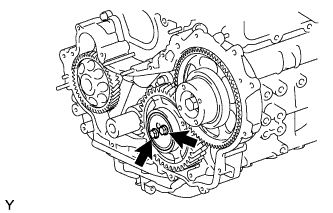
    Remove the 2 bolts and idle gear thrust plate.


36. REMOVE NO. 1 IDLE GEAR

  1. A238858
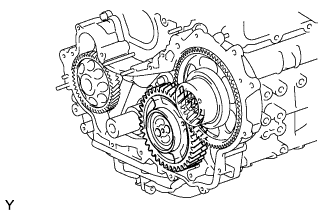
    Remove the No. 1 idle gear together with the No. 2 idle sub gear.


37. REMOVE NO. 1 IDLE GEAR SHAFT

  1. A238859
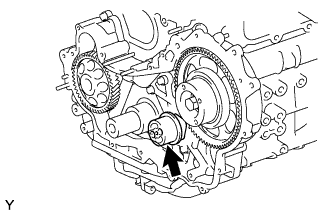
    Remove the No. 1 idle gear shaft.


38. REMOVE FUEL SUPPLY PUMP ASSEMBLY
  1. Disconnect the 2 fuel hoses.

  1. Disconnect the fuel temperature sensor connector and suction control valve connector from the fuel supply pump.

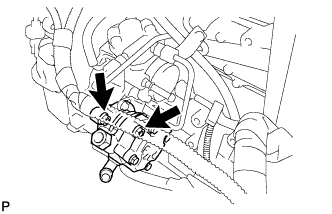
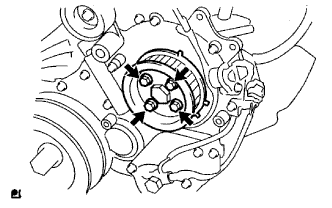
  1. A070710E01
    Remove the 4 bolts indicated by the arrows in the illustration.

  1. Remove the No. 2 camshaft timing pulley flange and pump drive shaft pulley.

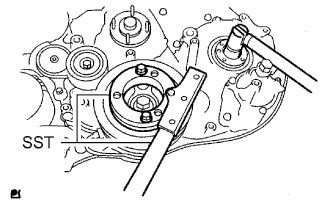
  1. A070711E04
    Remove the set nut and O-ring while holding the crankshaft pulley using SST.
    SST
    09213-58014  
    09330-00021  

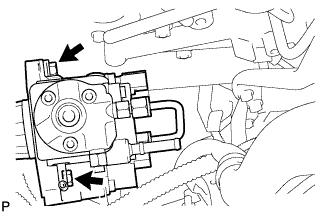
  1. A257066
    Loosen the 2 nuts.

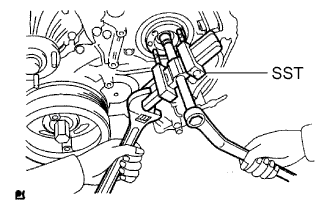
  1. A070714E02
    Using SST, disconnect the fuel supply pump from the injection gear.
    SST
    09950-50013   (09951-05010, 09952-05010, 09953-05020, 09954-05021)

    NOTICE:
    Apply lubricant to the threads and tip of SST (center bolt) before using it.

  1. Remove the 2 nuts and fuel supply pump.

    NOTICE:
    1. Do not hold or carry the fuel supply pump by the pipe.
    2. The fuel supply pump must be kept horizontal.

  1. Remove the O-ring.


39. REMOVE OIL PAN SUB-ASSEMBLY
  1. Remove the 22 bolts and 2 nuts.

  1. Z004119E03
    Insert the blade of an oil pan seal cutter between the oil pan and cylinder block, cut through the applied sealer and remove the oil pan.

    NOTICE:
    1. Do not use the oil pan seal cutter for the area between the oil pan and timing belt case, or for the area between the oil pan and rear oil seal retainer.
    2. Be careful not to damage the oil pan flange.


40. REMOVE OIL STRAINER SUB-ASSEMBLY
  1. Remove the 2 bolts, 2 nuts, oil strainer and gasket.


41. REMOVE TIMING GEAR CASE ASSEMBLY

  1. A069842E01
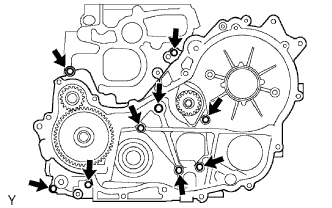
    Remove the union bolt and 8 bolts.

  1. A102853
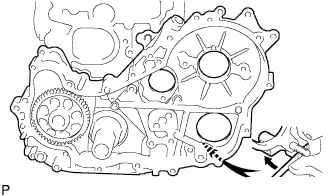
    Pry the timing gear case at the location shown in the illustration and remove the gear case and gasket.

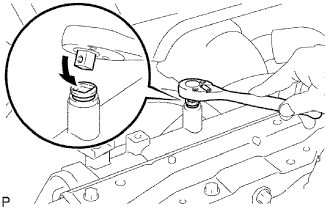
  1. A069840E03
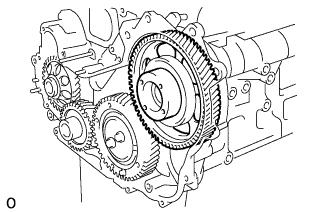
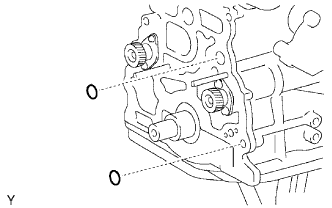
    Remove the 2 O-rings.

← REMOVAL (Aug 2012 – Jul 2013)DISASSEMBLY (from Jun 2011) →