2014 Hilux · Service Manual BODY ELECTRICAL

REMOVAL

Removal / installation · Vehicles built Aug 2012 – Jul 2013

Versions by build date: Jun 2011 – Jul 2012 Aug 2012 – Jul 2013 from Aug 2013

HINT:
  1. Use the same procedures for the RH side and LH side.
  2. The procedures listed below are for the LH side.


1. DISCONNECT CABLE FROM NEGATIVE BATTERY TERMINAL

CAUTION:
Wait at least 90 seconds after disconnecting the cable from the negative (-) battery terminal to prevent airbag and seat belt pretensioner activation.


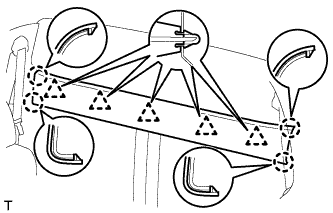
2. REMOVE UPPER BACK PANEL GARNISH

B276964
  1. Detach the 4 claws and 5 clips and remove the upper back panel garnish.


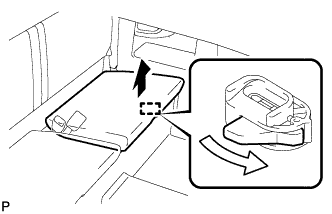
3. REMOVE REAR SEAT CUSHION ASSEMBLY LH (w/ Seat Cushion)

  1. B288340
    Operate the rear seat cushion lock hook release lever and pull up the rear seat cushion assembly LH to detach the hook.
    Text in Illustration 
    V100135
    Pull Up
    V100136
    Release

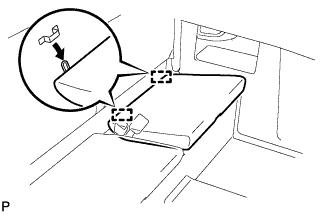
  1. B288341
    Detach the 2 hooks and rear seat cushion assembly LH.


4. REMOVE REAR SEAT CUSHION ASSEMBLY RH (w/ Seat Cushion)

HINT:
Use the same procedures described for the LH side.


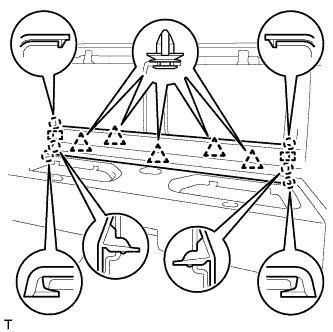
5. REMOVE LOWER BACK PANEL GARNISH

B276965
  1. Detach the 6 claws, 2 guides and 5 clips and remove the lower back panel garnish.


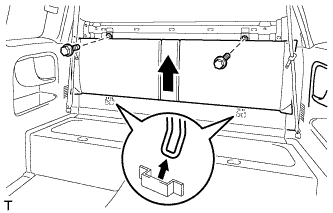
6. REMOVE REAR SEATBACK ASSEMBLY

  1. B276915
    Remove the 2 bolts.

  1. Lift up the rear seatback assembly in the direction indicated by the arrow to detach the 2 hooks from the vehicle body. Then remove the rear seatback assembly.

    NOTICE:
    Be careful not to damage the vehicle body.


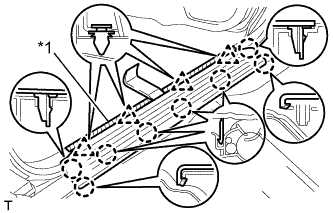
7. REMOVE FRONT DOOR SCUFF PLATE LH

B276994E01
  1. Put protective tape around the front door scuff plate.

    Text in Illustration 
    *1
    Protective Tape

  1. Using a moulding remover, detach the 4 clips and 8 claws and remove the front door scuff plate.


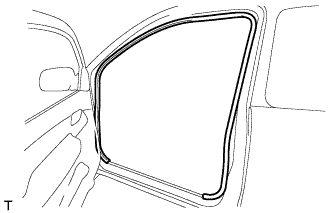
8. REMOVE FRONT DOOR WEATHERSTRIP LH

B276972
  1. Remove the front door opening trim.


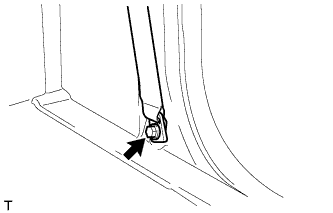
9. REMOVE QUARTER INSIDE TRIM BOARD LH

B276966
  1. Remove the bolt and disconnect the front seat outer belt floor anchor.

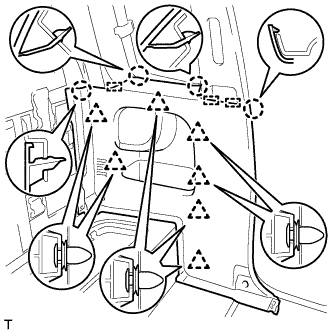
  1. B276968
    Detach the 4 claws, 3 guides and 7 clips and remove the quarter inside trim board.


10. REMOVE REAR SPEAKER ASSEMBLY

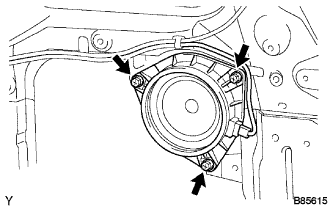
  1. B085615
    Disconnect the connector.

  1. Remove the 3 screws and speaker.

← REMOVAL (Jun 2011 – Jul 2012)REMOVAL (from Aug 2013) →