Removal / installation · Vehicles built from Jun 2011
1.
FIX POWER STEERING LINK ASSEMBLY
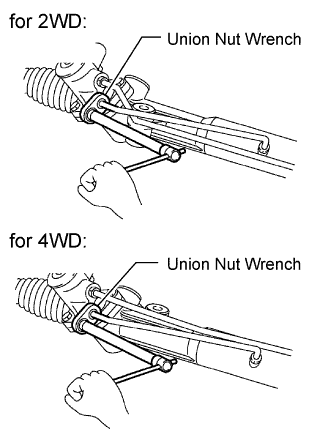
Using a union nut wrench, remove the 2 turn pressure tubes.
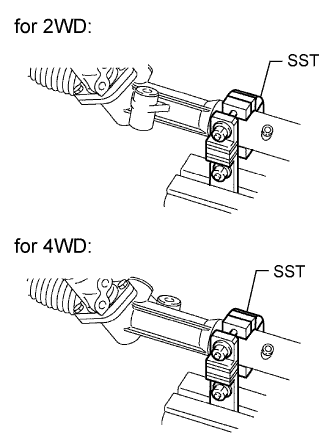
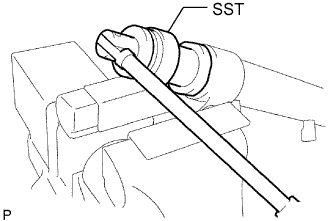
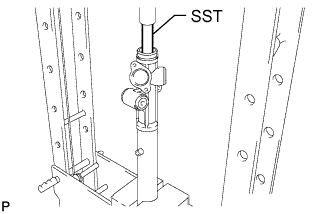
Using SST, fix the steering link between aluminum plates in a vise, as shown in the illustration.
SST
09612-00012
2.
REMOVE TIE ROD END SUB-ASSEMBLY LH
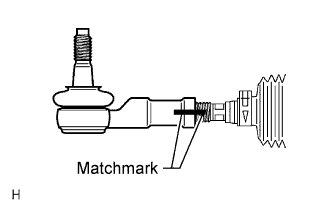
Place matchmarks on the tie rod end, lock nut and rack end.
Loosen the lock nut and remove the tie rod end and lock nut.
3.
REMOVE TIE ROD END SUB-ASSEMBLY RH
HINT:
Use the same procedures described for the LH side.
4.
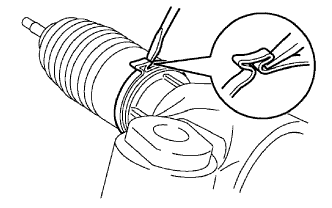
REMOVE STEERING RACK BOOT CLAMP LH
Using pliers and a screwdriver, loosen the clamp.
HINT:
Mark the RH and LH boots.
NOTICE:
Be careful not to damage the boot.
5.
REMOVE STEERING RACK BOOT CLAMP RH
HINT:
Use the same procedures described for the LH side.
6.
REMOVE STEERING RACK BOOT CLIP LH
Using pliers, remove the clip.
NOTICE:
Be careful not to damage the boot.
7.
REMOVE STEERING RACK BOOT CLIP RH
HINT:
Use the same procedures described for the LH side.
8.
REMOVE STEERING RACK BOOT LH
9.
REMOVE STEERING RACK BOOT RH
10.
REMOVE STEERING RACK END SUB-ASSEMBLY
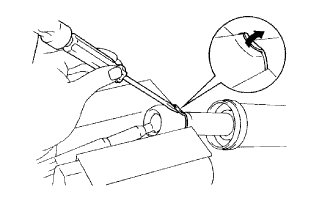
Using a screwdriver and hammer, stake back the washer.
NOTICE:
Do not strike the steering rack.
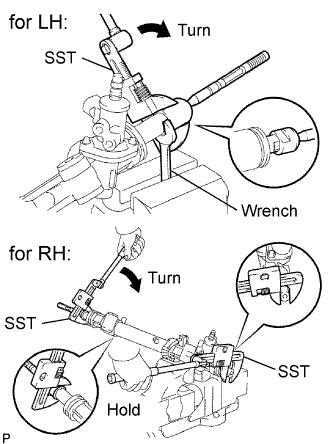
Using a wrench, hold the steering rack (LH side).
Using SST, remove the steering rack end (LH side) from the power steering rack.
SST
09922-10010
NOTICE:
Rotate SST in the direction shown in the illustration.
Using SST, remove the steering rack end (RH side) from the power steering rack.
SST
09922-10010
NOTICE:
Rotate SST in the direction shown in the illustration.
Remove the 2 claw washers.
11.
REMOVE RACK GUIDE
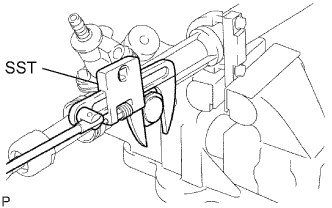
Using SST, remove the lock nut.
SST
09922-10010
Remove the claw washer.
NOTICE:
Rotate SST in the direction shown in the illustration.
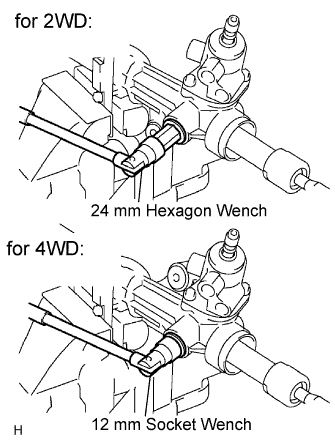
for 2WD: Using a 24 mm hexagon wrench, remove the rack guide spring cap.
for 4WD: Using a 12 mm socket wrench, remove the rack guide spring cap.
Remove the spring and rack guide.
12.
REMOVE POWER STEERING CONTROL VALVE
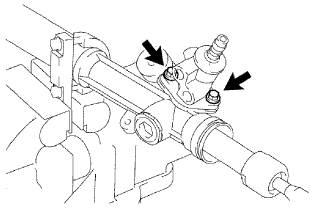
Remove the 2 bolts.
Pull out the control valve from the rack housing.
Remove the control valve gasket.
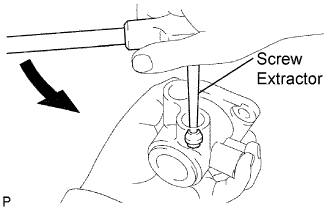
Using screw extractor, remove the 2 union seats from the control valve housing.
13.
REMOVE CYLINDER END STOPPER
Using SST, remove the stopper.
SST
09631-20120
14.
REMOVE STEERING RACK AND OIL SEAL
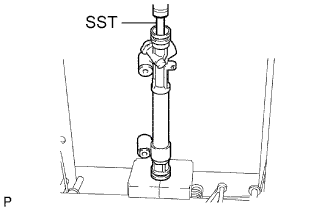
Using SST, press out the steering rack and oil seal.
SST
09950-70010
(09951-07200)
NOTICE:
Take care not to drop the steering rack.
Remove the oil seal from the steering rack.
15.
INSPECT POWER STEERING RACK
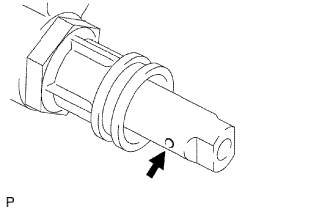
Insert a wire 20 mm (0.787 in.) into the vent hole of the steering rack and ensure that the vent hole is not clogged with grease.
NOTICE:
If the hole is clogged, the pressure inside the boot will change after it is assembled and the steering wheel is turned.
16.
INSPECT TIE ROD END SUB-ASSEMBLY LH
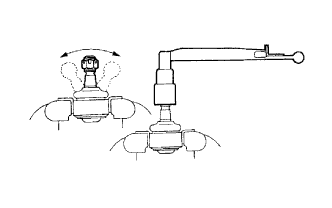
Move the ball joint stud back and forth 5 times as shown in the illustration, before installing the nut.
Using a torque wrench, turn the nut continuously at a rate of 2 to 4 seconds per turn and take the torque reading on the 5th turn.
Torque:
(turning):
0.5 to 3.5 N*m{
5.1 to 35.7 kgf*cm
, 0.37 to 2.58 in.*lbf
}
17.
INSPECT TIE ROD END SUB-ASSEMBLY RH
HINT:
Use the same procedures described for the LH side.
18.
REMOVE STEERING RACK PISTON RING
Using a screwdriver, remove the "teflon" ring and O-ring from the steering rack.
NOTICE:
Be careful not to damage the groove of the ring.
19.
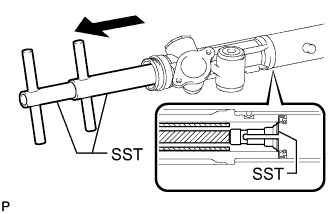
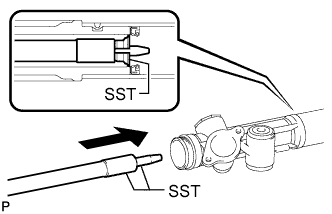
REMOVE CYLINDER END STOPPER OIL SEAL
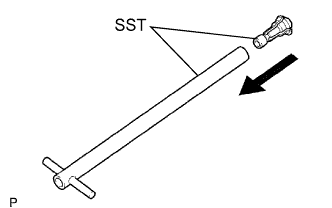
Install SST (09612-07120) to SST (09612-07210).
SST
09612-70100
(09612-07120, 09612-07210)
NOTICE:
Lightly apply MP grease to the tip of SST (09612-07230) and inside of SST (09612-07210 and 09612-07120) before use.
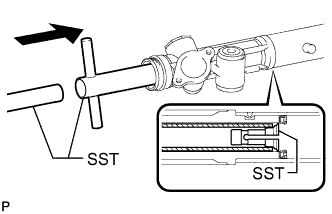
Completely install SST (09612-07120) to SST (09612-07210) to prevent damage to the inside of the rack housing.
Insert SST (09612-07210) into the rack housing at an angle until it comes in contact with the power steering cylinder tube oil seal. Install SST (09612-07220) to SST (09612-07210).