REMOVAL
Removal / installation · Vehicles built Aug 2012 – Jul 2013
Versions by build date: Jun 2011 – Jul 2012 Aug 2012 – Jul 2013 from Aug 2013
| 1. DRAIN CLUTCH FLUID |

- NOTICE:
- Wash off clutch fluid immediately if it comes into contact with a painted surface.
| 2. REMOVE LOWER INSTRUMENT PANEL FINISH PANEL SUB-ASSEMBLY |
| 3. REMOVE COMBINATION METER ASSEMBLY |
Remove the combination meter assembly (Click here).
| 4. DISCONNECT CLUTCH RESERVOIR TUBE |
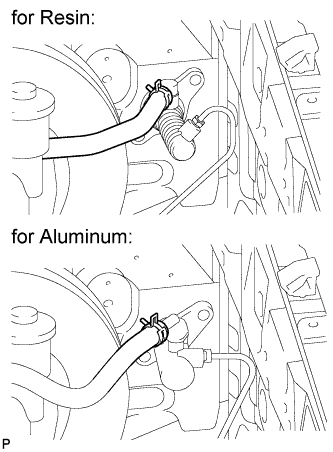  |
Using pliers, grip the claws of the clip and slide the clip, and then disconnect the clutch reservoir hose.
- HINT:
- Use a container to catch the fluid.
| 5. DISCONNECT CLUTCH MASTER CYLINDER TO FLEXIBLE HOSE TUBE |
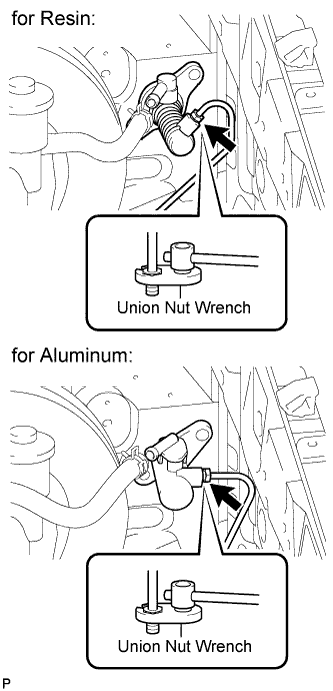 |
Using a union nut wrench, disconnect the tube.
- HINT:
- Use a container to catch the fluid.
| 6. REMOVE CLUTCH MASTER CYLINDER ASSEMBLY |
Remove the clutch pedal (Click here).
Remove the 2 nuts, clutch master cylinder assembly and gasket.
| 7. REMOVE CYLINDER PUSH ROD CLEVIS |
Loosen the lock nut, and then remove the clevis.
Remove the lock nut from the master cylinder.