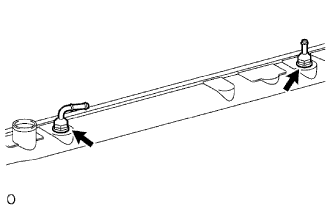
Removal / installation · Vehicles built Jun 2011 – Jul 2013
Versions by build date: Jun 2011 – Jul 2013from Aug 2013
1.
REMOVE RADIATOR BRACKET SUB-ASSEMBLY
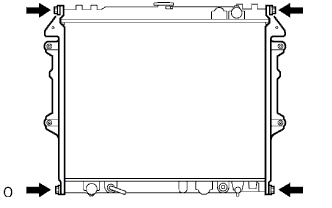
Remove the 4 bolts and 2 brackets.
2.
REMOVE RADIATOR DRAIN COCK PLUG
Remove the drain cock plug.
Remove the O-ring.
3.
ASSEMBLE SST
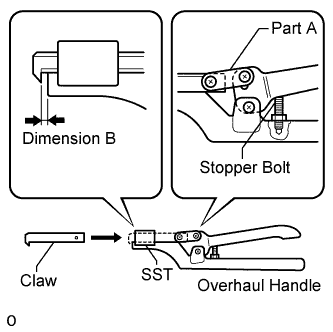
Install the claw to part A of the overhaul handle as shown in the illustration.
SST
09230-01010
(09231-01010, 09231-01030)
While squeezing the handle, adjust the stopper bolt so that dimension B is as specified below.
Dimension B:
0.2 to 0.3 mm (0.008 to 0.012 in.)
NOTICE:
If this adjustment is not performed, the claw will be damaged.
4.
UNCAULK LOCK PLATE
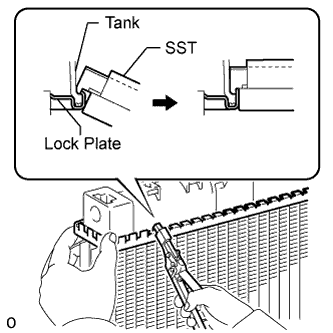
Using SST, squeeze the handle until stopped by the stopper bolt to release the caulking.
SST
09230-01010
(09231-01010, 09231-01030)
5.
REMOVE RADIATOR TANK UPPER AND RADIATOR TANK LOWER
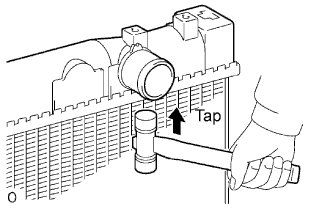
Lightly tap the bracket of the radiator (or the connection area for the radiator hose inlet or outlet) with a plastic-faced hammer and remove the tank.
NOTICE:
Do not tap automatic transmission oil cooler pipe.