Removal / installation · Vehicles built from Jun 2011
1.
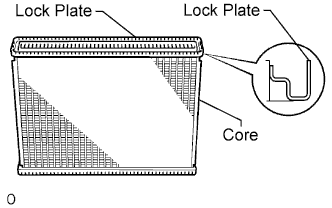
INSPECT LOCK PLATE FOR DAMAGE
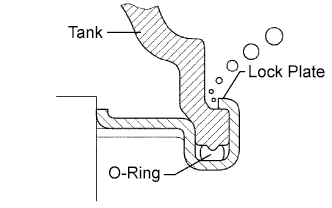
Inspect the lock plate for damage. If the sides of the lock plate groove are deformed, reassembly of the tank will be impossible. Correct any deformations with pliers. Water will leak if the bottom of the lock plate groove is damaged or dented. Repair or replace it if necessary.
NOTICE:
The radiator can only be recaulked twice. After the second time, the radiator core must be replaced.
2.
INSTALL RADIATOR TANK UPPER AND TANK LOWER
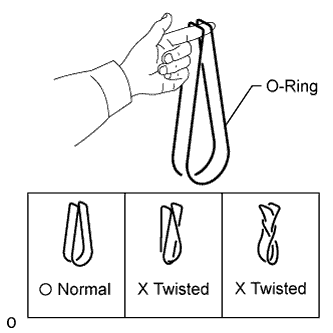
Check that there are no foreign objects in the lock plate groove, and install a new O-ring. Make sure the O-ring is not twisted.
HINT:
When cleaning the lock plate groove, lightly rub it with sandpaper without scratching it.
Install the tank without damaging the O-ring.
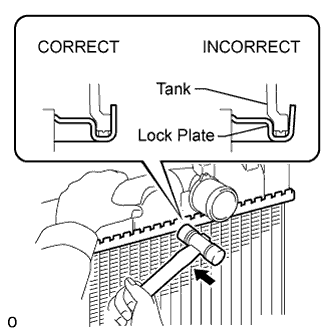
Tap the lock plate with a plastic-faced hammer so that there is no gap between the lock plate and the tank.
3.
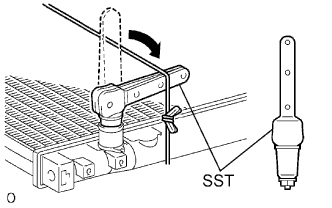
ASSEMBLE SST
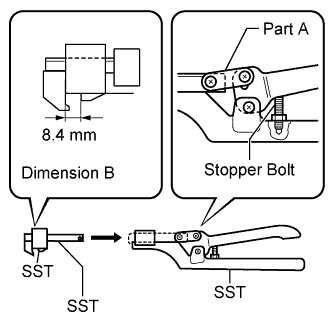
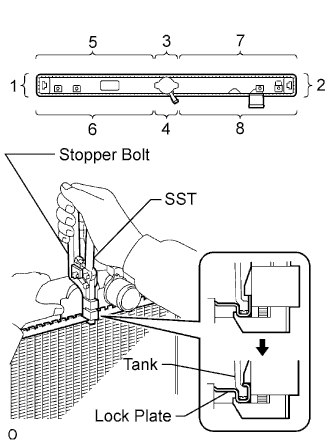
Install the punch assembly to part A of the overhaul handle as shown in the illustration.
While gripping the handle, adjust the stopper bolt so that dimension B is as specified below.
Dimension B:
8.4 mm (0.331 in.)
4.
CAULK LOCK PLATE
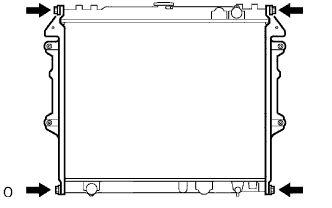
Lightly press SST against the lock plate in the order shown in the illustration. After repeating this a few times, fully caulk the lock plate by squeezing the handle until stopped by the stopper bolt.
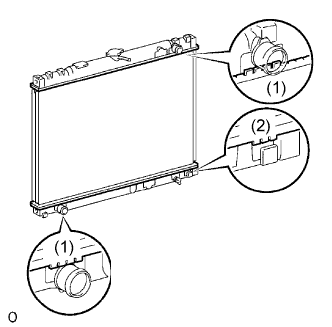
Do not press the protruding areas around the ports (1) and bracket (2).
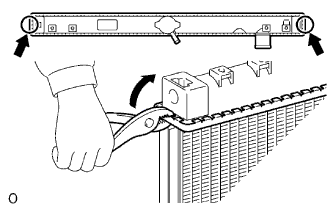
Do not use SST to press the areas indicated by the circle marks in the illustration. Use pliers and be careful not to damage the core plates.
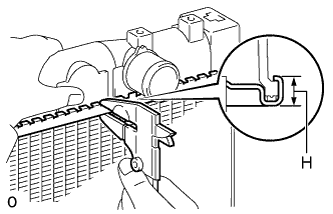
Check the lock plate height H after completing the caulking.
Standard plate height H:
8.8 mm (0.346 in).
If the height is not as specified, readjust the stopper bolt of the handle and caulk the lock plate again.
5.
INSTALL RADIATOR DRAIN COCK PLUG
Install a new O-ring to the drain plug.
Install the drain plug.
6.
INSPECT FOR WATER LEAKS
Plug the inlet and outlet pipes of the radiator with SST.
SST
09230-01010
(09231-00030, 09231-00060)
Using a radiator cap tester, apply pressure to the radiator.
Standard test pressure:
177 kPa (1.8 kgf/cm2, 26 psi)
Submerge the radiator in water.
Inspect for leaks.
HINT:
For radiators with resin tanks, there is clearance between the tank and lock plate where a small amount of air will remain. This air is released when the radiator is submerged in water, giving the appearance of an air leak. Before performing the water leak test, first shake the radiator in the water until all air bubbles are released.