INSTALLATION
Removal / installation · Vehicles built Jun 2011 – Jul 2013
Versions by build date: Jun 2011 – Jul 2013 from Aug 2013
- HINT:
- Use the same procedure for the RH and LH sides.
- The procedure listed below is for the LH side.
- Use the same procedure for the RH and LH sides.
| 1. INSTALL FRONT FLEXIBLE HOSE |

Install a new gasket and connect the front flexible hose to the disc brake cylinder assembly with a new union bolt.
- Torque:
- 29 N*m{ 296 kgf*cm , 21 ft.*lbf }
Install a new clip to the front flexible hose.
- NOTICE:
- Make sure the clip is completely pushed in.
Using a union nut wrench, connect the brake line to the front flexible hose while holding the flexible hose with a wrench.
- Torque:
- 15 N*m{ 155 kgf*cm , 11 ft.*lbf }
- NOTICE:
- Do not kink or damage the brake tube.
- Do not allow any foreign matter such as dirt and dust to enter the brake tube from the connecting points.
- Use the formula to calculate special torque values for situations where a union nut wrench is combined with a torque wrench (Click here).
- Do not kink or damage the brake tube.
Install the front flexible hose to the absorber bracket with the bolt.
- Torque:
- 29 N*m{ 296 kgf*cm , 21 ft.*lbf }
| 2. FILL RESERVOIR WITH BRAKE FLUID (for TMT Made) |
- Fluid:
- SAE J1703 or FMVSS No. 116 DOT 3
| 3. FILL RESERVOIR WITH BRAKE FLUID (for TSAM Made) |
- Fluid:
- SAE J1704 or FMVSS No. 116 DOT 4
| 4. BLEED AIR FROM BRAKE MASTER CYLINDER (for TMT Made) |
- HINT:
- If the master cylinder has been disassembled or if the reservoir becomes empty, bleed air from the master cylinder.
Using a union nut wrench, disconnect the 2 brake lines from the master cylinder.
Slowly depress and hold the brake pedal.
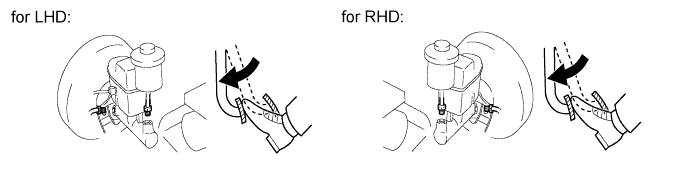

Cover the outer holes with your finger, and release the pedal.
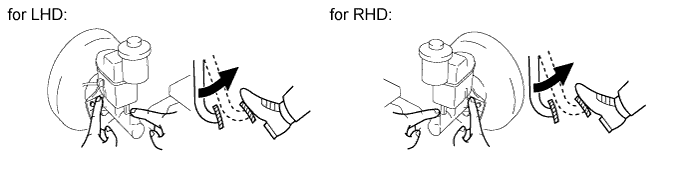
Repeat the 2 previous steps 3 or 4 times.
Using a union nut wrench, connect the 2 brake lines to the master cylinder.
- Torque:
- 15 N*m{ 155 kgf*cm , 11 ft.*lbf }
- NOTICE:
- Use the formula to calculate special torque values for situations where a union nut wrench is combined with a torque wrench (Click here).
| 5. BLEED AIR FROM BRAKE MASTER CYLINDER (for TSAM Made) |
- HINT:
- If the master cylinder has been disassembled or if the reservoir becomes empty, bleed air from the master cylinder.
Using a union nut wrench, disconnect the 2 brake lines from the master cylinder.
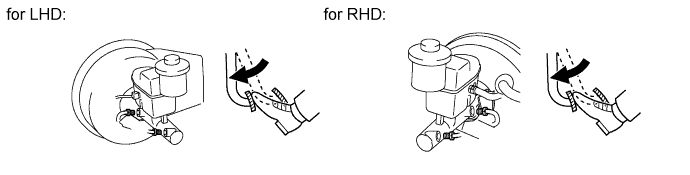
Slowly depress and hold the brake pedal.
Cover the outer holes with your finger, and release the pedal.
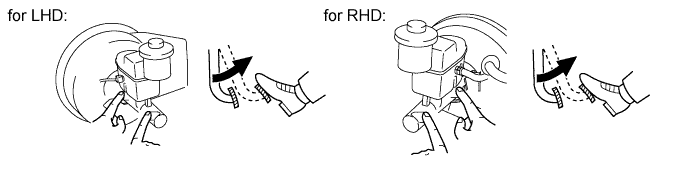
Repeat the 2 previous steps 3 or 4 times.
Using a union nut wrench, connect the 2 brake lines to the master cylinder.
- Torque:
- 15 N*m{ 155 kgf*cm , 11 ft.*lbf }
- NOTICE:
- Use the formula to calculate special torque values for situations where a union nut wrench is combined with a torque wrench (Click here).
| 6. BLEED AIR FROM BRAKE LINE (for TMT Made) |
Remove the bleeder plug cap.
Connect the vinyl tube to the bleeder plugs.
Depress the pedal several times, and then loosen the bleeder plug with the pedal depressed.
When fluid stops coming out, immediately tighten the bleeder plug. Then release the pedal.
Repeat the 2 previous steps until all the air in the brake fluid is gone.
Tighten the bleeder plug.
- Torque:
- for front brake:
- 11 N*m{ 110 kgf*cm , 8 ft.*lbf }
- for rear brake (2WD):
- 11 N*m{ 112 kgf*cm , 8 ft.*lbf }
- for rear brake (4WD and Pre-Runner):
- 10 N*m{ 102 kgf*cm , 7 ft.*lbf }
Install the cap.
Bleed air from the brake line for each wheel by repeating the above procedures.
| 7. BLEED AIR FROM BRAKE LINE (for TSAM Made) |
Remove the bleeder plug cap.
Connect the vinyl tube to the bleeder plugs.
Depress the pedal several times, and then loosen the bleeder plug with the pedal depressed.
When fluid stops coming out, immediately tighten the bleeder plug. Then release the pedal.
Repeat the 2 previous steps until all the air in the brake fluid is gone.
Tighten the bleeder plug.
- Torque:
- for front brake (2WD):
- 10 N*m{ 102 kgf*cm , 7 ft.*lbf }
- for front brake (4WD and Pre-Runner):
- 11 N*m{ 110 kgf*cm , 8 ft.*lbf }
- for rear brake (2WD):
- 11 N*m{ 112 kgf*cm , 8 ft.*lbf }
- for rear brake (4WD and Pre-Runner):
- 10 N*m{ 102 kgf*cm , 7 ft.*lbf }
Install the cap.
Bleed air from the brake line for each wheel by repeating the above procedures.
| 8. BLEED AIR FROM CLUTCH LINE (for Manual Transmission) |
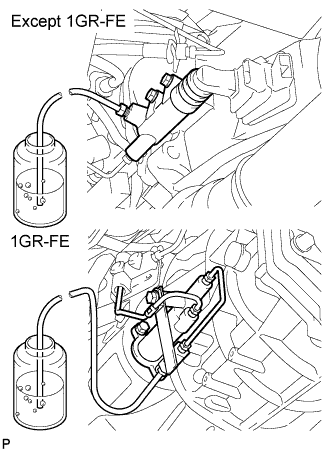 |
Remove the bleeder plug cap.
Connect the vinyl tube to the bleeder plug.
Depress the clutch pedal several times, and then loosen the bleeder plug with the pedal depressed.
At the point when fluid stops coming out, tighten the bleeder plug, and then release the clutch pedal.
Repeat the previous 2 steps until all the air in the fluid is completely bled out.
Tighten the bleeder plug.
- Torque:
- 11 N*m{ 112 kgf*cm , 8 ft.*lbf }
Install the bleeder plug cap.
Check that all the air has been bled out of the clutch line.
| 9. CHECK BRAKE FLUID LEVEL IN RESERVOIR (for TMT Made) |
Check the fluid level.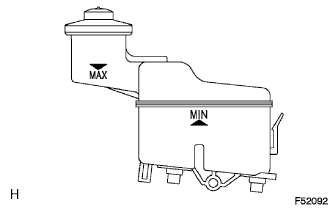
If the brake fluid level is lower that the MIN line, check for leaks and inspect the disc brake pads. If necessary, refill the reservoir with brake fluid to the MAX line after repair or replacement.- Fluid:
- SAE J1703 or FMVSS No. 116 DOT 3
| 10. CHECK BRAKE FLUID LEVEL IN RESERVOIR (for TSAM Made) |
Check the fluid level.
If the brake fluid level is lower than the MIN line, check for leaks and inspect the disc brake pads. If necessary, refill the reservoir with brake fluid to the MAX line after repair or replacement.- Fluid:
- SAE J1704 or FMVSS No. 116 DOT 4
| 11. CHECK FOR BRAKE FLUID LEAKAGE |
| 12. INSTALL FRONT WHEEL |
Install the front wheel.
- Torque:
- for steel wheel:
- 152 N*m{ 1550 kgf*cm , 112 ft.*lbf }
- for aluminum wheel:
- 121 N*m{ 1234 kgf*cm , 89 ft.*lbf }