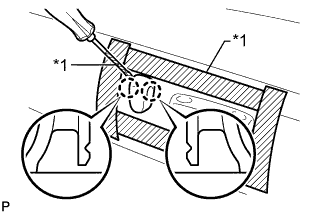
Apply protective tape around the front seat cushion shield.
Using a screwdriver, detach the 2 claws and remove the reclining power seat switch knob.
HINT:
Tape the screwdriver tip before use.
Text in Illustration
*1
Protective Tape
3.
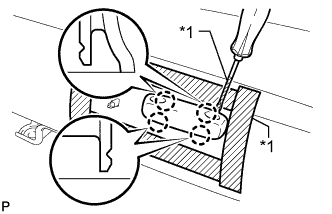
REMOVE SLIDE AND VERTICAL POWER SEAT SWITCH KNOB
Apply protective tape around the front seat cushion shield.
Using a screwdriver, detach the 4 claws and remove the slide and vertical power seat switch knob.
HINT:
Tape the screwdriver tip before use.
Text in Illustration
*1
Protective Tape
4.
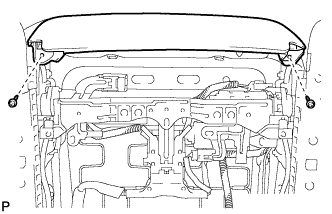
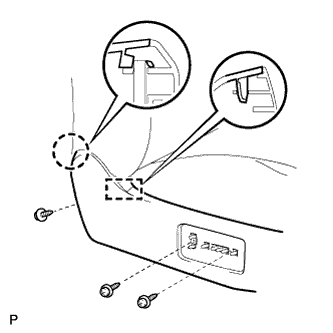
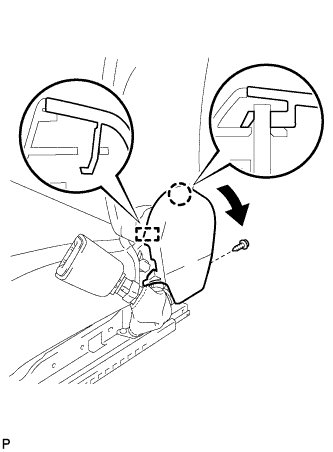
REMOVE FRONT SEAT CUSHION SHIELD RH
Remove the 2 screws.
Remove the 3 screws.
Detach the claw and guide.
Remove the front seat cushion shield RH.
5.
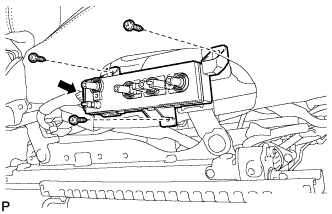
REMOVE FRONT POWER SEAT SWITCH RH
Remove the 3 screws.
Disconnect the connector and remove the front power seat switch RH.
6.
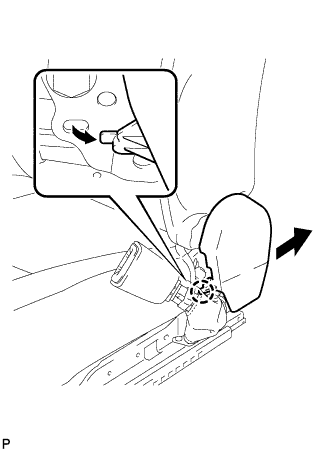
REMOVE FRONT SEAT INNER CUSHION SHIELD RH
Remove the screw.
Detach the claw and guide.
Pull the front seat inner cushion shield RH to detach the claw and remove the front seat inner cushion shield RH.
7.
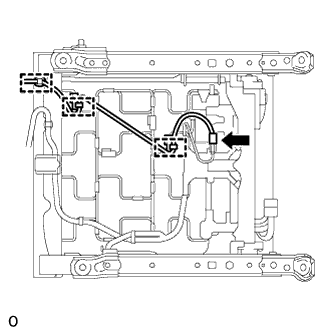
REMOVE FRONT SEAT INNER BELT ASSEMBLY RH
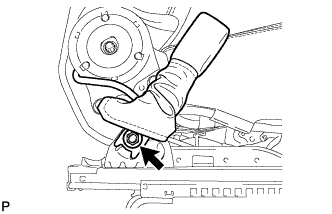
Disconnect the connector and detach the 3 clamps.
Roll up the front seat cushion cover LH.
Remove the nut and front seat inner belt assembly.
Remove the buckle cover.
8.
REMOVE FRONT SEAT CUSHION COVER WITH PAD
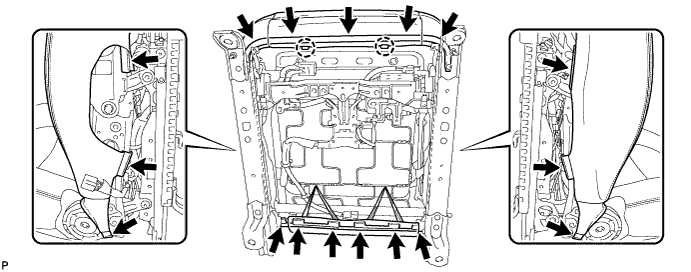
Remove the hog rings.
for LHD, w/ Seat Heater System:
Disconnect the 2 front seat cushion heater assembly LH connectors.
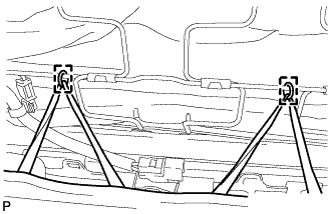
Detach the 4 front seat cushion heater assembly LH clamps.
Bend the 2 front seat cushion frame claws upward.
Detach the hooks and remove the front seat cushion cover with pad.
9.
REMOVE POWER SEAT MOTOR ASSEMBLY (for Rear Lifter)
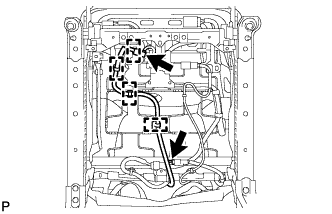
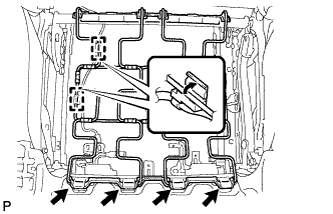
Detach the 2 wire harness clamps.
Detach the 4 clamps indicated by the arrows in the illustration and remove the seat cushion spring.
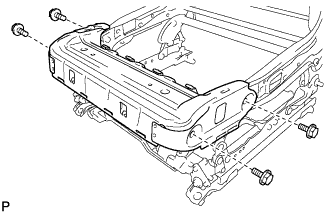
Remove the 4 bolts and seat cushion frame.
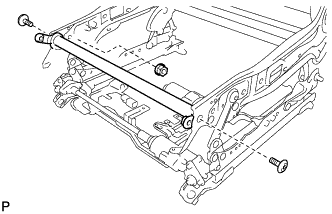
Using a T40 "TORX" socket wrench, remove the 2 "TORX" bolts for the tilt rod.
Remove the nut and tilt rod.
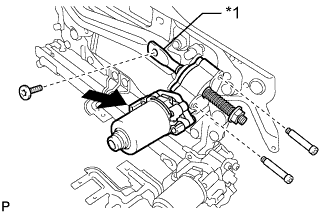
Disconnect the connector.
Using a T40 "TORX" socket wrench, remove the "TORX" bolt for the adjust screw.
Using a 4 mm socket hexagon wrench, remove the 2 bolts and power seat motor assembly (for Rear Lifter).
HINT:
When the adjust screw is locked in the uppermost or lowermost position, turn the adjust screw to release the lock before removing the power seat motor assembly.