DISASSEMBLY
Removal / installation · Vehicles built from Jun 2011
- HINT:
- Use the same procedure for RHD and LHD vehicles.
- The procedure listed below is for LHD vehicles.
- Use the same procedure for RHD and LHD vehicles.
| 1. REMOVE CONSOLE COMPARTMENT DOOR SUB-ASSEMBLY |

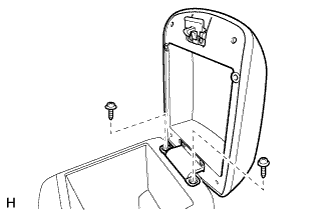  |
Remove the 2 screws and console compartment door.
| 2. REMOVE REAR CONSOLE END PANEL SUB-ASSEMBLY (w/ Cup Holder) |
Remove the 4 screws and rear console end panel.
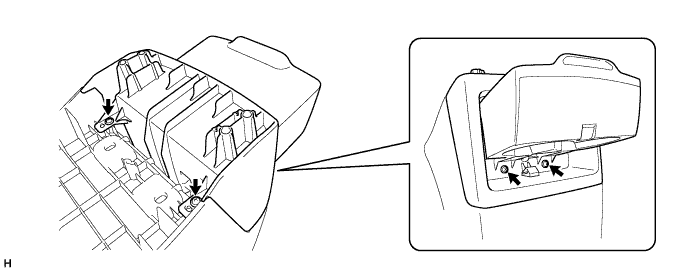
| 3. REMOVE REAR NO. 2 BOX PANEL (w/o Cup Holder) |
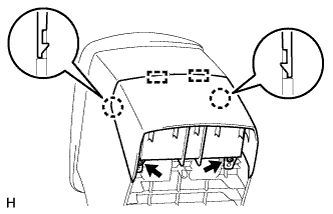 |
Remove the 2 screws.
Detach the 2 claws and 2 guides and remove the rear No. 2 panel box.
| 4. REMOVE CONSOLE BOX BEZEL (for Manual Transmission, for 2WD) |
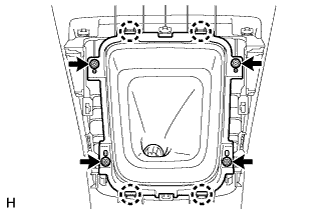 |
Remove the 4 screws.
Detach the 4 claws and remove the shifting hole cover.
Detach the 8 claws and remove the console box bezel.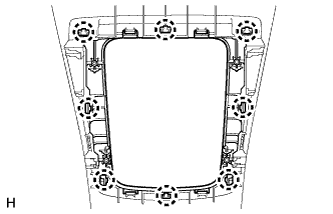
| 5. REMOVE SHIFTING HOLE COVER SUB-ASSEMBLY (for Automatic Transmission, for 4WD) |
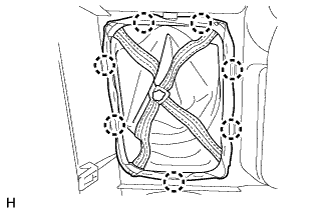 |
Detach the 7 claws and remove the shifting hole cover.