Removal / installation · Vehicles built Jun 2011 – Jul 2013
Versions by build date: Jun 2011 – Jul 2013from Aug 2013
CAUTION:
Wear protective gloves. Sharp areas on the parts may injure your hands.
HINT:
Use the same procedure for the RH and LH sides.
The procedure listed below is for the LH side.
1.
INSTALL FRONT SEATBACK HEATER ASSEMBLY LH
Set the front seatback heater assembly LH on the separate type front seatback cover.
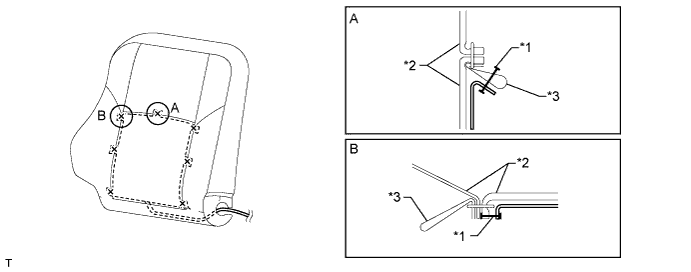
Using a tacker, install the front seatback heater assembly LH to the separate type front seatback cover with 6 new tack pins as shown in the illustration.
NOTICE:
Do not substitute other metal parts for tack pins.
Text in Illustration
*1
Tack Pin
*2
Separate Type Front Seatback Cover
*3
Listing Pocket of Separate Type Front Seatback Cover
-
-
2.
INSTALL SEPARATE TYPE FRONT SEATBACK COVER
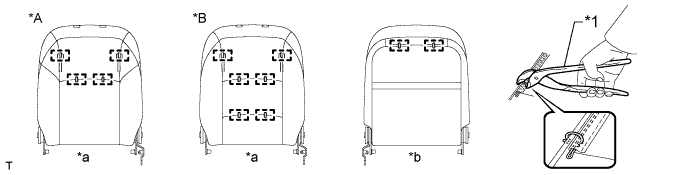
Using hog ring pliers, install the separate type front seatback cover to the separate type front seatback pad with new hog rings.
NOTICE:
Be careful not to damage the cover.
When installing the hog rings, avoid wrinkling the cover.
Text in Illustration
*A
for Vinyl Seat, for Cloth Seat
*B
for Leather Seat
*1
Hog Ring Pliers
-
-
*a
Front view of front seatback
*b
Rear view of front seatback
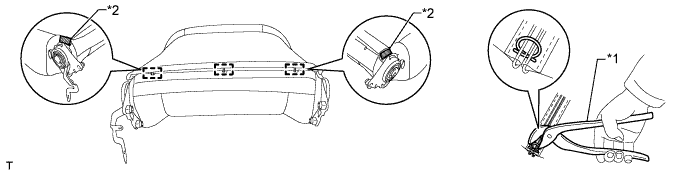
Attach the 4 claws to install the 2 front seat headrest supports.
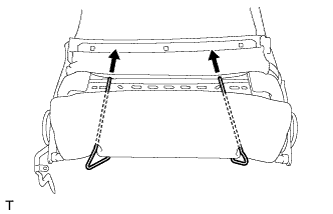
Pass the straps of the separate type front seatback cover through the holes of the separate type front seatback pad.
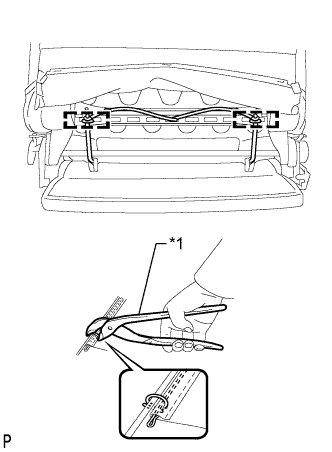
Using hog ring pliers, attach the 2 straps of the separate type front seatback cover to the separate type front seatback spring assembly with new hog rings.
Text in Illustration
*1
Hog Ring Pliers
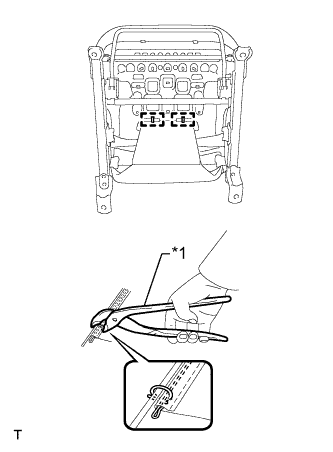
Using hog ring pliers, attach the separate type front seatback cover with new hog rings.
NOTICE:
Be careful not to damage the cover.
When installing the hog rings, avoid wrinkling the cover.
Attach the 2 pieces of fastening tape.
Text in Illustration
*1
Hog Ring Pliers
*2
Fastening Tape
Install the front seatback assembly with the 4 bolts.
Torque:
40 N*m{
408 kgf*cm
, 30 ft.*lbf
}
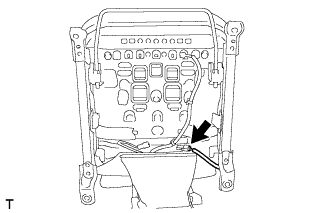
for LHD, w/ Seat Heater System: Connect the front seatback heater assembly LH connector.
Using hog ring pliers, attach the separate type front seat cushion cover to the front seat cushion frame sub-assembly LH with new hog rings.
Text in Illustration
*1
Hog Ring Pliers
NOTICE:
Be careful not to damage the cover.
When installing the hog rings, avoid wrinkling the cover.
3.
INSTALL FRONT SEATBACK HINGE PLATE (for Walk in Seat Type)
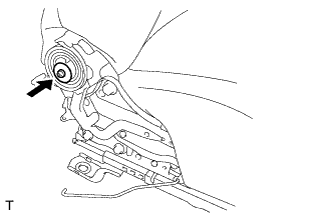
Apply MP grease to the location shown in the illustration.
Text in Illustration
MP Grease
Install the front seatback hinge plate.
4.
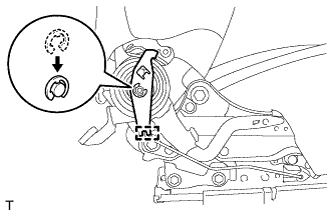
INSTALL SEAT TRACK CONTROL CABLE BRACKET RH (for Walk in Seat Type)
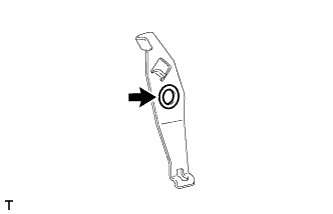
Apply MP grease to the location shown in the illustration.
Text in Illustration
MP Grease
Attach the hook to install the seat track control cable bracket RH.
Install a new E-ring.
5.
INSTALL SEAT TRACK CONTROL CABLE BRACKET LH (for Walk in Seat Type)
HINT:
Use the same procedure described for the RH side.
6.
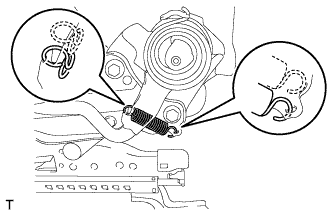
INSTALL SEATBACK SPRING LH
Install the seatback spring LH.
7.
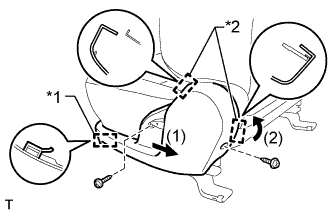
INSTALL FRONT SEAT CUSHION SHIELD RH
Attach the guide and 2 hooks in the order shown in the illustration to install the front seat cushion shield LH.
Text in Illustration
*1
Guide
*2
Hook
Install the 2 screws.
8.
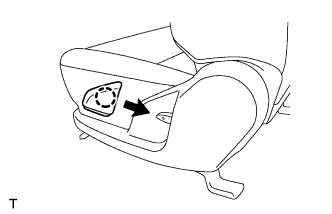
INSTALL RECLINING ADJUSTER RELEASE HANDLE LH
Attach the claw to install the reclining adjuster release handle LH.
9.
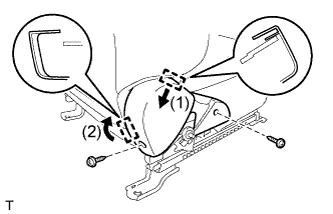
INSTALL FRONT SEAT INNER CUSHION SHIELD LH
Attach the 2 hooks in the order shown in the illustration to install the front seat inner cushion shield LH.
Install the 2 screws.
10.
INSTALL FRONT SEAT INNER BELT ASSEMBLY RH (for Front Passenger Side)