INSTALLATION
Removal / installation · Vehicles built Jun 2011 – Jul 2012
Versions by build date: Jun 2011 – Jul 2012 Aug 2012 – Jul 2013 from Aug 2013
| 1.
INSTALL FRONT SEAT INNER W/ CENTER BELT ASSEMBLY LH (for Bench Seat Type) |
 |
Install the seat belt with its built-in bolt.
-
Torque:
- 42 N*m{
428 kgf*cm
, 31 ft.*lbf
}
| 2.
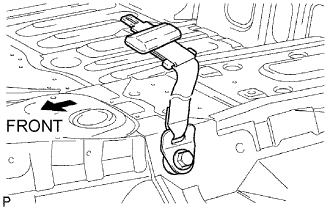
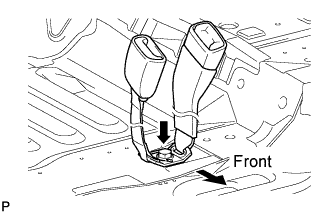
INSTALL FRONT SEAT INNER W/ CENTER BELT ASSEMBLY RH (for Bench Seat Type) |
|
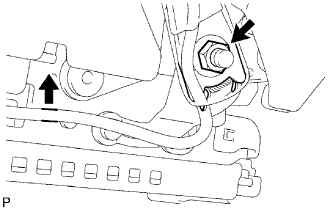
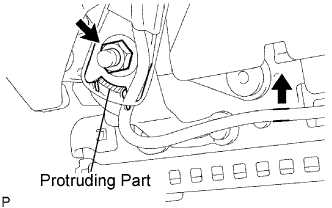
Align the direction of the anchor plate with the protruding part of the vehicle body as shown in the illustration.
Install the seat belt with the bolt.
-
Torque:
- 42 N*m{
428 kgf*cm
, 31 ft.*lbf
}
- NOTICE:
- Do not overlap the anchor part of the seat belt and protruding part of the seat adjuster.
| 3.
INSTALL FRONT SEAT INNER BELT ASSEMBLY (for Separate Seat Type Passenger Side) |
|
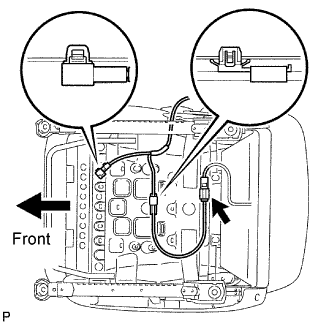
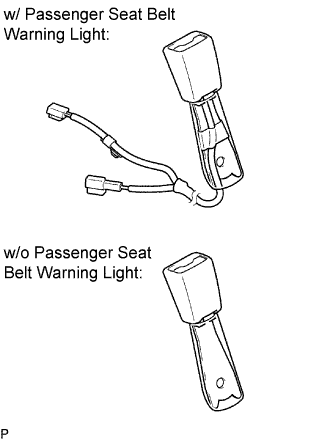
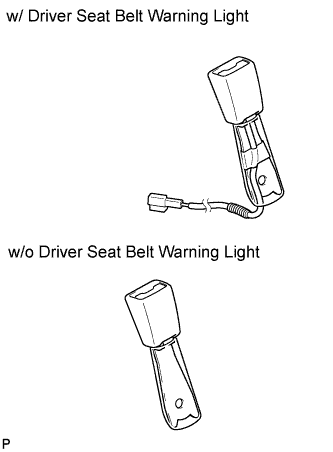
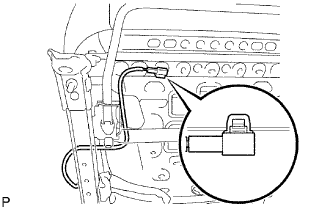
w/ Passenger seat belt warning light:
Install the 2 clamps as shown in the illustration.
w/ Passenger seat belt warning light:
Connect the connector.
- Install the buckle cover on the inner belt.
- Install the seat belt with the nut.
-
Torque:
- 42 N*m{
428 kgf*cm
, 31 ft.*lbf
}
- NOTICE:
- Do not overlap the anchor part of the seat belt and protruding part of the seat adjuster.
| 4.
INSTALL FRONT SEAT INNER BELT ASSEMBLY (for Driver Side) |
|
Install the buckle cover on the seat belt.
- Install the seat belt with the nut.
-
Torque:
- 42 N*m{
428 kgf*cm
, 31 ft.*lbf
}
- NOTICE:
- Do not overlap the anchor part of the seat belt and protruding part of the seat adjuster.
- w/ Driver seat belt warning light:
Install the clamp as shown in the illustration.
| 5.
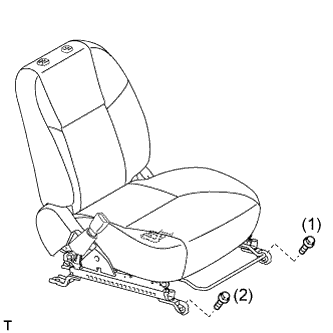
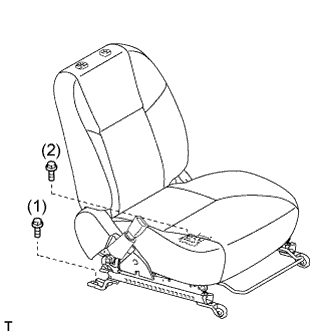
INSTALL FRONT SEAT ASSEMBLY (for Separate Seat Type)
|
|
Place the front seat assembly in the cabin.
- NOTICE:
- Be careful not to damage the vehicle body.
Connect the connector and attach the wire harness clamp under the seat.
Temporarily install the front seat assembly with the 4 bolts.
Lift up the seat track handle sub-assembly LH and move the seat to the rearmost position.
- Tighten the bolts in the order shown in the illustration.
-
Torque:
- 37 N*m{
377 kgf*cm
, 27 ft.*lbf
}
Lift up the seat track handle sub-assembly LH and move the seat to the foremost position.
- Tighten the bolts in the order shown in the illustration.
-
Torque:
- 37 N*m{
377 kgf*cm
, 27 ft.*lbf
}
| 6.
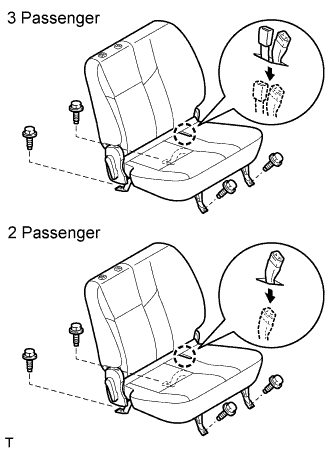
INSTALL FRONT SEAT ASSEMBLY (for Bench Seat Type)
|
|
Place the seat in the cabin.
- NOTICE:
- Be careful not to damage the vehicle body.
w/ Occupant detection sensor:
Connect the connector under the seat.
Install the seat with the 4 bolts.
-
Torque:
- 37 N*m{
377 kgf*cm
, 27 ft.*lbf
}
- HINT:
- Tighten the bolts in the order indicated in the illustration.
Pass the inner belts through the hole of the seat cushion.
| 7.
CONNECT CABLE TO NEGATIVE BATTERY TERMINAL |
|
| 8.
PERFORM INITIALIZATION |
|
Perform Initialization (Click here).
- NOTICE:
- Certain systems need to be initialized after disconnecting and reconnecting the cable from the negative (-) battery terminal.