SEAT FRONT SEAT ASSEMBLY(for Power Seat) REASSEMBLY
CAUTION / NOTICE / HINT
- CAUTION:
-
Wear protective gloves. Sharp areas on the parts may injure your hands.
PROCEDURE

 1.INSTALL SEPARATE TYPE FRONT SEATBACK SPRING ASSEMBLY
Install the separate type front seatback spring assembly with the 4 bolts.
- Torque:
- 42 N*m (428 kgf*cm, 31 ft.*lbf)
2.INSTALL NO. 2 SEAT WIRE
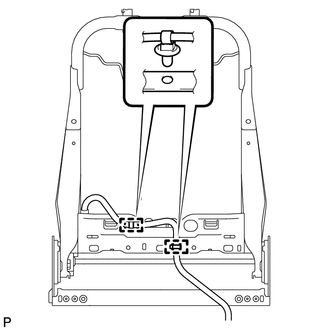
Attach the 2 wire harness clamps to install the No. 2 seat wire.
3.INSTALL FRONT SEAT WIRE LH
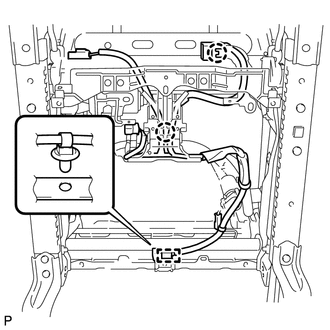
Attach the 2 claws to install the front seat wire LH.
Attach the wire harness clamp.
Connect the connector.
4.INSTALL FRONT LOWER SEAT CUSHION SHIELD LH
Attach the 4 claws to install the front lower seat cushion shield LH.
Install the screw.
5.INSTALL FRONT LOWER SEAT CUSHION SHIELD RH
Attach the 4 claws to install the front lower seat cushion shield RH.
Install the screw.
6.INSTALL POWER SEAT MOTOR ASSEMBLY (for Rear Lifter)
7.INSTALL POWER SEAT MOTOR ASSEMBLY (for Slide)
8.INSTALL POWER SEAT MOTOR ASSEMBLY (for Reclining)
9.INSTALL RECLINING ADJUSTER INSIDE COVER LH
Attach the guide to install the reclining adjuster inside cover LH.
Install the screw.
10.INSTALL RECLINING ADJUSTER INSIDE COVER LH
Attach the claw to install the reclining adjuster inside cover LH.
Install the screw.
11.INSTALL RECLINING ADJUSTER INSIDE COVER RH
Attach the guide to install the reclining adjuster inside cover RH.
Install the screw.
12.INSTALL RECLINING ADJUSTER INSIDE COVER RH
Attach the claw to install the reclining adjuster inside cover RH.
Install the screw.
13.INSTALL NO. 1 SEATBACK CLOTH
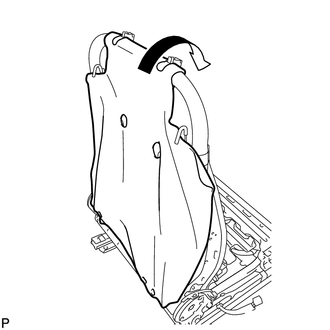
Install the No. 1 seatback cloth.
14.INSTALL SEPARATE TYPE FRONT SEATBACK PAD
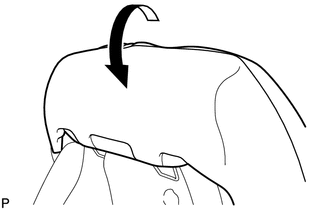
Install the separate type front seatback pad.
15.INSTALL SEPARATE TYPE FRONT SEATBACK COVER
Using hog ring pliers, attach the strap of the separate type front seatback cover to the separate type front seatback pad with new hog rings.
- NOTICE:
- ·
Be careful not to damage the cover.
·When installing the hog rings, avoid wrinkling the cover.
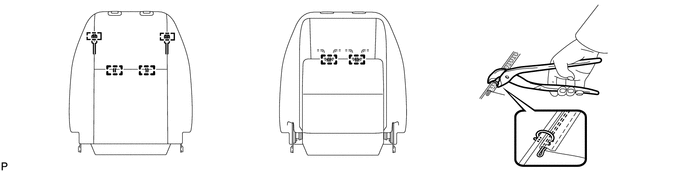
| *1 | Hog Ring Pliers | - | - |
| *a | Front view of front seatback | *b | Rear view of front seatback |
Attach the 4 claws to install the 2 front seat headrest supports.
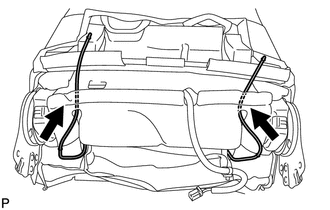
Pass the straps of the separate type front seatback cover through the holes of the separate type front seatback pad.
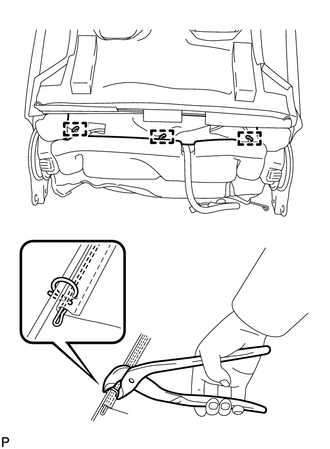
| *1 | Hog Ring Pliers |
Using hog ring pliers, attach the strap of the separate type front seatback cover together with the No. 1 seatback cloth to the separate type front seatback spring assembly with new hog rings.
- NOTICE:
- ·
Be careful not to damage the cover.
·When installing the hog rings, avoid wrinkling the cover.
Pass the No. 2 seat wire through the hole of the separate type front seatback cover.
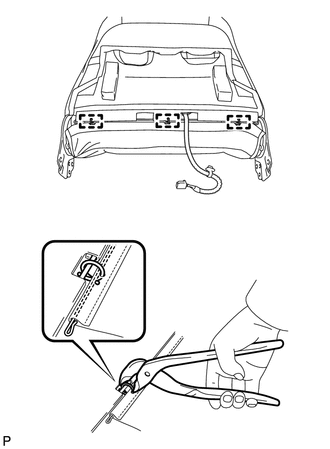
| *1 | Hog Ring Pliers |
Using hog ring pliers, attach the wires at the bottom of the separate type front seatback cover with new hog rings.
- NOTICE:
- ·
Be careful not to damage the cover.
·When installing the hog rings, avoid wrinkling the cover.
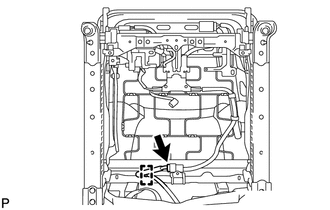
Connect the No. 2 seat wire connector and attach the wire harness clamp.
16.INSTALL SEPARATE TYPE FRONT SEAT CUSHION COVER
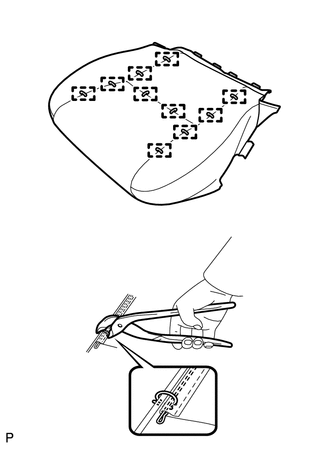
| *1 | Hog Ring Pliers |
Using hog ring pliers, install the separate type front seat cushion cover to the separate type front seat cushion pad with new hog rings.
- NOTICE:
- ·
Be careful not to damage the cover.
·When installing the hog rings, avoid wrinkling the cover.
17.INSTALL FRONT SEAT CUSHION COVER WITH PAD
Attach the hooks to install the front seat cushion cover with pad.
Bend the 2 front seat cushion frame claws downward.
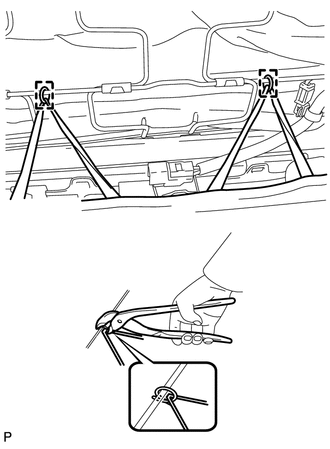
| *1 | Hog Ring Pliers |
Using hog ring pliers, attach the rubber bands of the separate type front seatback cover to the seat cushion spring with new hog rings.
- NOTICE:
- ·
Be careful not to damage the cover.
·When installing the hog rings, avoid wrinkling the cover.
18.INSTALL FRONT SEAT CUSHION COVER LH
Install the front seat cushion cover LH.
19.INSTALL FRONT SEAT INNER BELT ASSEMBLY LH
20.INSTALL FRONT SEAT INNER CUSHION SHIELD LH
Pass the wire harness of the front seat inner belt assembly below the claw and into the front seat inner cushion shield LH.
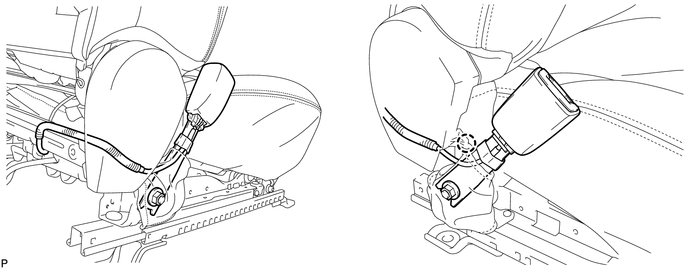
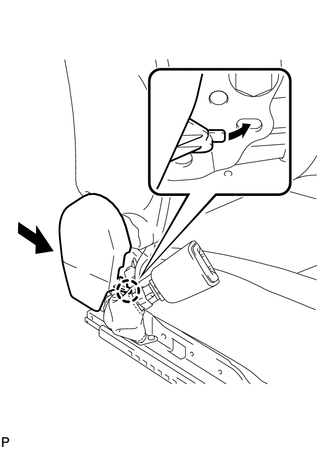
Attach the claw to temporarily install the front seat inner cushion shield LH.
- NOTICE:
-
Make sure that the wire harness of the front seat inner belt assembly is not being pinched inside the front seat inner cushion shield.
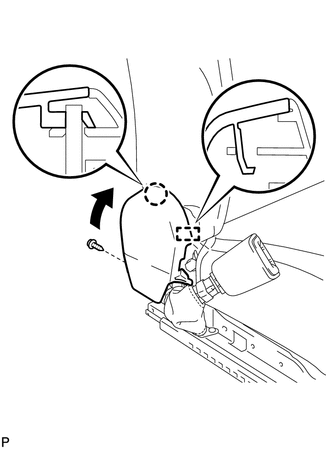
Attach the guide and claw.
- NOTICE:
-
Make sure that the wire harness of the front seat inner belt assembly is not being pinched inside the front seat inner cushion shield.
Install the screw.
21.INSTALL FRONT POWER SEAT SWITCH LH
22.INSTALL FRONT INNER NO. 1 SEAT CUSHION SHIELD LH
Attach the 2 claws to install the front inner No. 1 seat cushion shield LH to the front seat cushion shield LH.
Install the 2 screws.
23.INSTALL FRONT SEAT CUSHION SHIELD LH
Attach the claw and guide to install the front seat cushion shield LH with the front inner No. 1 seat cushion shield LH.
Install the 3 screws.
Install the 2 screws.
24.INSTALL SLIDE AND VERTICAL POWER SEAT SWITCH KNOB
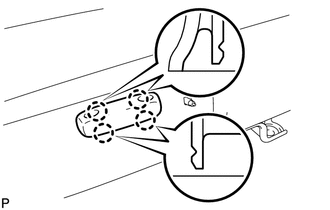
Attach the 4 claws to install the slide and vertical power seat switch knob.
25.INSTALL RECLINING POWER SEAT SWITCH KNOB
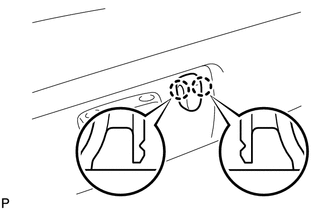
Attach the 2 claws to install the reclining power seat switch knob.