SEAT BELT FRONT SEAT OUTER BELT ASSEMBLY(for Double Cab) REMOVAL
CAUTION / NOTICE / HINT
- HINT:
- ·
Use the same procedure for the RH and LH sides.
·The procedure listed below is for the LH side.
PROCEDURE

 1.REMOVE FRONT SEAT ASSEMBLY LH
for Power Seat:
(See page Vehicle Interior>SEAT>FRONT SEAT ASSEMBLY(for Separate Seat Type)>REMOVAL)
for Separate Seat Type:
(See page Vehicle Interior>SEAT>FRONT SEAT ASSEMBLY(for Power Seat)>REMOVAL)
for Bench Seat Type:
(See page Vehicle Interior>SEAT>FRONT SEAT ASSEMBLY(for Bench Seat Type)>REMOVAL)
2.REMOVE FRONT DOOR SCUFF PLATE LH
3.REMOVE REAR DOOR SCUFF PLATE LH
4.REMOVE FRONT DOOR OPENING TRIM LH
Partially remove the front door opening trim LH so that the lower center pillar garnish LH and center pillar garnish LH can be removed (See page Vehicle Interior>INTERIOR PANELS / TRIM>ROOF HEADLINING(for Double Cab)>REMOVAL).
5.REMOVE REAR DOOR OPENING TRIM LH
- HINT:
-
Use the same procedure described for the LH side.
6.REMOVE LOWER CENTER PILLAR GARNISH LH
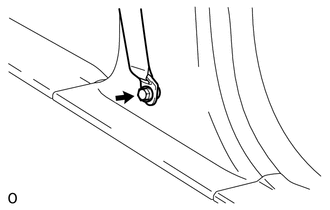
Remove the bolt and disconnect the front seat outer belt floor anchor.
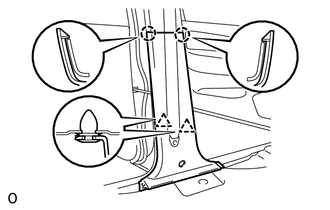
Using a screwdriver, detach the 2 claws.
- HINT:
-
Tape the screwdriver tip before use.
Detach the 2 clips and remove the lower center pillar garnish LH.
7.REMOVE SEAT BELT ANCHOR COVER CAP
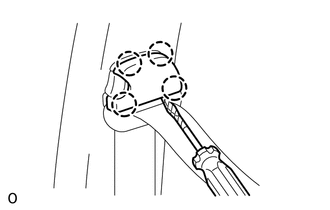
| *1 | Protective Tape |
Using a screwdriver, detach the 4 claws and remove the seat belt anchor cover cap.
- HINT:
-
Tape the screwdriver tip before use.
8.REMOVE FRONT SEAT OUTER BELT ASSEMBLY LH
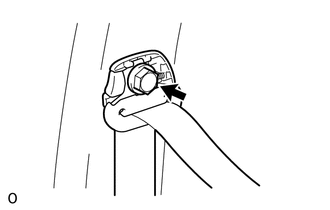
Remove the bolt and front seat outer belt shoulder anchor.
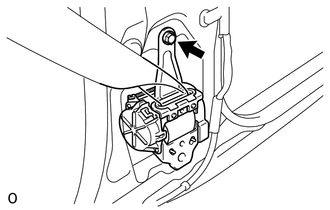
Remove the bolt and front seat outer belt assembly LH.
9.REMOVE CENTER PILLAR GARNISH LH
10.REMOVE SHOULDER BELT ANCHORAGE PLATE COVER
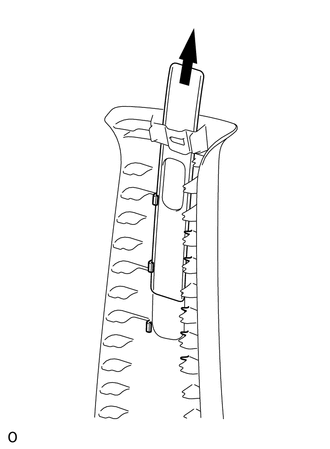
| *a | Slide |
Slide the shoulder belt anchorage plate cover upward and remove it from the center pillar garnish LH.
11.REMOVE FRONT SHOULDER BELT ANCHOR ADJUSTER ASSEMBLY
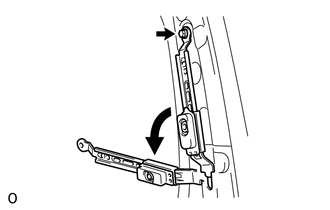
| *a | Rotate 90° |
Remove the bolt.
Rotate the adjuster approximately 90° , and then pull and remove the front shoulder belt anchor adjuster assembly.